Example: Using the Match Hue Controls
of the Color Corrector 3-Way Filter
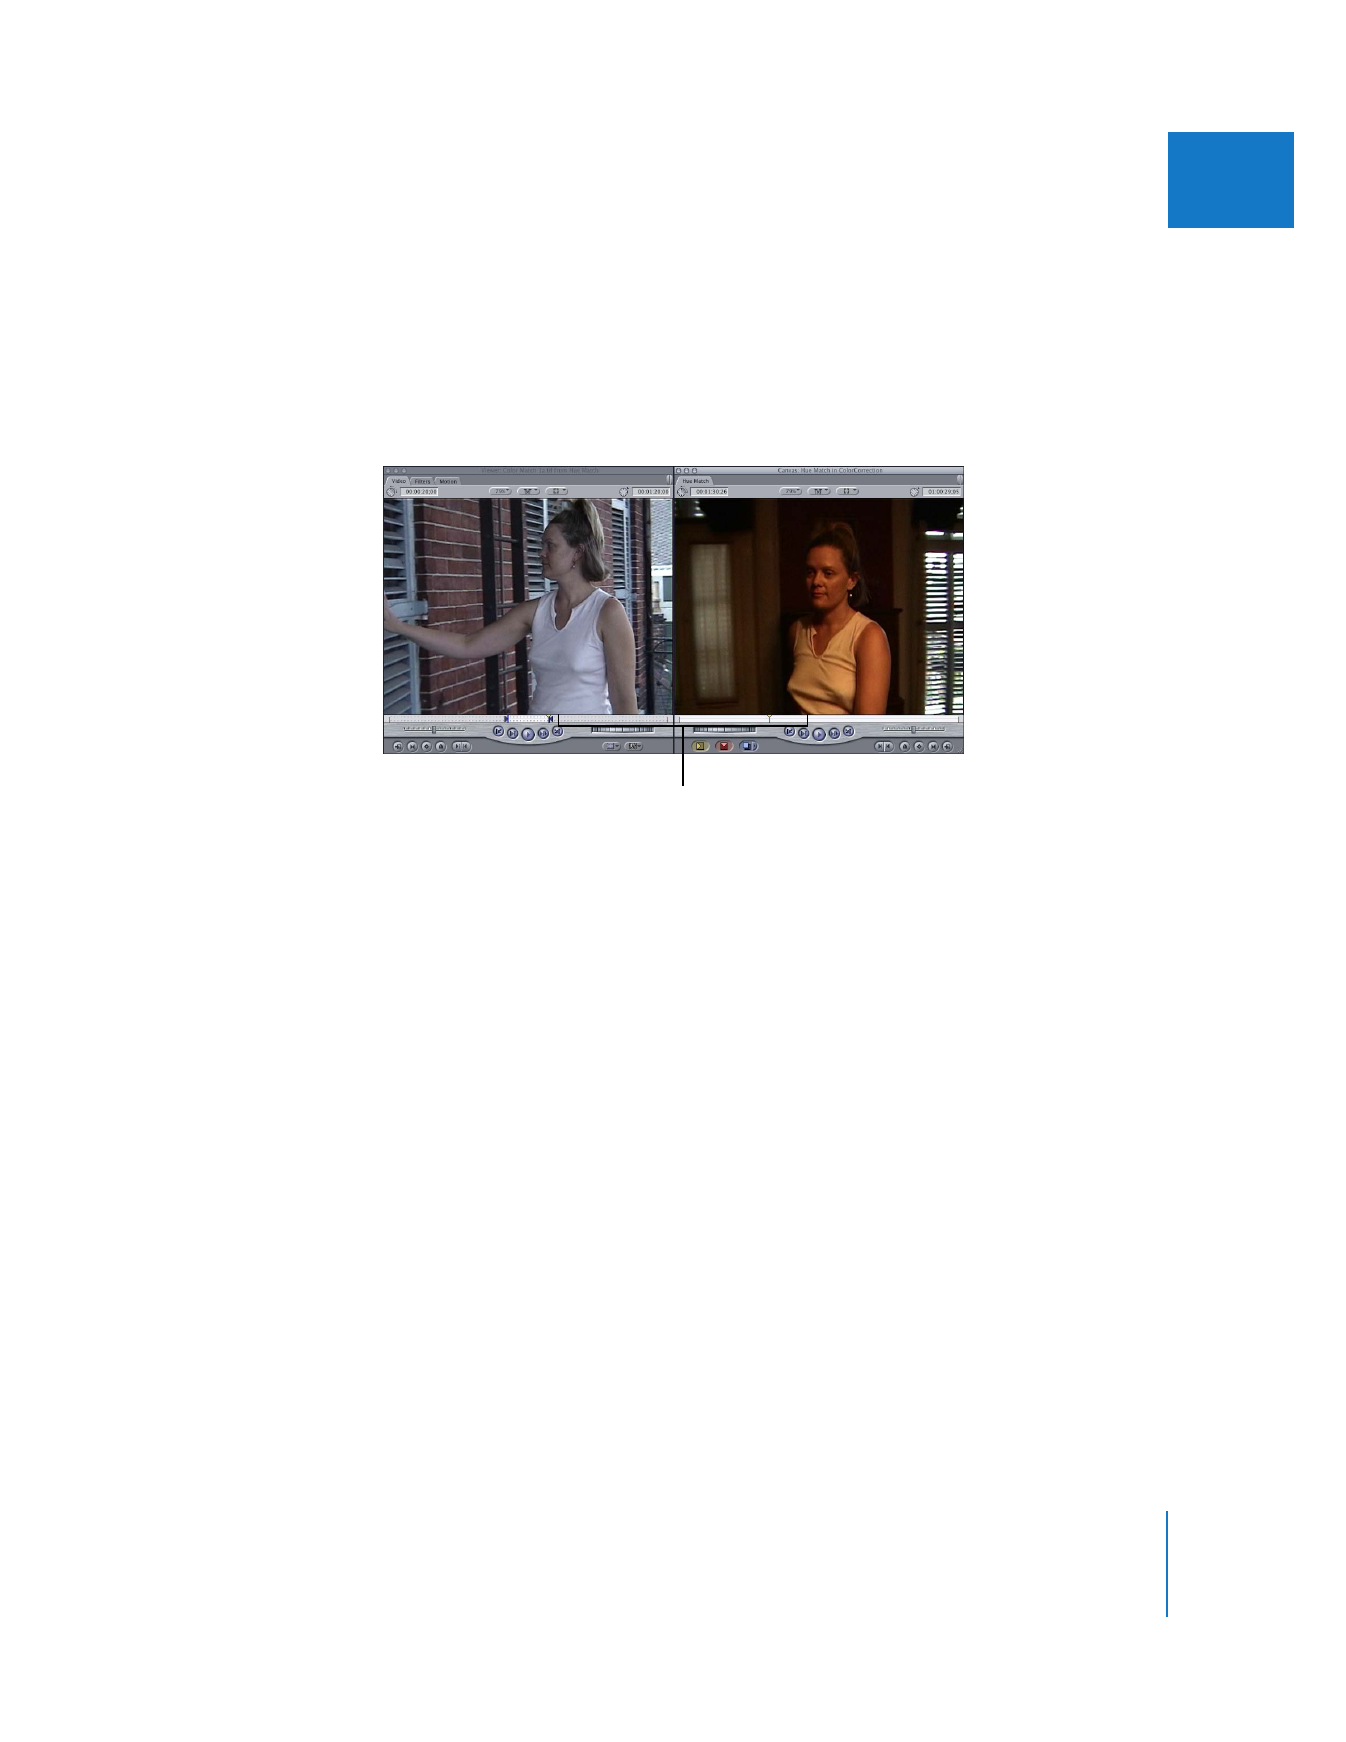
This example shows how to use the Match Hue controls of the Color Corrector 3-way
filter to match the flesh tones of an actor in two different shots. In the first shot, the actor
is outside, and the color of the shot is correctly balanced for daylight and has a cool blue
look. In the second shot, the actor has walked inside, where the color is incorrectly
balanced for tungsten, causing it to be excessively warm and emphasizing the reds.
1
Choose Window > Arrange > Multiple Edits to select the Multiple Edits layout.
This layout makes it easiest to use the Match Hue controls.
2
Because you’re matching the colors of clip 2 to those in clip 1, apply the Color Corrector
3-way filter to clip 2.
3
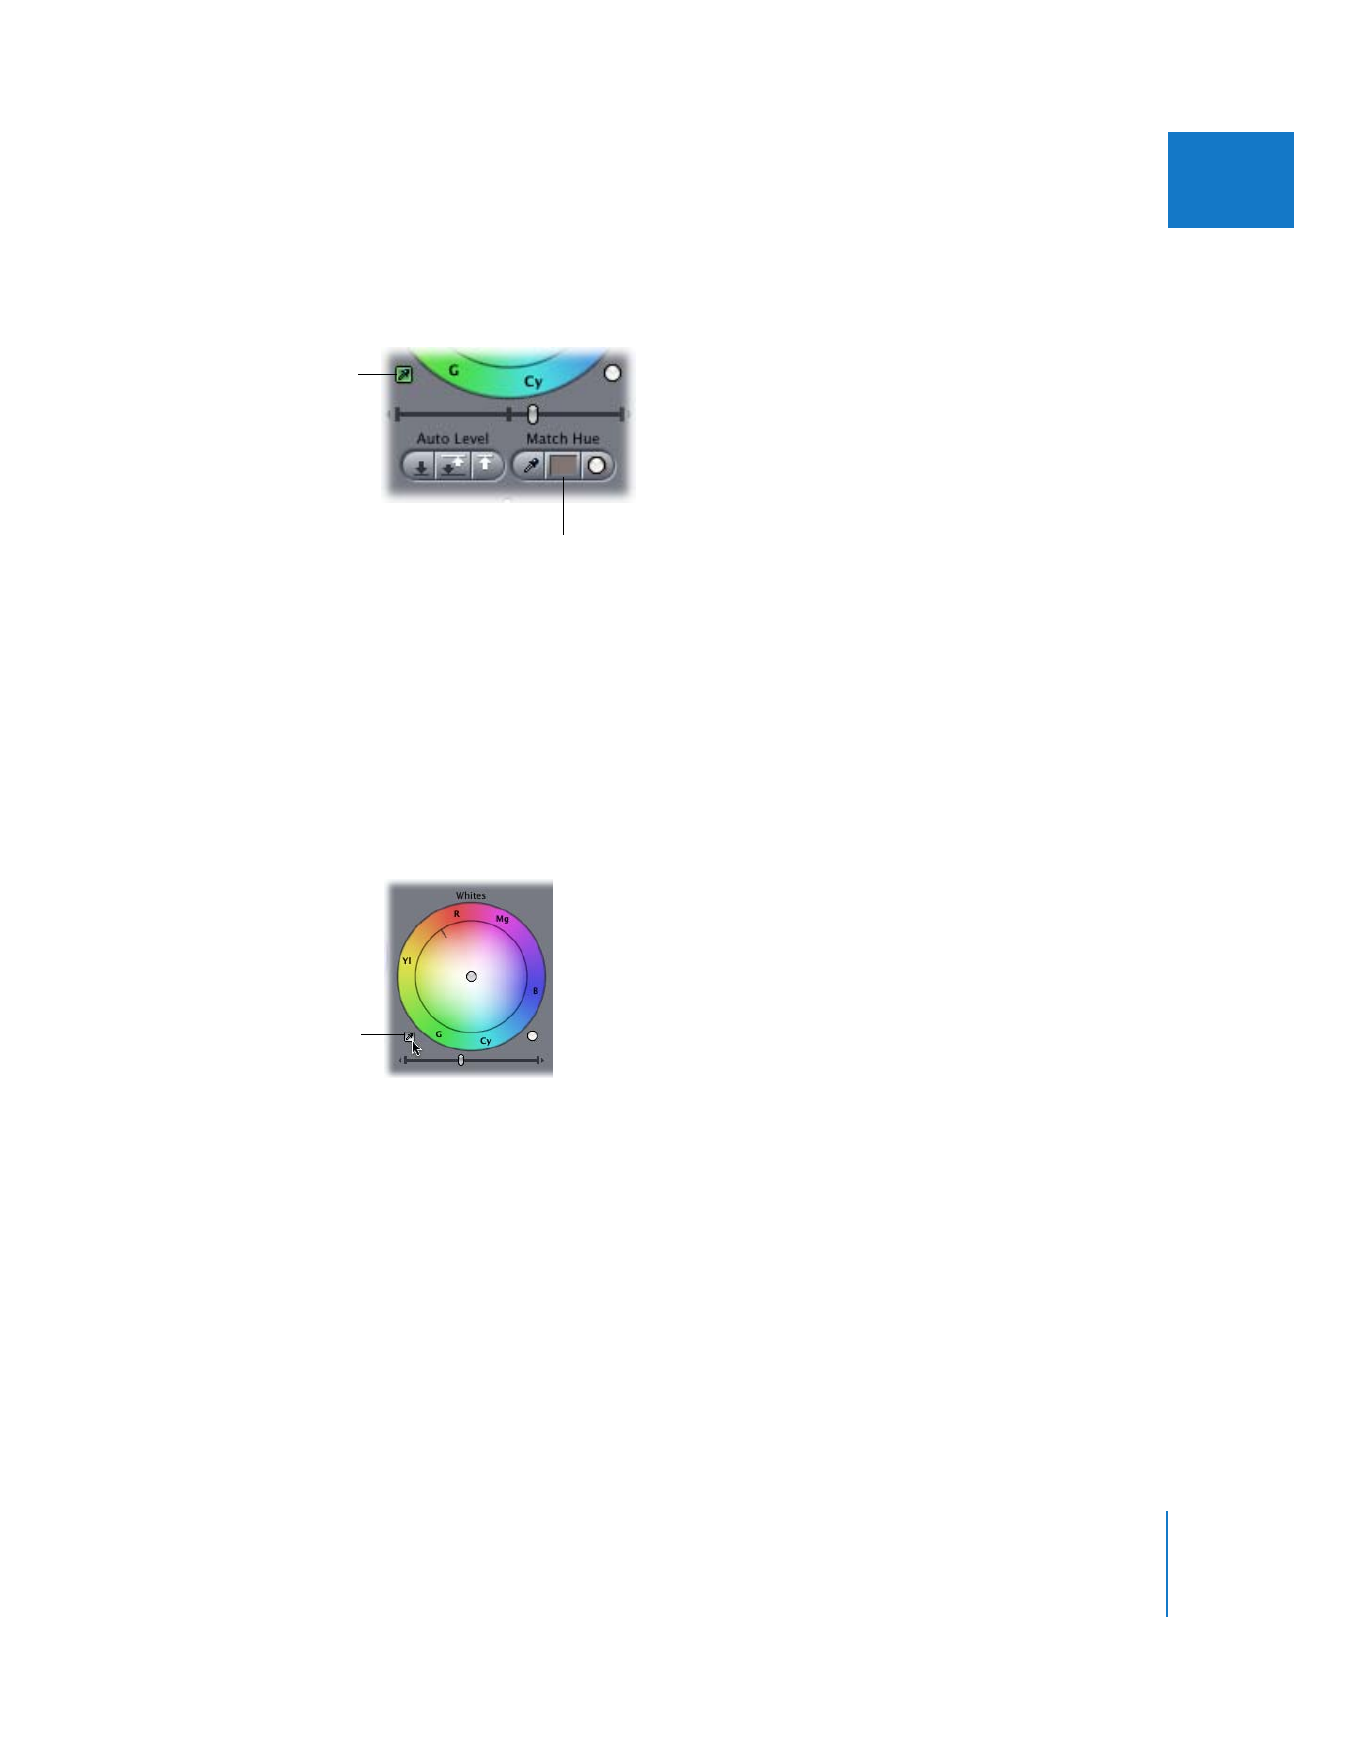
Open clip 2 in the Viewer, then click the Color Corrector 3-way tab.
The Match Hue controls let you
match hues in two different shots.

600
Part III
Color Correction and Video Quality Control
As with any color correction, the first step is to adjust the contrast of clip 2 to match
that of clip 1 as closely as possible. In this case, raising the midtones by dragging the
Mids slider to the right brings out more detail in the actor’s face and matches the
contrast of clip 1 more accurately.
4
Once the contrast has been adjusted the way you want it, click the Match Hue eyedropper.
5
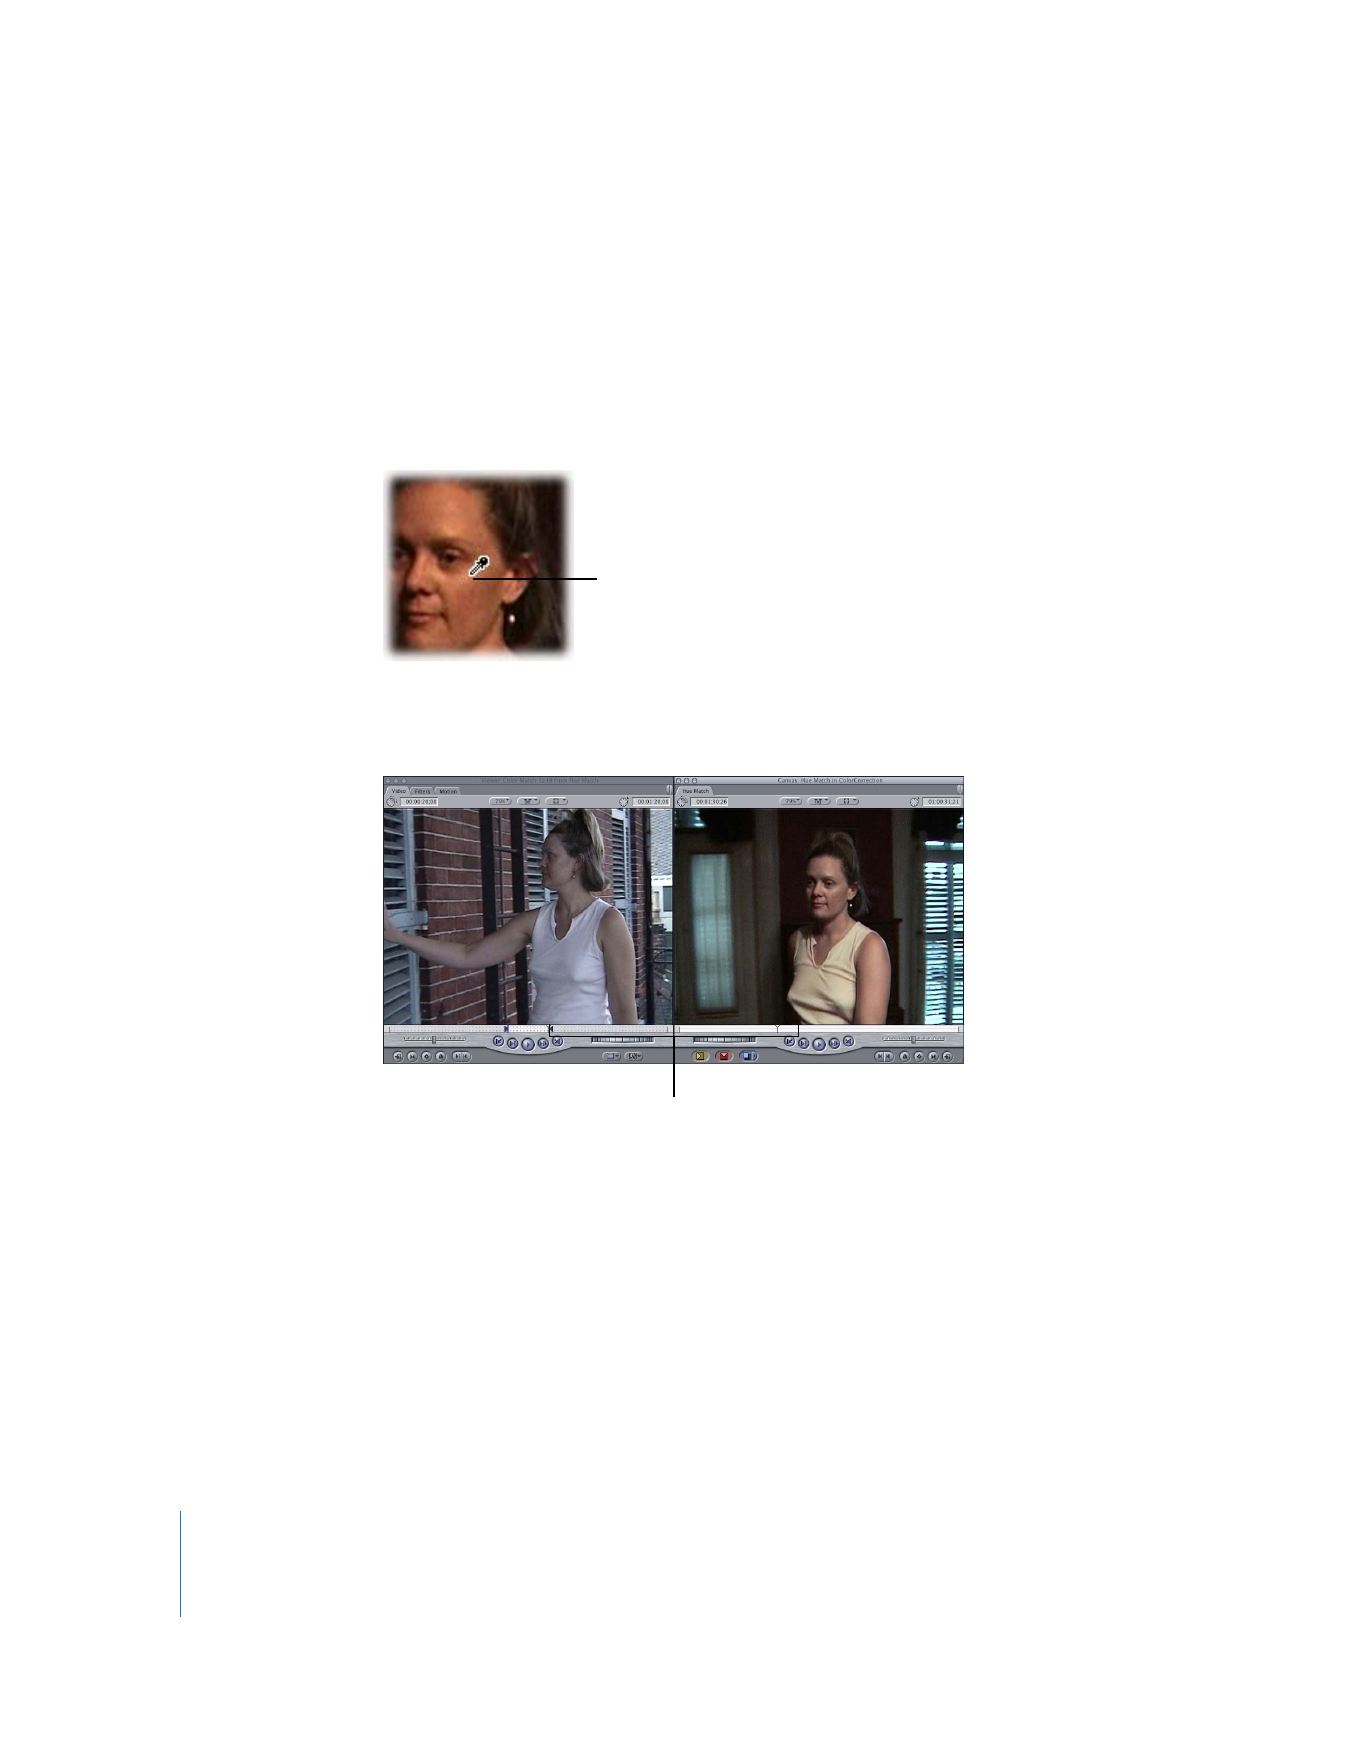
Move the pointer into the Frame Viewer 2 tab where clip 1 is showing. When the
pointer becomes an eyedropper, click a highlight in the actor’s face in clip 1.
Click a highlight.
Chapter 27
Color Correction
601
III
The Match Color indicator fills with this color to let you know it’s been selected, and
either the Whites, Mids, or Blacks Auto-Balance eyedropper is highlighted to let you
know which Auto-Balance eyedropper you should use in the next step.
When selecting a match color, the level of the color you select affects how well the
match works. When matching flesh tones, choosing a highlight generally gives the best
results, but in certain circumstances you may achieve better results by choosing a
midtone or shadow.
Note: When selecting a highlight, make sure that the highlight you select is not
overexposed (for example, a reflection or surface with excessive shine), but rather
represents the lightest area of the actor’s face that accurately represents the skin tone.
6
Now, in the Color Corrector 3-way tab in the Viewer, click the highlighted Whites
Auto-Balance eyedropper.
The Auto-Balance eyedropper that is highlighted depends on what you selected as your
match color. If you selected a highlight, as in this example, the Whites Auto-Balance
eyedropper is highlighted, letting you know that it’s the appropriate eyedropper tool to
use. If you selected a shadow, however, the Blacks Auto-Balance eyedropper is highlighted.
Note: In general, it’s always a good idea to start by picking a match color that will
highlight either the Whites or Blacks Auto-Balance eyedropper, and make this adjustment
first. Adjust the midtones afterward, if it’s necessary to achieve the look you want.
Highlighted eyedropper
Match Color indicator
Click the Whites
Auto-Balance eyedropper.
602
Part III
Color Correction and Video Quality Control
7
With the Whites Auto-Balance eyedropper selected, move the pointer into the Canvas
where clip 2 is displayed. When the pointer becomes an eyedropper, click a highlight in
the actor’s face in clip 2 that matches, as closely as possible, the highlight you selected
in clip 1.
Note: For best results, it’s extremely important to select an area of color in the clip
being corrected that accurately matches the level of the area of color you selected as
the match color.
8
The Whites control adjusts, dipping into the blues to compensate for the overly warm
lighting. The color balance of clip 2 now approximates that of clip 1 much more closely.
If you’ve achieved the results you wanted, you can stop. Often, however, using the Match
Hue controls is simply the first step, and you will make other adjustments afterward.
∏
Tip: Holding down the Shift key while adjusting the color balance control you’re
working with will lock the angle along which the color balance indicator moves,
allowing you to keep the exact hue of your adjustment the same.
Click a highlight in clip 2
that closely matches the
highlight you selected in
clip 1.
The color balance of both
shots is now similar.
Chapter 27
Color Correction
603
III