Example: Using the Color Corrector Filter
The following example shows you how to use the Color Corrector filter to adjust a clip
that’s incorrectly color balanced and underexposed. This example shows a simple use
of color correction for a clip of a white cat on a white bedspread. The camera was
incorrectly white-balanced during the shoot, and the shot is also underexposed. Using
the Color Corrector filter, you can fix both these problems.
1
Move the playhead in the Timeline over the clip you want to work on so that you can
see your changes output to video as you work.
2
Select the clip in the Timeline, then apply the Color Corrector filter to the clip.
For more information on applying filters, see Chapter 12, “
Using Video Filters
,” on page 217.
3
Open the clip in the Viewer by double-clicking it, or by selecting it and pressing Return.
4
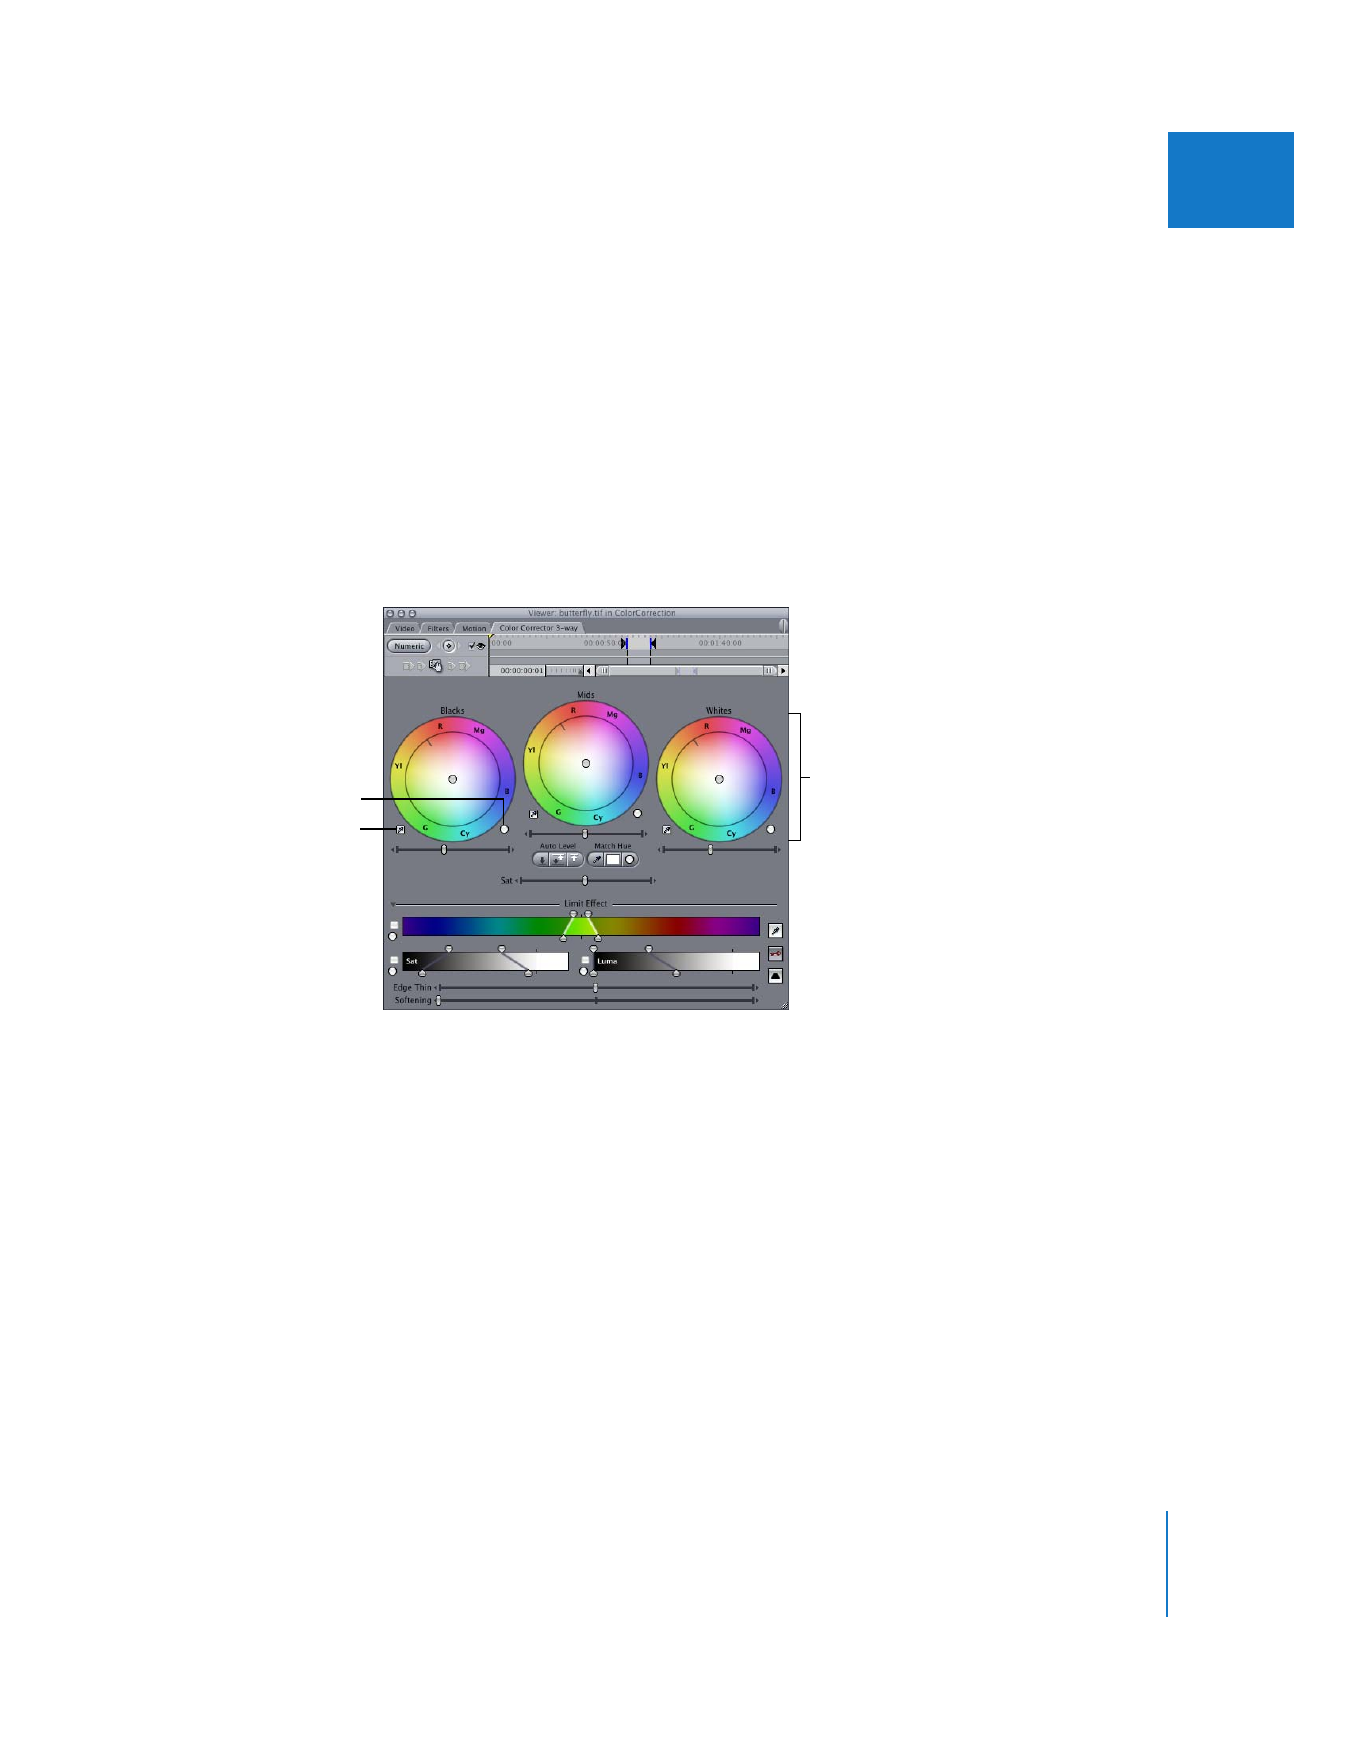
Click the Color Corrector tab at the top of the Viewer to access the Color Corrector
visual controls.
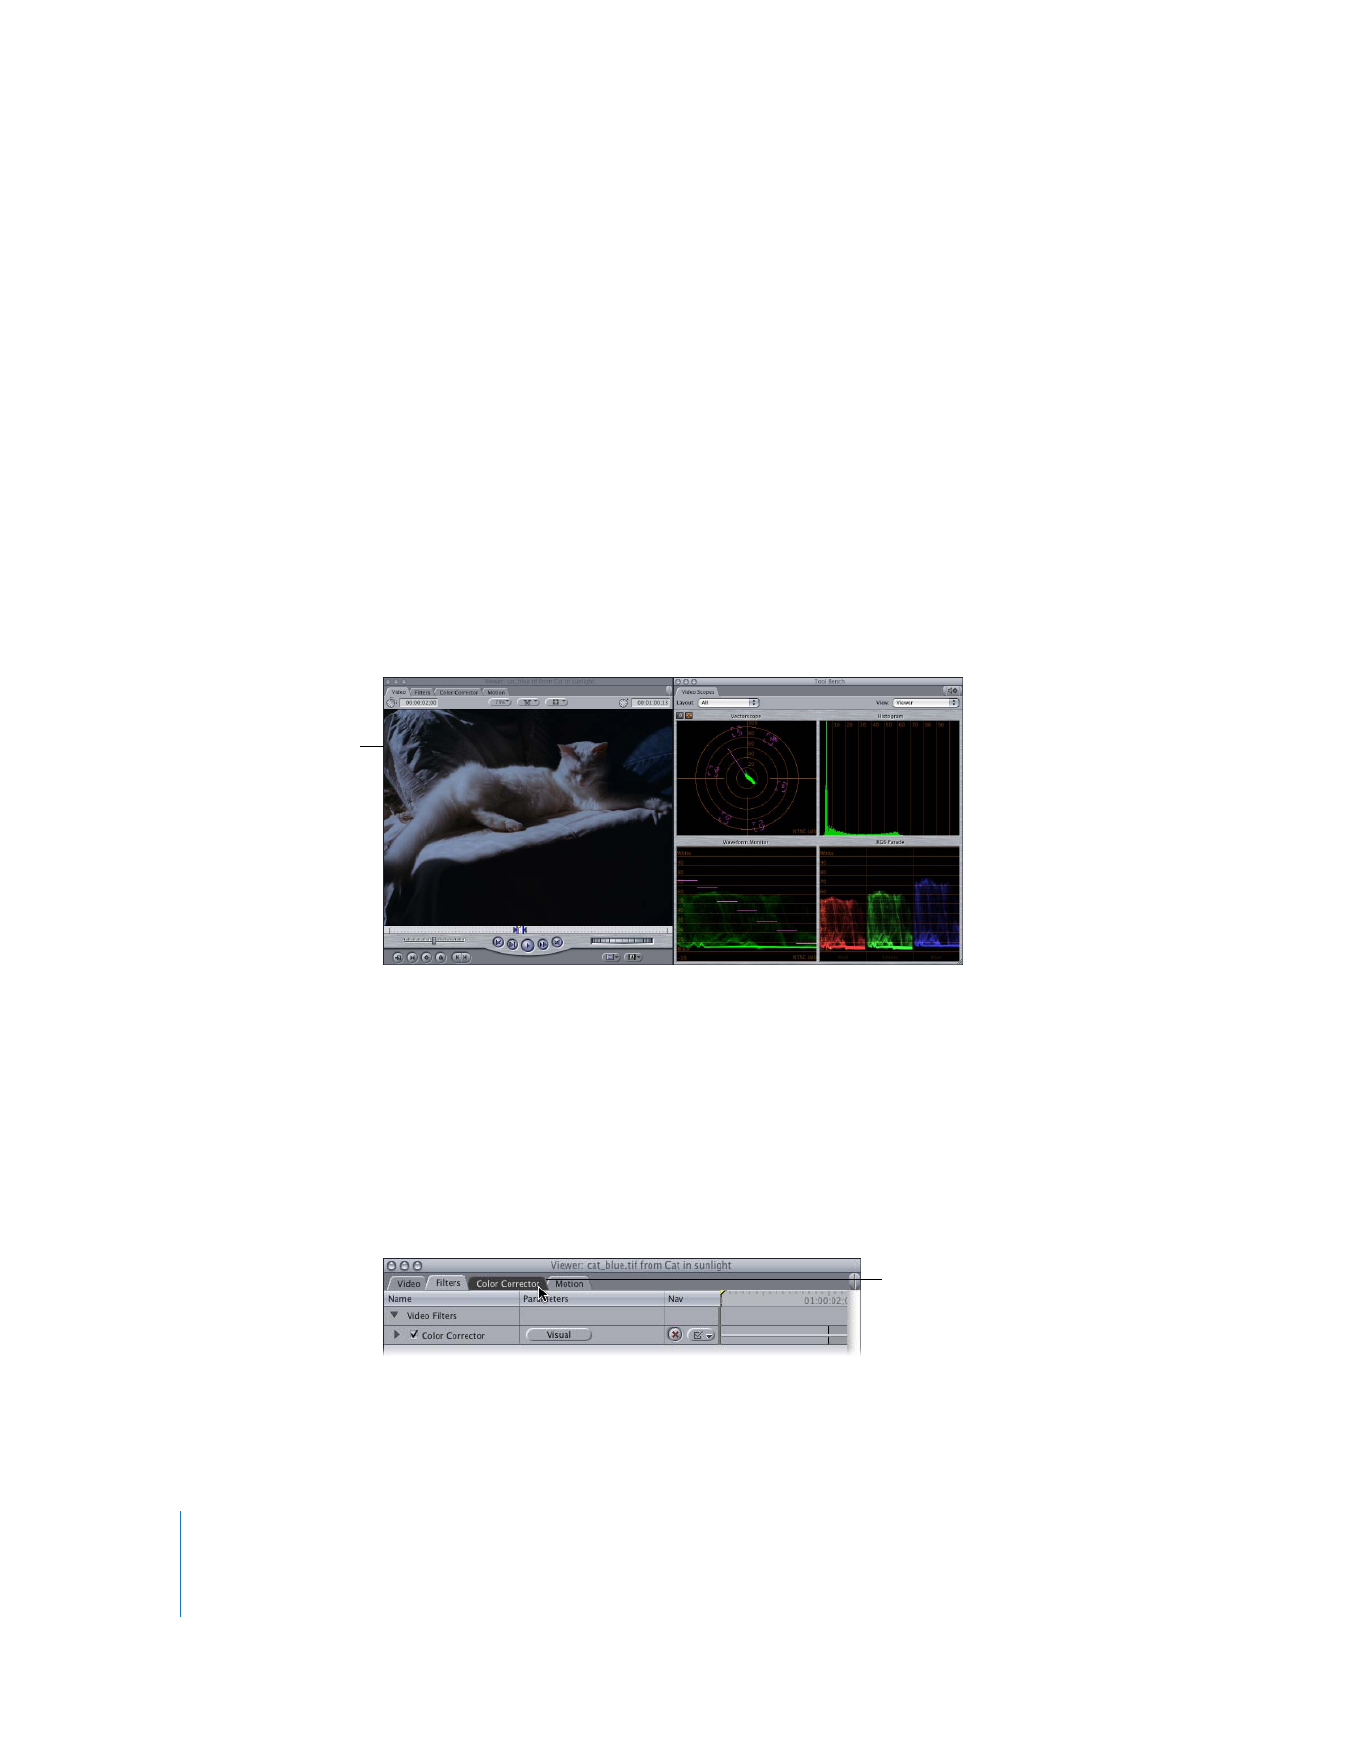
This example shows
how to color correct
this underexposed
clip of a white cat.
Click the Color Corrector tab
to view the visual controls.

Chapter 27
Color Correction
575
III
5
Choose Window > Arrange > Color Correction.
This displays the Video Scopes tab in the Tool Bench window. While color correcting, it’s
helpful to have the Video Scopes tab open to get a more detailed analysis of your
video as you work.
6
From the Layout pop-up menu of the Video Scopes tab, choose All to make sure that all
the scopes are available.
Now you’re ready to begin adjusting the image.
7
Click the Auto Contrast button to maximize the range from white to black in your clip.
The Whites and Blacks sliders automatically adjust themselves to achieve the best
numeric distribution based on the luma levels shown in the Histogram. This gives you a
starting point from which to proceed.
8
Because the image is underexposed, adjust the Mids slider to bring more detail out of
the shadows.
Choose All so that all
video scopes are available
for you to use.
Auto Contrast button

576
Part III
Color Correction and Video Quality Control
Moving the Mids slider to the right moves the distribution of midtones farther to the
right, as you can see in the Histogram. Lightening this shot using the Mids slider, as
opposed to readjusting the whites, allows you to preserve the maximum amount of
available detail in the image. Otherwise, boosting the whites might result in the lighter
areas of your clip being blown out.
Now it’s time to address the color. In the example, the white cat is tinted green because
the video camera was white-balanced incorrectly.
9
To compensate for the green tint, click the Auto-Balance eyedropper.
Note: When this button is selected, your pointer turns into an eyedropper when you
move it into the Canvas.
10
Click the eyedropper in an area of the picture that’s supposed to be pure white.
The Color Corrector filter automatically adjusts the Balance control to compensate for
whatever tint exists in that area of the picture. In this example, click a highlight of the
white bedspread.
The Histogram reflects the
change in midtone levels.
Waveform Monitor
reflects change in mids.
Click the eyedropper
near the Balance control.
Click in a white area of
the image, such as the
bedspread.

Chapter 27
Color Correction
577
III
Remember, don’t select an area that’s overexposed, like a light source or a shiny
highlight. This does not give you the result you want. Instead, select a properly exposed
area of your picture that’s white, like a well-lit shirt sleeve or white wall. You may have
to try several different spots to get the result you want; don’t hesitate to undo this
operation and try again if you’re not satisfied with the results of your initial selection.
Because the picture was tinted into the blues, when you click the eyedropper in part of
the white bedspread, the color balance indicator moves into a mixture of red and
yellow to turn the whites of the image into true white.
You can see the correction in the Canvas.
The color balance
indicator moves to
correct the whites.
After color correction
Before color correction

578
Part III
Color Correction and Video Quality Control
Note: When using the Auto-Balance eyedropper, it’s important to recognize that the
color temperature of the light illuminating the white area you select will affect the hue
of the compensation that is made. For example, if the picture is lit with a combination
of daylight and tungsten sources, selecting a part of the picture illuminated by daylight
will result in compensating the overall color temperature of the image by adding more
reds, whereas selecting a part of the picture illuminated by tungsten will result in
adding more blues. In such a case, you need to simply pick the best possible
compromise that looks right to you.
In general, using the Auto-Balance eyedropper will get you close to where you need to
be quickly and easily. However, to achieve the look you really want, you need to make
further adjustments to the Balance control by hand.
11
Click anywhere in the Balance color wheel and drag to move the color balance
indicator relative to its previous position.
Because you already used the Auto-Balance eyedropper to add more reds to compensate
for the blues that you didn’t want, this will be your starting point as you work to achieve
the particular effect you want for this scene. For example, you could drag the color
balance indicator farther into the direction of magenta in order to make the image look a
bit warmer and more inviting while preserving the corrected color balance.
Because you’re not worrying about matching this image to any other shots right now,
you can select whatever look you want. Whether you go warmer, cooler, or even into
other more surreal balances of color is purely a creative choice at this point. If you’re
going for a realistic look, however, it’s important to restrain yourself and stick to making
subtle changes.
Once you’ve achieved the color balance you want, it’s time to adjust the saturation of
your clip to complete the look of the shot.
12
Drag the Saturation slider to increase or decrease the saturation.
Be careful when you do this. A common mistake beginners make is to automatically
oversaturate shots to make them look “better.” While a highly saturated look is sometimes
appropriate, less saturation may actually improve the look of your footage. This is
especially true if you have a camcorder with artificially vivid color. In this case, it may be
appropriate to desaturate the image somewhat to keep it from looking too “hot.”
Note: As always, be careful to make adjustments to saturation only while looking at a
properly calibrated broadcast monitor. It can be very tempting to oversaturate the
colors of your clip based on the way video looks on a computer display. It’s a good idea
to enable the Excess Chroma option (in the Range Check submenu of the View menu)
to keep yourself from inadvertently setting illegal chroma levels by boosting the
saturation too high.
Chapter 27
Color Correction
579
III