Learning to Read the Vectorscope
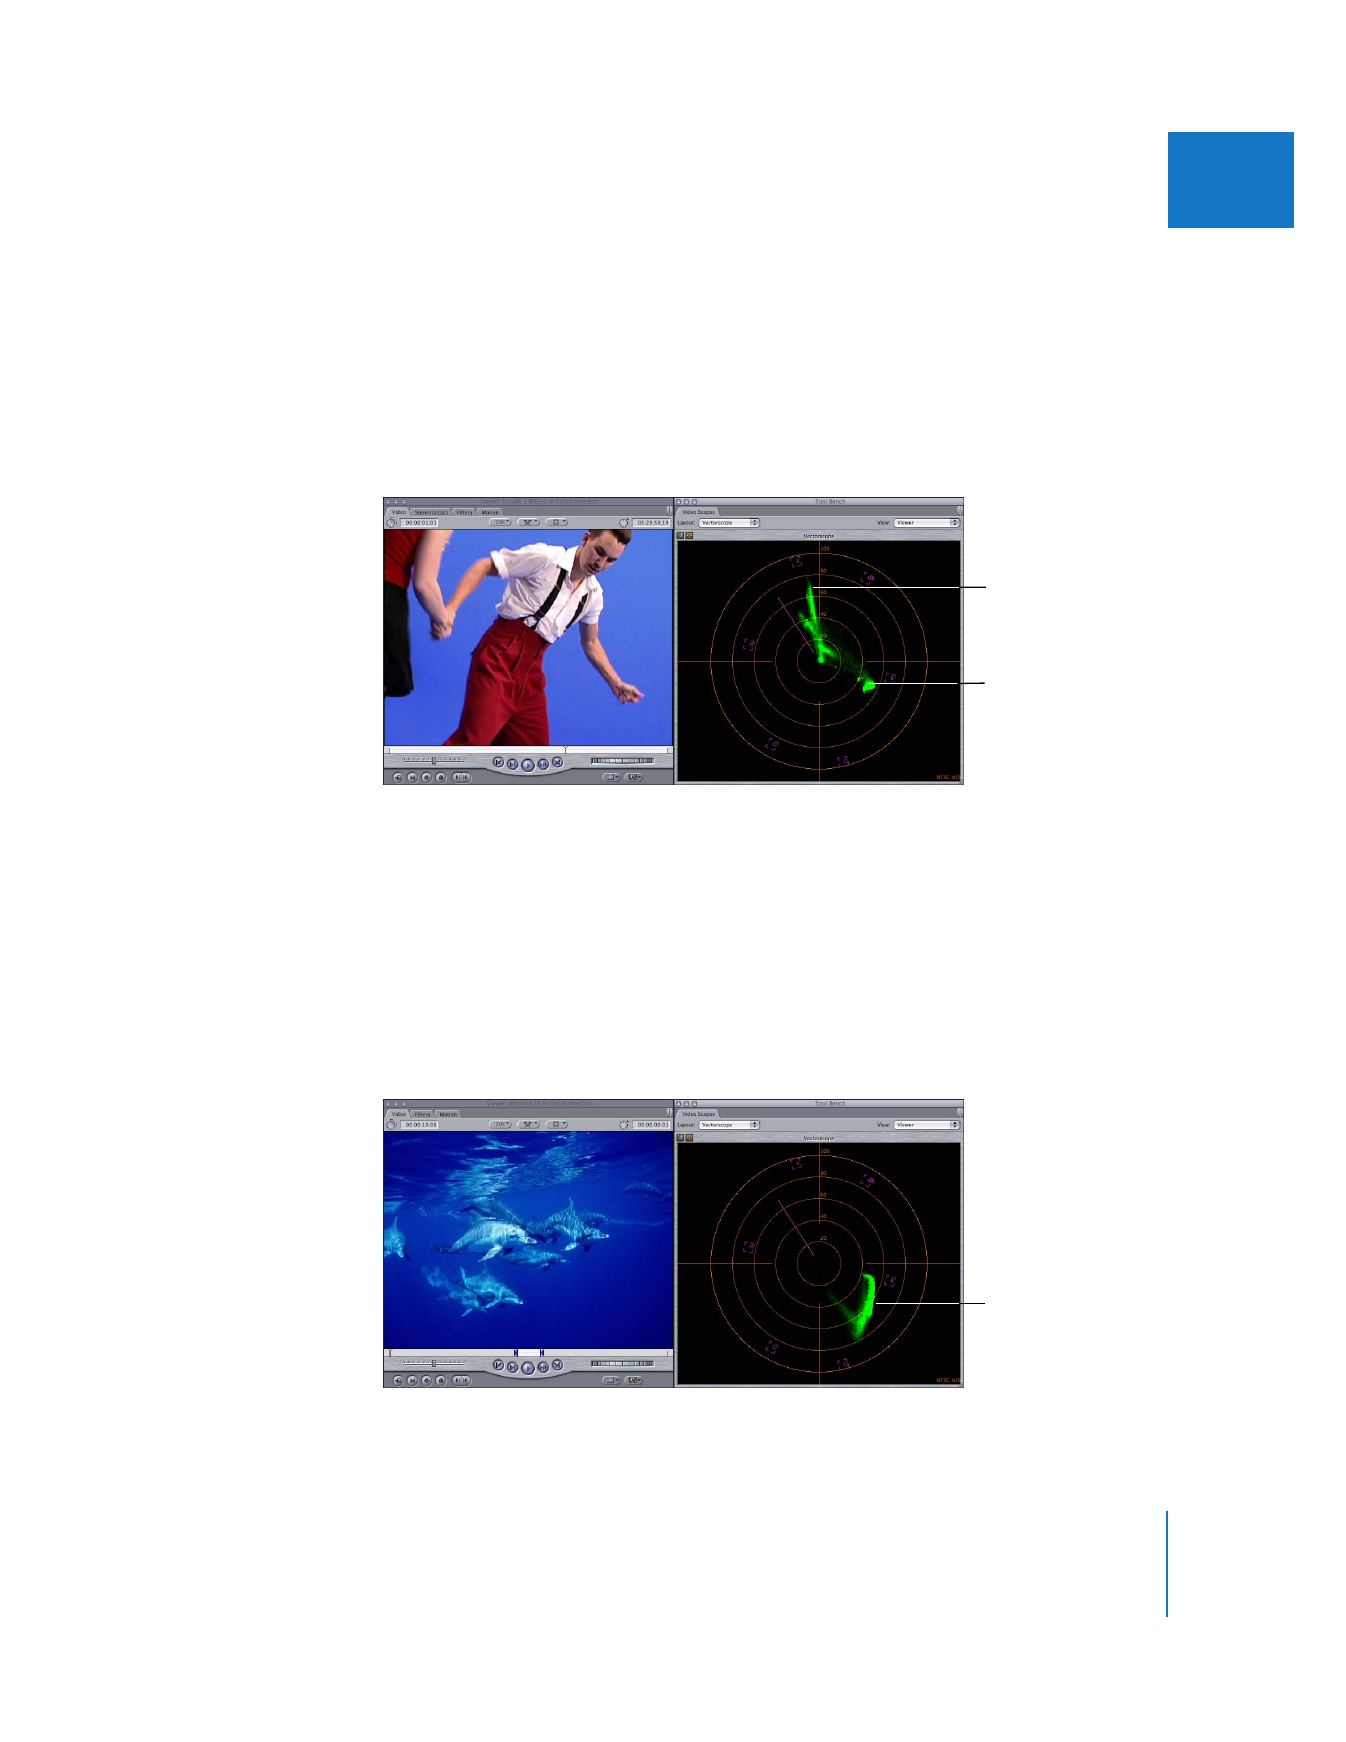
The Vectorscope shows you the distribution of color in your image on a circular scale.
The color in your video is represented by a series of connected points that fall
somewhere within this scale. The angle around the scale represents the hue displayed,
with targets indicating the primary colors of red, green, and blue and the secondary
colors of yellow, cyan, and magenta. The distance from the center of the scale to the
outer ring represents the saturation of the color being displayed. The center of the
scale represents zero saturation, while the outer ring represents maximum saturation.
The Vectorscope is useful for seeing, at a glance, the hue and intensity of the various
colors in your image. Once you learn to identify the colors in your clips on the graph in
the Vectorscope, you will be better able to match two images as closely as possible
because you can see where they vary. For example, the image above has points of
intense red and areas of vivid blue, which you can spot immediately on the Vectorscope.
The underwater image below contains predominantly blues, which present an entirely
different profile on the Vectorscope. Although this is an extreme comparison, by looking
at various images and studying how the Vectorscope changes you’ll learn how to spot
the information you’re looking for.
Red of clothing
Blue of background
Distribution of blues

516
Part III
Color Correction and Video Quality Control
The color targets of the Vectorscope scale match the colors in the color balance
controls of the Final Cut Pro color correction filters. If the hues of two shots you’re
trying to match don’t match, the direction and distance of their offset on the
Vectorscope scale give you an indication of which direction to move the color balance
indicator to correct for this.
The Vectorscope is also helpful for identifying and correcting the flesh tones of actors
in a shot. When recorded to videotape and measured on a vectorscope, the hues of
human flesh tones, regardless of race, fall along a fairly narrow range (although the
saturation and brightness will vary). This range is identified by a special target line that
indicates the average hue of flesh tones. When there’s an actor in a shot, you’ll know
whether or not the flesh tones are reproducing accurately by checking to see if there’s
an area of color that falls loosely around the Flesh Tone line.
If the flesh tones of your actors are noticeably off, the offset between the most likely
nearby area of color on the Vectorscope and the Flesh Tone line will give you an idea of
how much to change the hue to make the correction.
Flesh tones are clustered
about the Flesh Tone line.
As in the previous image,
flesh tones appear
around the Flesh Tone
line.

Chapter 26
Measuring and Setting Video Levels
517
III