Example: Removing Portions of Media Files
After Creating Subclips
A common logging and capturing workflow involves capturing each tape to a single
media file, breaking the master clip into subclips, and then using the Media Manager to
create individual media files for each subclip. In this example, the Media Manager
creates a media file for every subclip in your project. Portions of your media that are
not referenced by subclips are not turned into new media files, and thus unnecessary
media can be eliminated by this process.
To eliminate portions of a media file not referenced by subclips:
1
In the Browser, delete the original master clip that your subclips were derived from.
Note: When you create a subclip, it becomes its own master clip. A subclip does not
refer back to the original clip it came from, but both the original clip and the new
subclip refer to the same media file.
Because the Media Manager tries to preserve media referenced by clips in your project,
it is necessary to delete the original master clip (which refers to the entire length of the
media file) so only the subclip media will be preserved.
2
Rename your subclips with descriptive names.
When the Media Manager creates new media files, they will be named after these
subclip names.
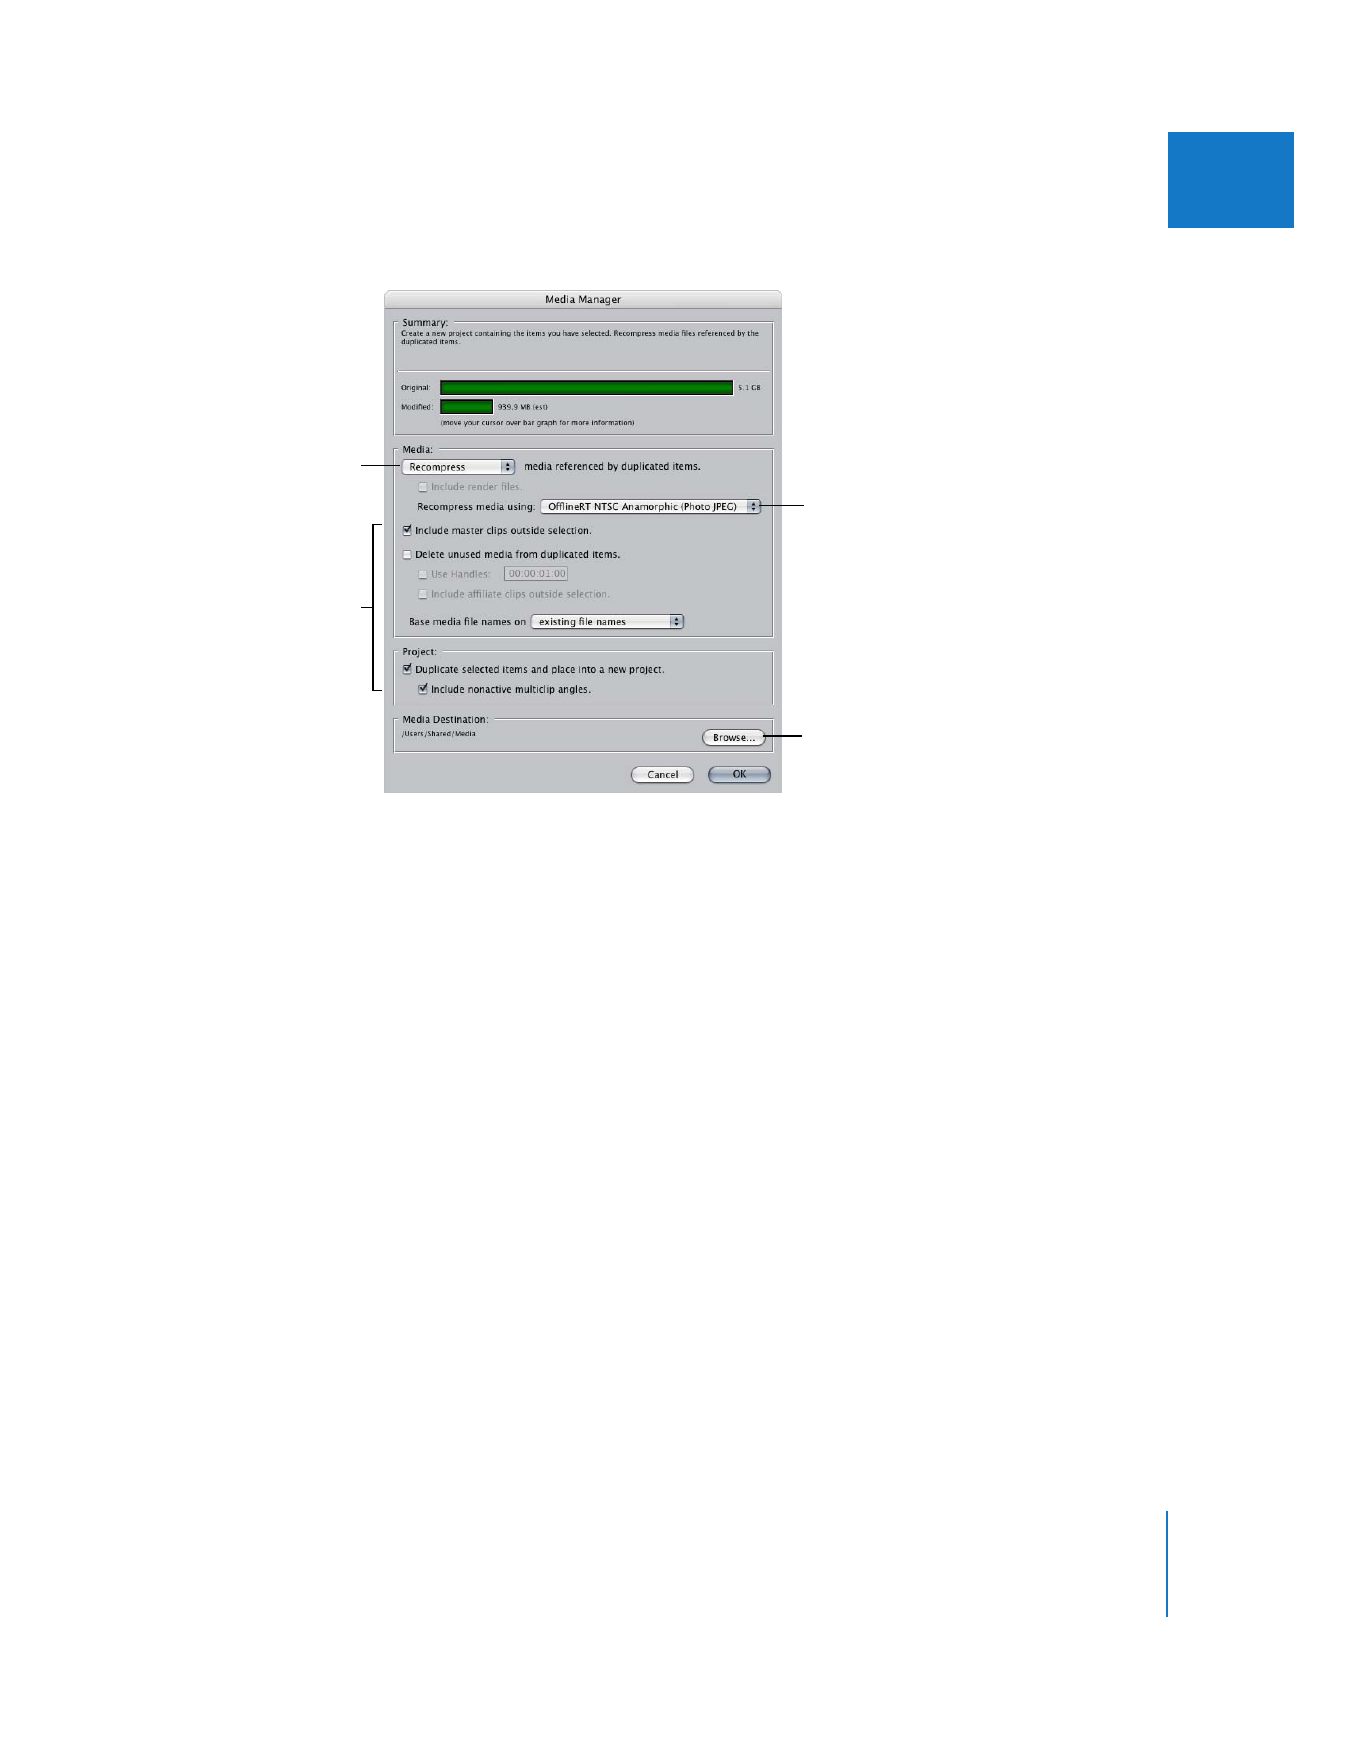
Click here to choose
a location for the
recompressed media
files. If your portable
computer is connected,
you can copy files
directly to it.
Choose Recompress from
this pop-up menu.
Make sure these options
are set properly.
Choose the codec
you want to use for
recompressing (you can
also create a new preset
from here).
116
Part I
Media and Project Management
3
Select all of the subclips that you created from the master clip you just deleted.
Important:
The media for any subclips you don’t select will be lost. To be safe, you
can move all the subclips whose media you want to retain to one bin, and the
subclips you don’t want to preserve to a different bin. Then select the bin of subclips
you want to preserve.
4
Control-click one of the selected subclips, then choose Media Manager from the
shortcut menu that appears.
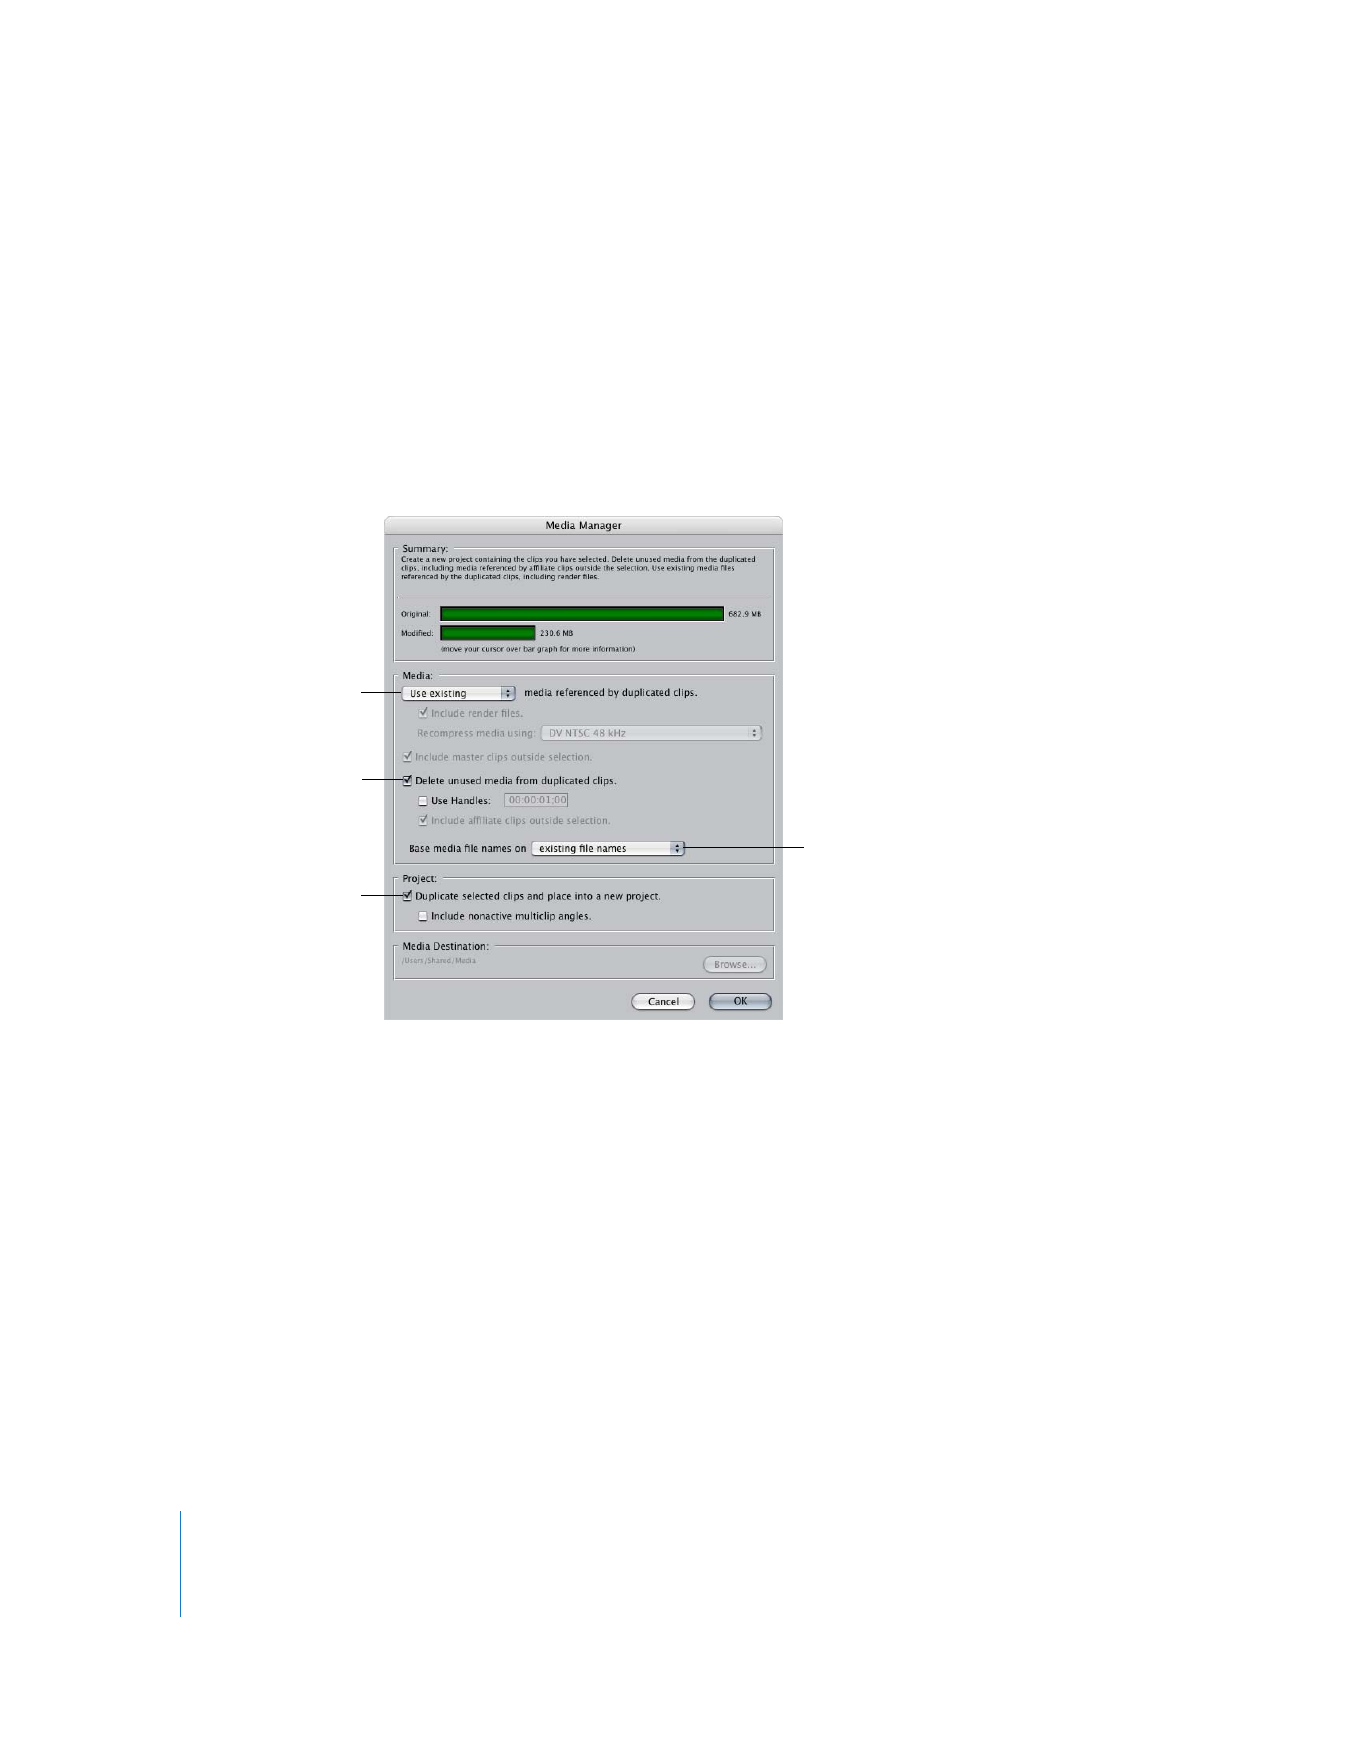
5
In the Media Manager, make the following selections:
6
Click OK.
The Media Manager creates a new media file for each selected subclip and reconnects
each subclip to the new media file. The original media file is deleted, so any subclips
not selected become offline.
Select this option.
Deselect the “Duplicate
selected item and place
into a new project”
checkbox.
Choose “Use existing”
from this pop-up menu.
Choose “clip names” from
this pop-up menu. This
option names your
media files using the
descriptive subclip
names instead of
numbered variations on
the original media
filename.

Chapter 8
Examples of How to Use the Media Manager
117
I