
Settings and Options in the EDL Export Dialog
This section describes the options in the EDL Export dialog.
EDL Title
The title entered here appears on the first line of the EDL and is limited to 60–77
characters, depending on the EDL format. By default, the title entered here is the name
of the exported sequence.
Note: Changing the EDL title does not change the filename of the exported EDL.
Format Pop-Up Menu
This menu allows you to choose which format your EDL is exported to. There are
several EDL file formats, each named after a particular manufacturer and model of a
linear, tape-to-tape editing system. Final Cut Pro supports the following EDL formats:
 CMX 340
 CMX 3600
 Sony 5000
 Sony 9100
 GVG 4 Plus
CMX 3600 is one of the most common EDL formats, so you should use this one unless
you have a specific reason to choose another. Check with the person receiving your
EDL to determine what format will work best.
Sorting Pop-Up Menu
This menu allows you to choose the order in which your sequence clips are sorted in
the exported EDL.
 Master, Audio Merged: Clips appear in the order in which they occur in the sequence.
Audio clips that start and end together are merged into one event line where
possible. This sorting method allows you to recreate your sequence in order of clips
in the Timeline.
 Source, Audio Merged: Clips are ordered based on their arrangement in the
original source tapes. Event number 1 has the earliest starting timecode on the
lowest-numbered reel. This sorting method allows you to recreate your sequence
one reel at a time, regardless of clip order in the Timeline.
136
Part II
Project Interchange
Target Video Track Only
This option allows you to select whether or not your EDL includes keying events when
you have clips on track V2.
An EDL can only include edits that are possible with a tape-based editing system. Since
videotape formats typically have only one video track, you can choose only one video
track in your Final Cut Pro sequence.
When you select the “Target Video Track Only” option, Final Cut Pro uses the current
destination video track in the Timeline to determine which video track is exported to
your EDL, and no key events are created in the EDL. For example, you can export only
the clips on video track V3 by setting it to the current destination track in the Timeline.
For more information about setting destination tracks, see Volume II, Chapter 8,
“Working with Tracks in the Timeline.”
This option is useful for exporting separate EDLs, one at a time, for each video track
above V1.
When this option is deselected, Final Cut Pro includes keying (K) events. Video track V1 is
treated as the background layer and track V2 as the foreground layer of the key effect.
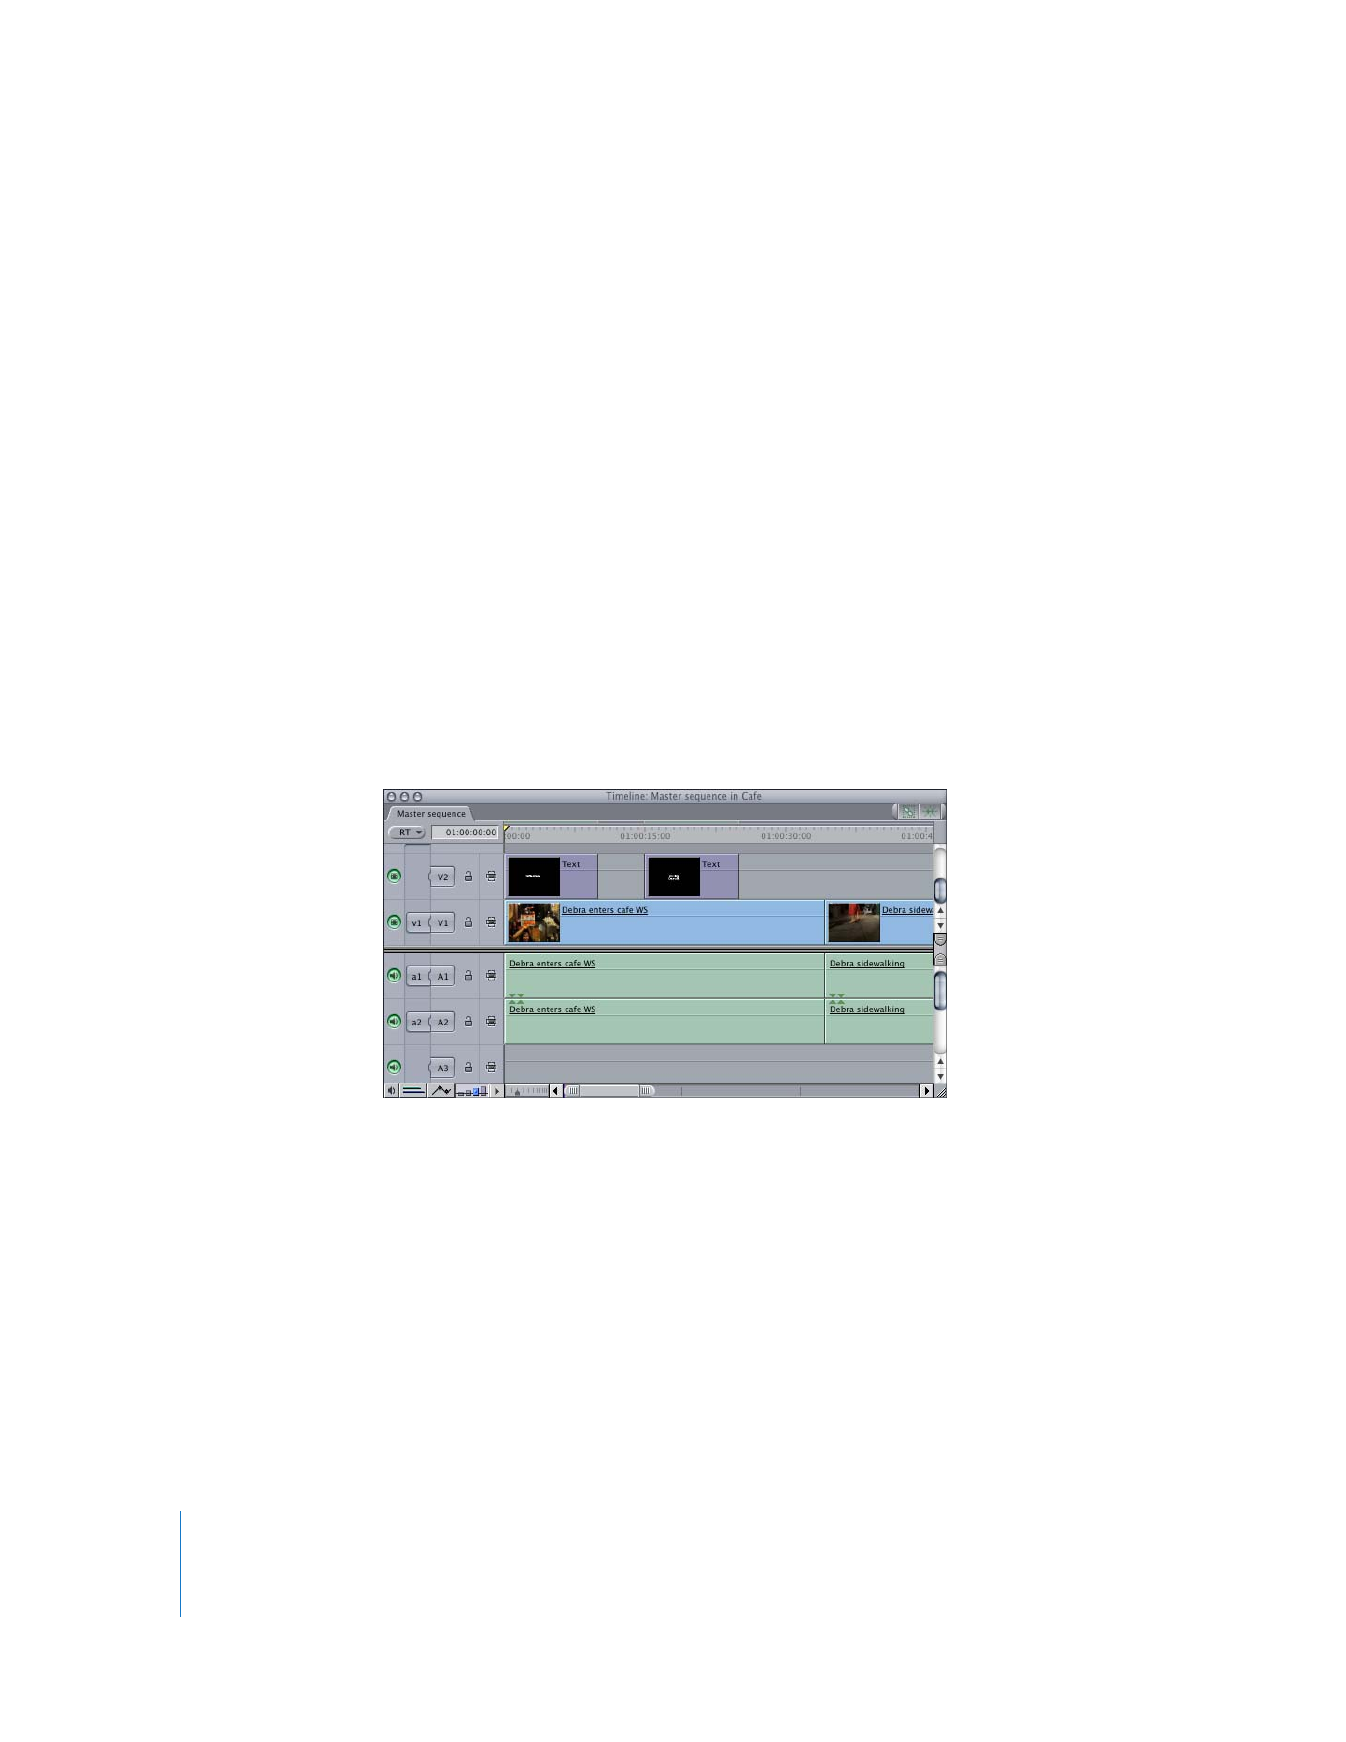
The following event refers to the first text generator clip in the sequence shown above.
001 002 V K B 02:10:42:13 02:10:52:13 01:00:00:00 01:00:10:00
001 GEN V K 000 00:00:55:00 00:00:55:00 01:00:00:00 01:00:00:00
This option does not affect audio track export.
Omit Transitions
Check this box to ignore all transitions in your sequence so the EDL contains cuts only.
This keeps your EDL as simple as possible, so transitions won’t complicate your online
session. The online editor can create the necessary transitions.
Chapter 10
Importing and Exporting EDLs
137
II
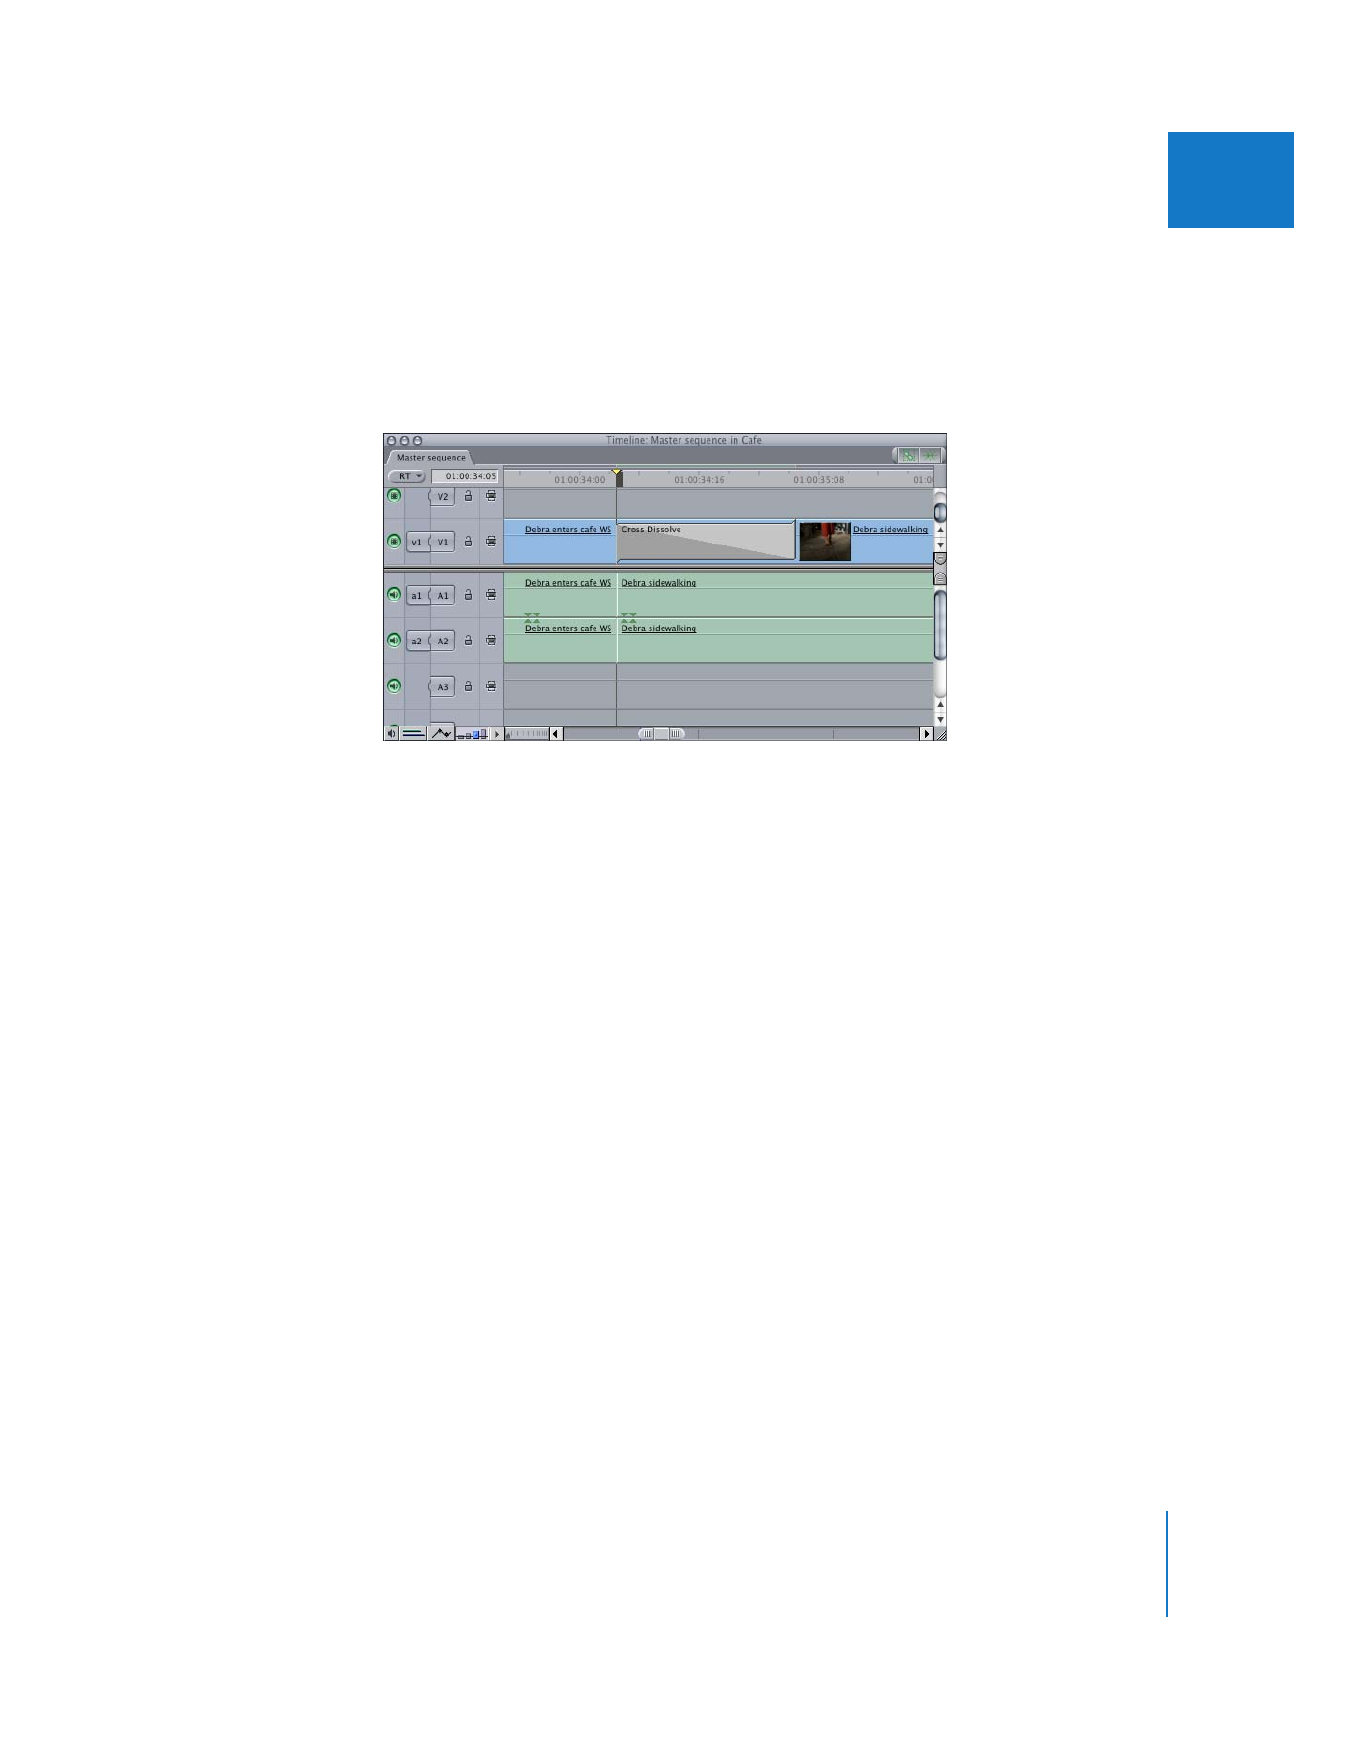
Reel Conflicts
If you create a transition between two clips from the same reel in your sequence,
Final Cut Pro considers this to be a reel conflict, because the resulting EDL event would
be impossible to perform in a tape-based editing system. This is because in a linear
editing suite, a transition requires two video sources, but you can’t put the same tape
in two decks at the same time.
Reel conflicts can be addressed in several ways, depending on the abilities of the
tape-to-tape editing suite you are using:
 B-Reel Edits: In a linear editing suite, transition events that require two different
shots on the same reel can be performed by first copying the second shot of each
transition to a new tape, called a B-reel. Final Cut Pro can automatically create a B-reel
EDL, which you can use to assemble a tape with any necessary shots. The B-reel tape
is automatically assigned its own reel name, and shots in the EDL for your main
sequence are replaced with corresponding shots on the B-reel.
TITLE: MASTER SEQUENCE BREEL1
001 002 AA/V C 02:18:32:07 02:18:56:19 01:00:00:00
01:00:24:12
TITLE: MASTER SEQUENCE
001 002 V C 02:10:42:13 02:11:16:18 01:00:00:00
01:00:34:05
001 BREEL1 V D 024 02:18:32:07 02:18:56:19 01:00:34:05
01:00:58:17
* FROM CLIP NAME: DEBRA ENTERS CAFE WS
* TO CLIP NAME: DEBRA SIDEWALKING

138
Part II
Project Interchange
 Pre-read Edits: Some high-end digital video decks can actually perform transitions by
using the master tape as one of the sources. A digital VTR with the ability to pre-read
video off the tape before recording is required. Pre-read is a technical feature that
allows a deck to read the signal off tape, send it to a device for processing, and then
record the processed signal back onto the same tape in the same location. In this
case, the record deck actually becomes the source deck, or one of two source decks
in the case of performing transitions.
Pre-read transitions always begin with the master deck and then dissolve to a source
deck. For example, a pre-read dissolve is performed in an online edit suite by making
a cut to the master tape signal, then dissolving to another source deck.
In the example below, the first event is a cut to Reel 002. The second event is a cut to
the master tape itself, which then dissolves to Reel 002.
TITLE: MASTER SEQUENCE
001 002 V C 02:10:42:13 02:11:17:18 01:00:00:00
01:00:35:05
002 PREREAD V C 01:00:00:00 01:00:34:05 01:00:00:00
01:00:34:05
002 002 V D 024 02:18:32:07 02:18:56:19 01:00:34:05
01:00:58:17
* FROM CLIP NAME: DEBRA ENTERS CAFE WS
* TO CLIP NAME: DEBRA SIDEWALKING
Important:
Check with your online editor before you select this option.
 Generic Edits: This option allows transitions from two places on the same source tape.
You should use this option when exporting your EDL for use in another nonlinear
editing system, or if specifically requested by your online editor. Some online editors
may prefer to receive generic transition EDLs and modify them manually.
TITLE: MASTER SEQUENCE
001 002 V C 02:10:42:13 02:11:16:18 01:00:00:00
01:00:34:05
001 002 V D 024 02:18:32:07 02:18:56:19 01:00:34:05
01:00:58:17
* FROM CLIP NAME: DEBRA ENTERS CAFE WS
* TO CLIP NAME: DEBRA SIDEWALKING
EDL Notes
EDL notes are useful for including details about your Final Cut Pro sequence, even though
the information can’t be used directly by the editing system that imports the EDL.

Chapter 10
Importing and Exporting EDLs
139
II
 File or Clip Names: This pop-up menu allows you to include either the file or clip
names as a note beneath each edit.
 Comments pop-up menu: Choose one of the comments columns in the Browser
(Master Comments 1–4 or Comments A–B) to include in the EDL. This is a useful way
for offline editors to provide notes about shots to the online editor.
 Filters: Includes names of video and audio filters applied to a clip.
 Video Levels: Opacity levels of each clip, if they are not 100%. Opacity keyframes are
also included, displayed by clip timecode and percentage level. Bezier curve
information is ignored.
 Audio Levels: Audio level changes of a clip, along with keyframe timecode and
relative gain adjustment (in decibels). The audio channel (A1, A2, and so on) is
specified next to each audio level note.
 Transitions: Includes notes about the transitions used in your edit.
Master
These settings allow you to set the starting timecode number for the master tape. This
overrides the Starting Timecode field in the Timeline Options of Sequence Settings.
 Start Time: The timecode for the first edit on the master tape. This number defaults
to the starting timecode of the sequence, but you can set it to any number you want.
 Drop Frame: Defines whether the timecode on the master tape being edited to has
drop frame or non-drop frame timecode. This appears as the first element under the
title in the EDL and defaults to the type of timecode of the sequence you’re exporting.
Note: This option is only relevant for sequences that have a timebase (frame rate)
of 29.97 fps.
Audio Mapping
You can choose which audio channels in your sequence are edited to the audio tracks
of the master tape. Some EDL formats support two audio channels, while others
support four. Each track in your sequence can be mapped to any audio channel in the
EDL format. For example, you can map sequence audio tracks 2, 6, 10, and 14 to audio
track 2 in the EDL. The resulting master tape created from this EDL will have audio clips
from sequence tracks 2, 6, 10, and 14 edited onto track 2.

140
Part II
Project Interchange