Importing EDLs into Final Cut Pro
You can import an EDL into Final Cut Pro to re-create an edit from another nonlinear
system or re-create an older sequence originally cut on a tape-to-tape linear system. An
imported EDL becomes an offline sequence in your project, accompanied by a bin
containing master clips which correspond to all the clips in that sequence. This bin is
named Master clips for [Sequence Name]. To recreate the sequence, you can batch capture
the master clips or select the sequence and batch capture all of its sequence clips.
Important:
If you name hard disks and folders with double-byte (or 16-bit) characters
(such as characters used for the Japanese language), Final Cut Pro may not be able to
either import or export EDLs. To avoid this problem, import from or export to disks and
folders with names that do not contain double-byte characters.
To import an Edit Decision List:
1
Choose File > Import > EDL.
2
Specify your import options, then click OK.
3
Locate and select the EDL, then click Open.
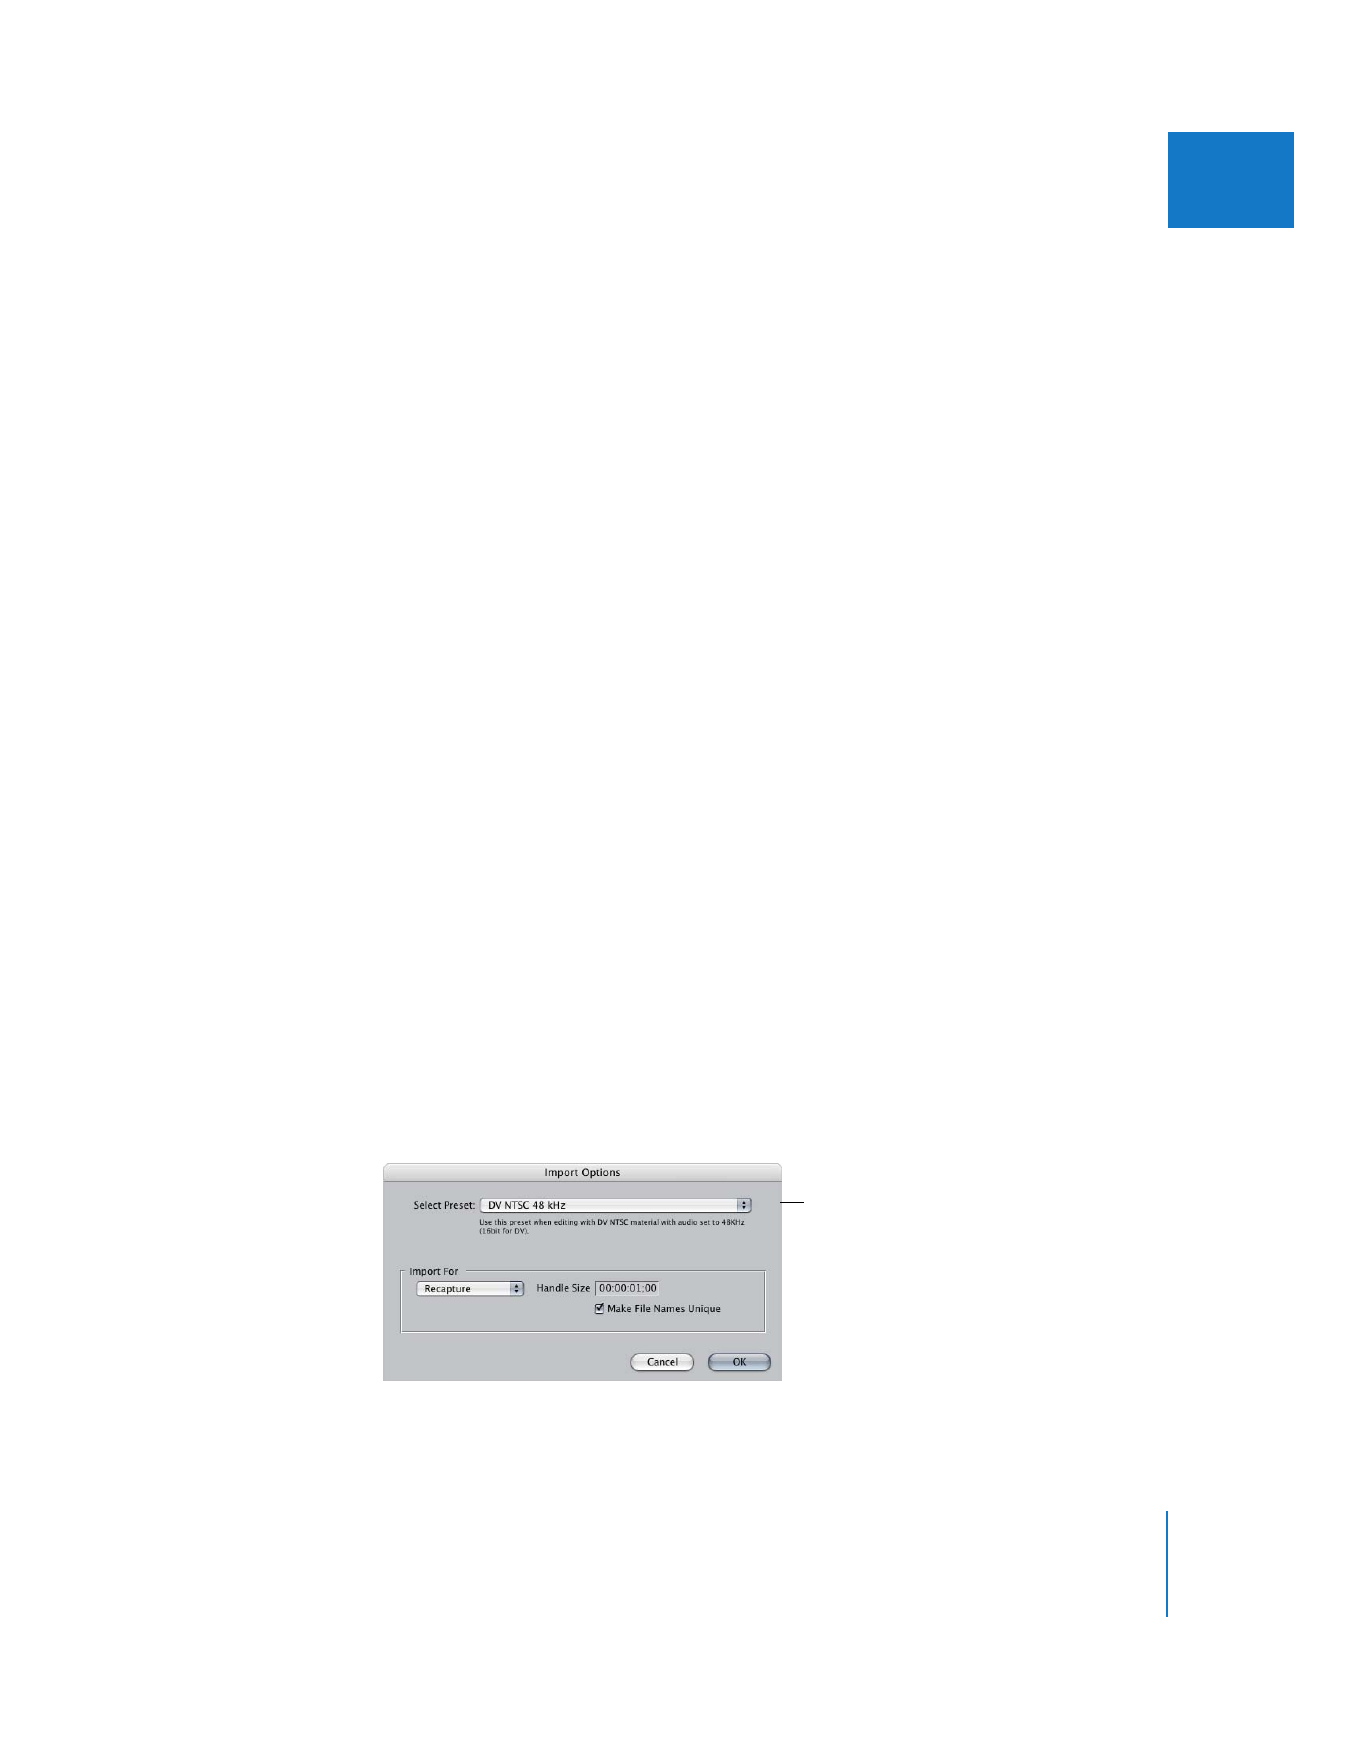
Select the options
you want.

142
Part II
Project Interchange
When you import an EDL, a sequence is created in your current project tab, along with
a bin that contains master clips for the clips in the sequence.
Note: When you import a Sony 5000 EDL, the title of the created sequence is “Untitled”.
Settings and Options in the EDL Import Dialog
This section describes the options in the EDL Import dialog.
 Select Preset: This determines the settings of the newly created sequence and the
clips within that sequence. Usually, you should choose a sequence preset that
corresponds to the format of your source tapes that you plan to recapture from.
 Import For: Choose an option from the pop-up menu.
 Recapture: Choose this option if you’re importing an EDL from a tape-to-tape
linear editing system or a non-QuickTime standard nonlinear editing system. This
makes the recaptured clip names unique and adds handles before and after the
clips during capture. You can change the handle size.
 Reconnect: Choose this option if you already have the media files on disk and
simply want to link the sequence to them. This is useful if you’ve imported an EDL
and also transferred QuickTime media files to your editing system. This option
keeps clip names in the same order to make relinking easier. You cannot create
handles if you are reconnecting media, since no new media is being created.
 Custom: Choose this option to specify handle size and unique clip names.
 Handle Size: Specify the number of additional frames you want to capture on either
side of each clip. You should always add handles when recapturing media from an
imported EDL because it gives you more flexibility for trimming edit points, adding
dissolves, and so on.
Note: You cannot set handles when you choose Reconnect since the media files are
already on your disk and are not being captured.
 Make File Names Unique: Select this option if you are recapturing clips so no two
media files have the same name. Deselect this option if you are reconnecting to
media files that are already on disk.