
Importing a Telecine Log to Create a Cinema Tools Database
You can import a telecine log file, which is usually either a FLEx file or an Avid Log
Exchange (ALE) file, into Cinema Tools or import it directly into Final Cut Pro. (Importing
the file into Final Cut Pro requires fewer steps.) When you import the log file into
Final Cut Pro:
 Offline clips are created for each telecine log entry, and each entry has all film-related
information, such as edge code and camera roll numbers, added to it. (If you import
the log file into Cinema Tools, you will have to export a batch capture file to import
into Final Cut Pro.)
The names of the clips are based on the scene and take information from the log file.
Additionally, you are able to append a camera letter to clip items if there were
multiple cameras involved in a shoot.
 You choose whether to create a new Cinema Tools database or to import the records
into an existing database.
168
Part II
Project Interchange
To import a telecine log file into Final Cut Pro:
1
Choose File > Import > Cinema Tools Telecine Log.
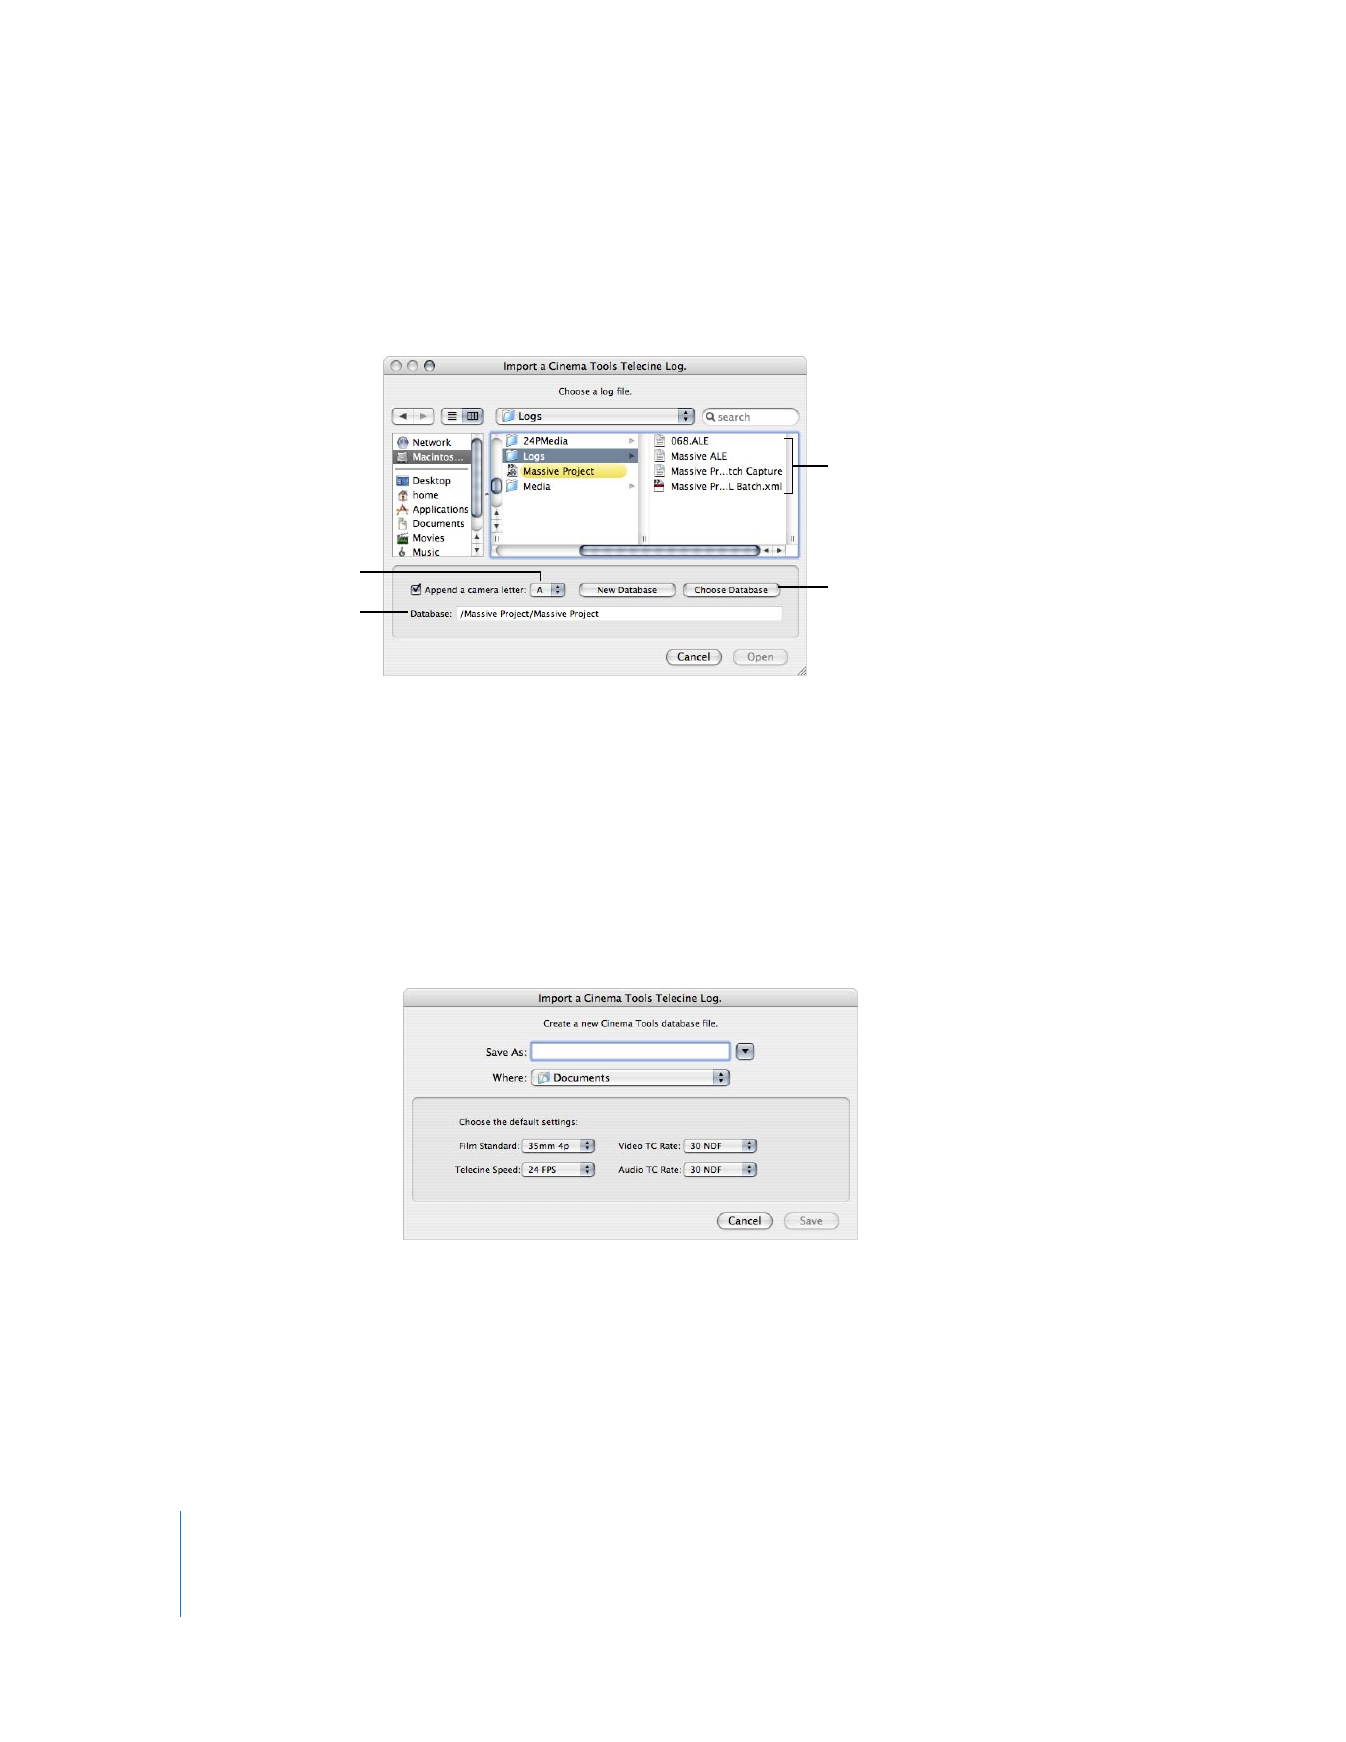
The Import a Cinema Tools Telecine Log dialog appears.
2
Use the top half of the dialog to select the telecine log file to import.
3
To assign a camera letter to the imported records, select the “Append a camera letter”
checkbox and choose a camera letter from the pop-up menu.
4
Do one of the following:
 Click New Database to create a new Cinema Tools database to import the telecine
log file into. This opens a new dialog where you can enter a name and location for
the database, as well as configure its default settings. See the Cinema Tools User
Manual for information on these settings. Click Save when finished.
 Click Choose Database to open a dialog where you can select an existing database to
import the telecine log file records into. Click Open when finished.
The selected database, whether new or previously existing, is listed in the Database
field of the Import a Cinema Tools Telecine Log dialog.
5
Click Open to import the selected telecine log file into the selected Cinema Tools database.
Select the telecine log
file to import.
Choose to either create
a new database or
import the file into an
existing database.
Choose a camera letter to
append to the imported
takes (if needed).
Lists the currently
selected database.

Chapter 12
Working with Film and Cinema Tools
169
II