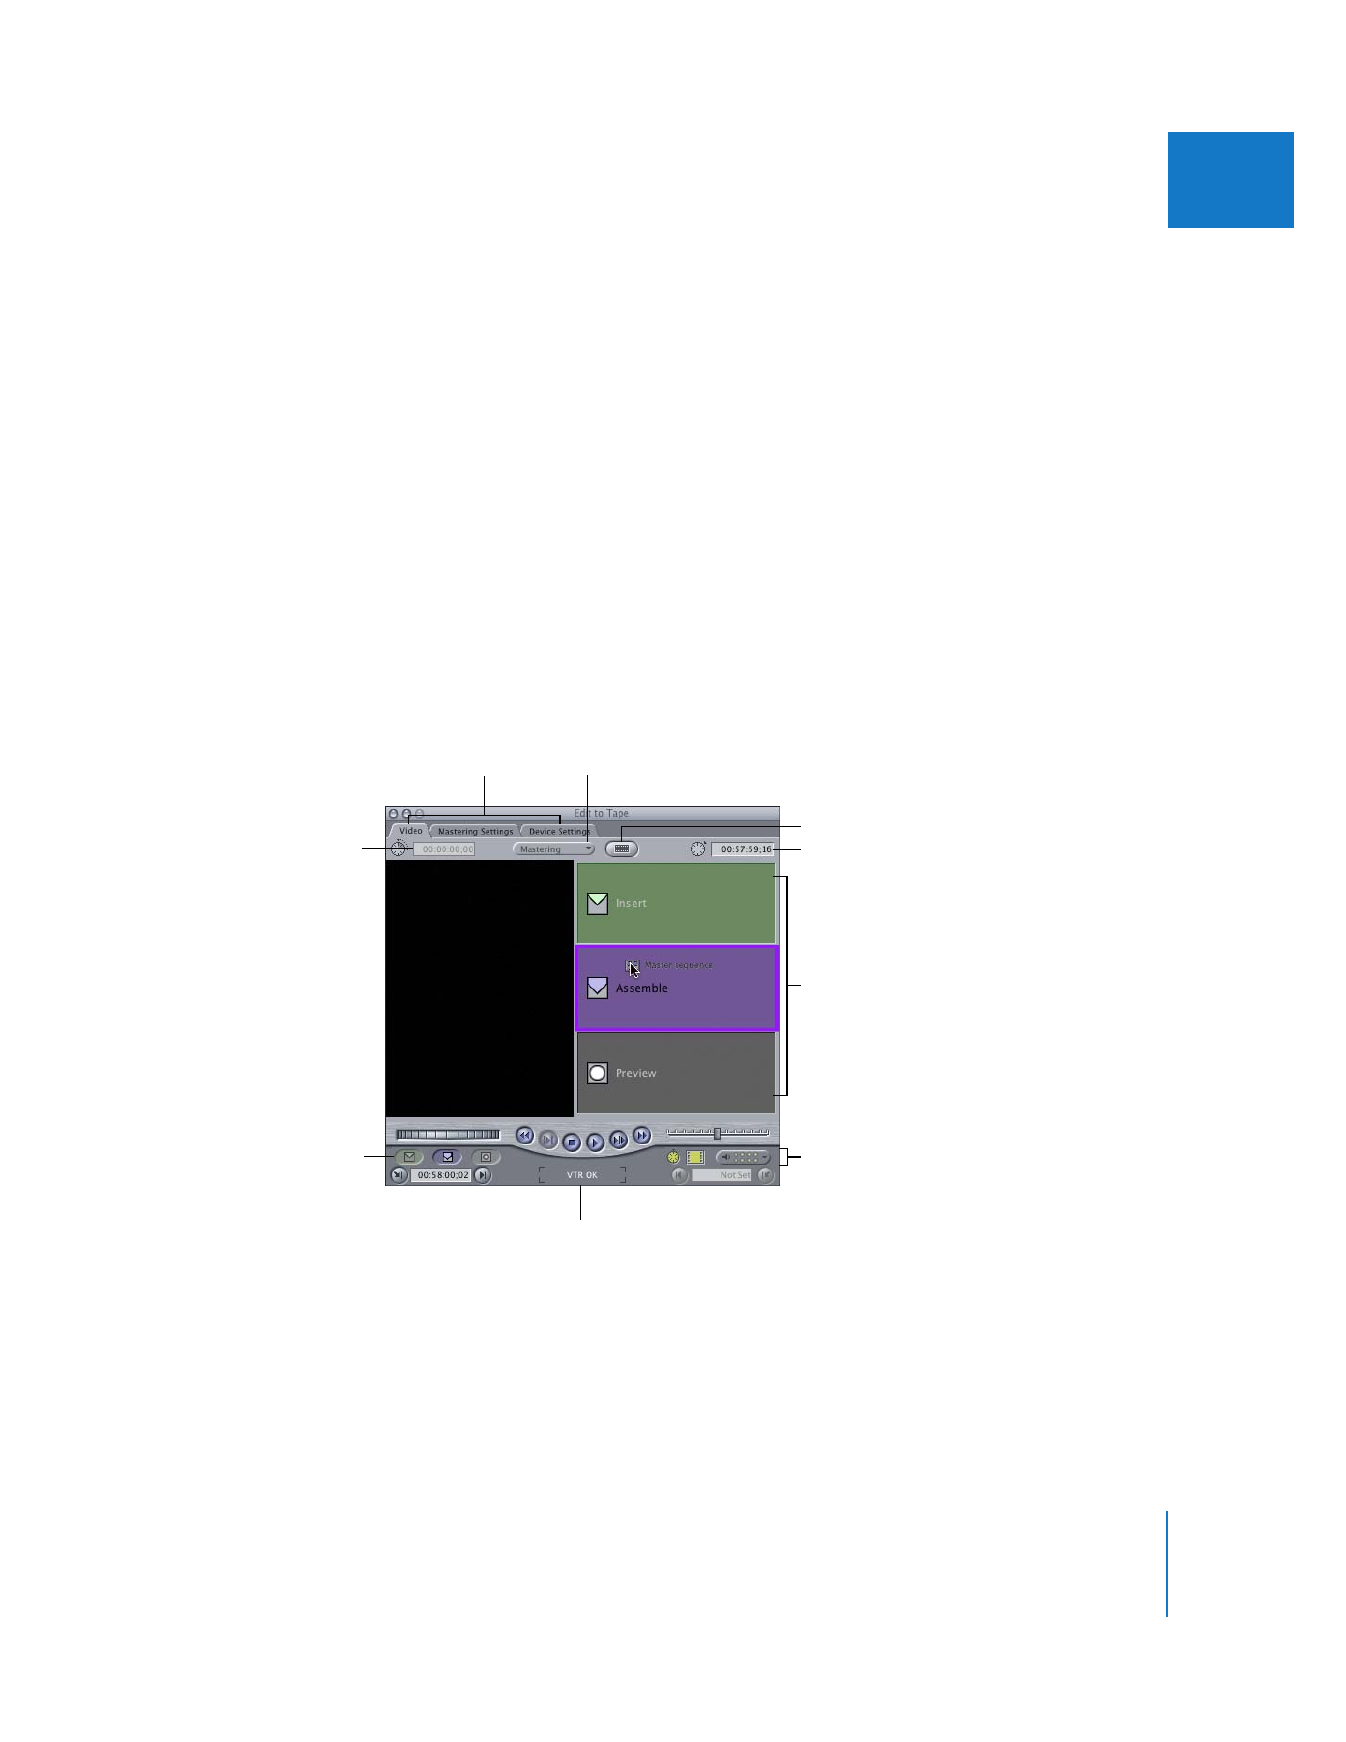
Video Tab
The Video tab allows you control and record onto the tape in your camcorder or deck.
You can cue the tape and set In and Out points using the transport controls. Edit
buttons and track selection controls allow you to determine exactly how your edit to
tape is performed.
Device status
Mode pop-up menu
Timecode
Duration field
Black and Code button
Edit Overlay
(with a dragged
clip shown)
Insert, assemble, and
preview buttons
Current Timecode field
Tabs
Destination track
controls (for insert edits)
202
Part III
Output
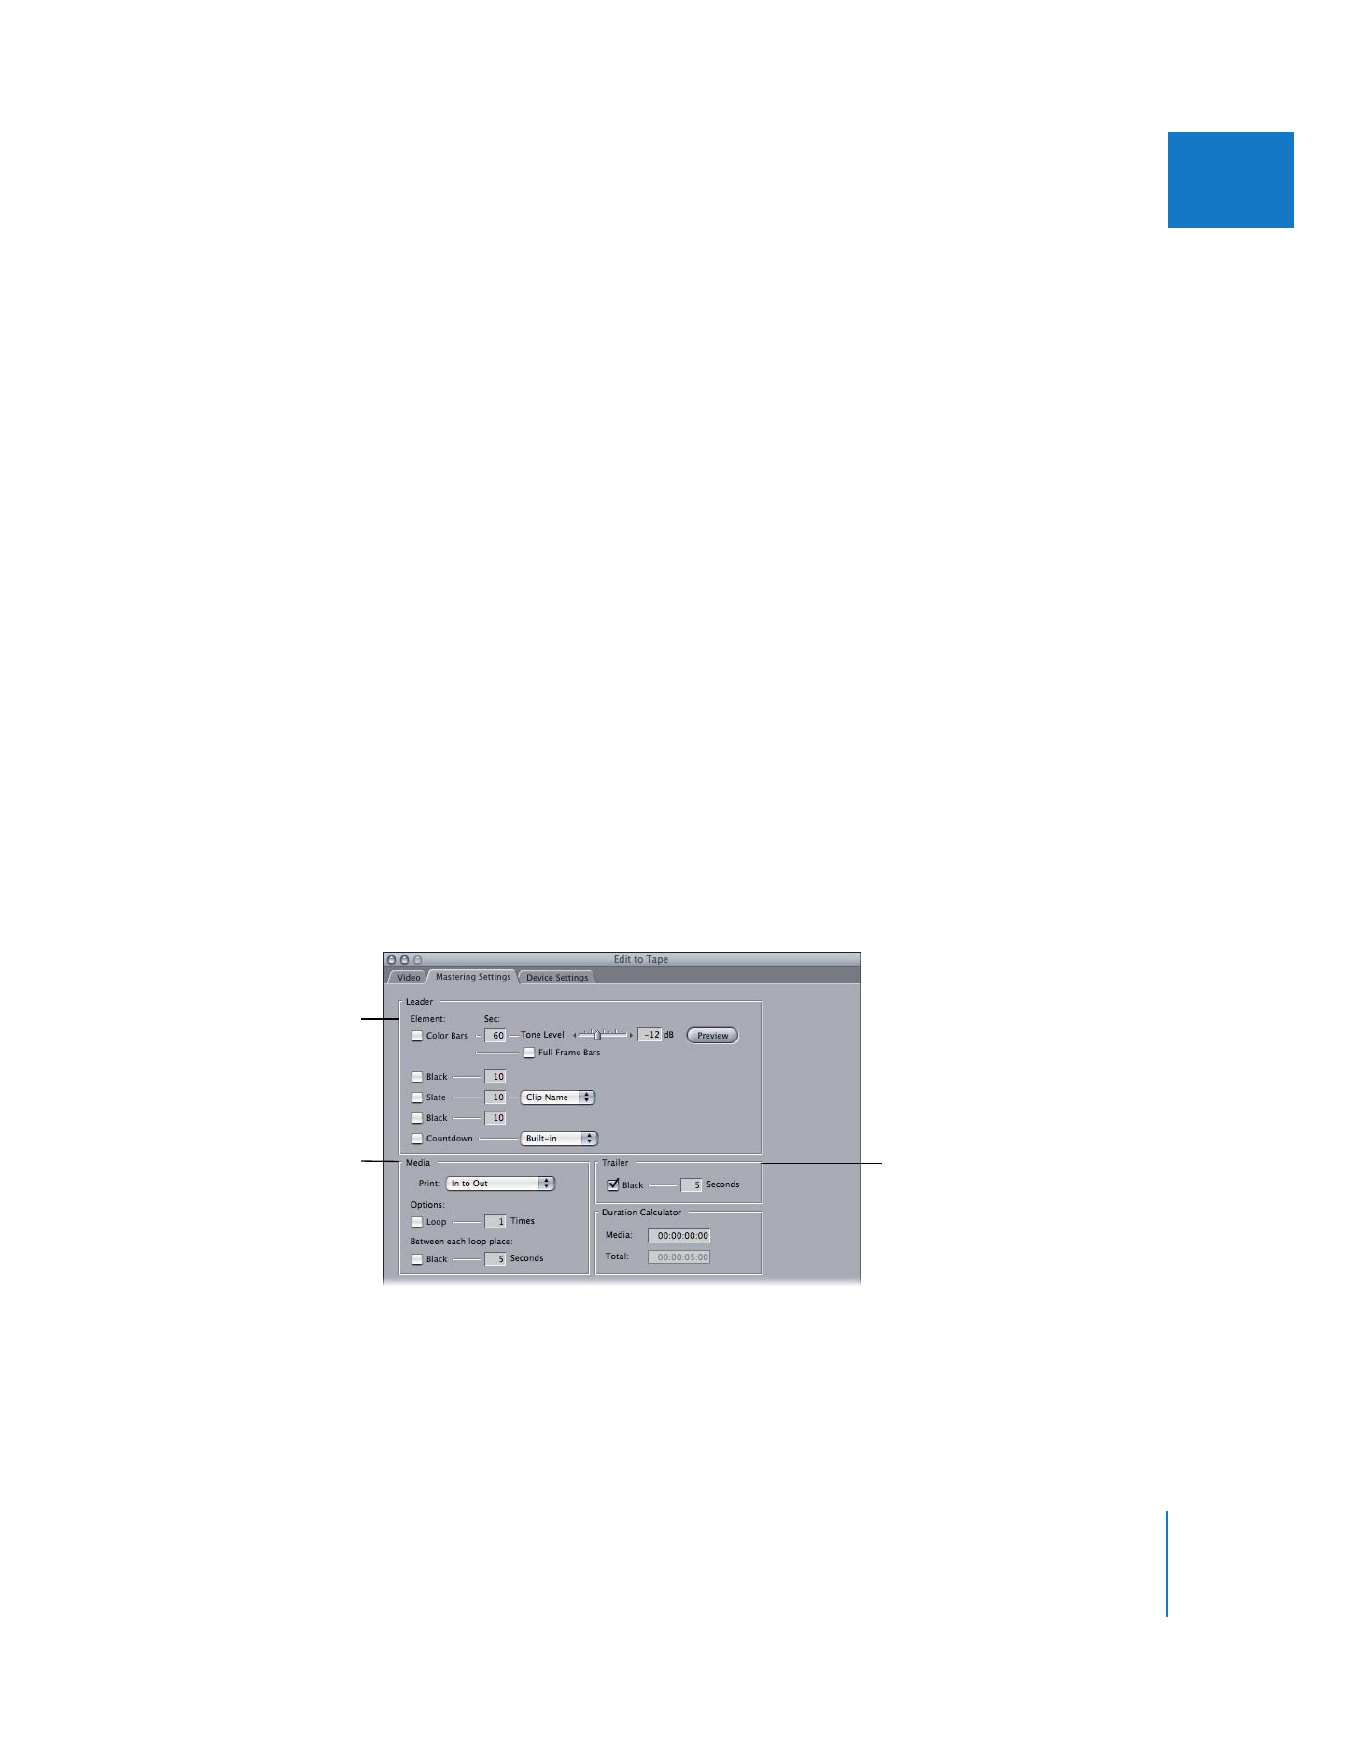
 Mode: Choose an option—Mastering or Editing.
 Mastering: This is the default mode. The mastering mode is useful if you want to
output an entire movie with leading elements such as color bars, slate, and
countdown. In mastering mode, you can only set an In point on the tape, because
the Out point is calculated based on the duration of the elements you choose in
the Mastering tab.
 Editing: In Editing mode, only the selected clip or sequence is recorded to tape.
You cannot add leader or trailer elements. You can use this mode when replacing
a shot that’s already on tape with frame accuracy, and you can also use three-point
editing between your clip or sequence and the tape. For example, you can set In
and Out points on the tape and only set an In point in your sequence.
 Black and Code: Automatically records a black signal on a videotape, with silent
audio and continuous control and timecode tracks, from the beginning to the end of
the videotape.
 Timecode Duration: Displays the duration between the In and Out points set on
the tape.
 Current Timecode: Displays the current timecode position of the tape. If you enter a
timecode, the tape will move to that position.
 Edit Overlay: Appears when you drag a clip or sequence to the Edit to Tape window.
You can choose to perform an assemble or insert edit, or preview an insert edit.
 Edit buttons: Click to do an insert or assemble edit or preview your insert edit.
 Device status: Shows the status of the connected video equipment.
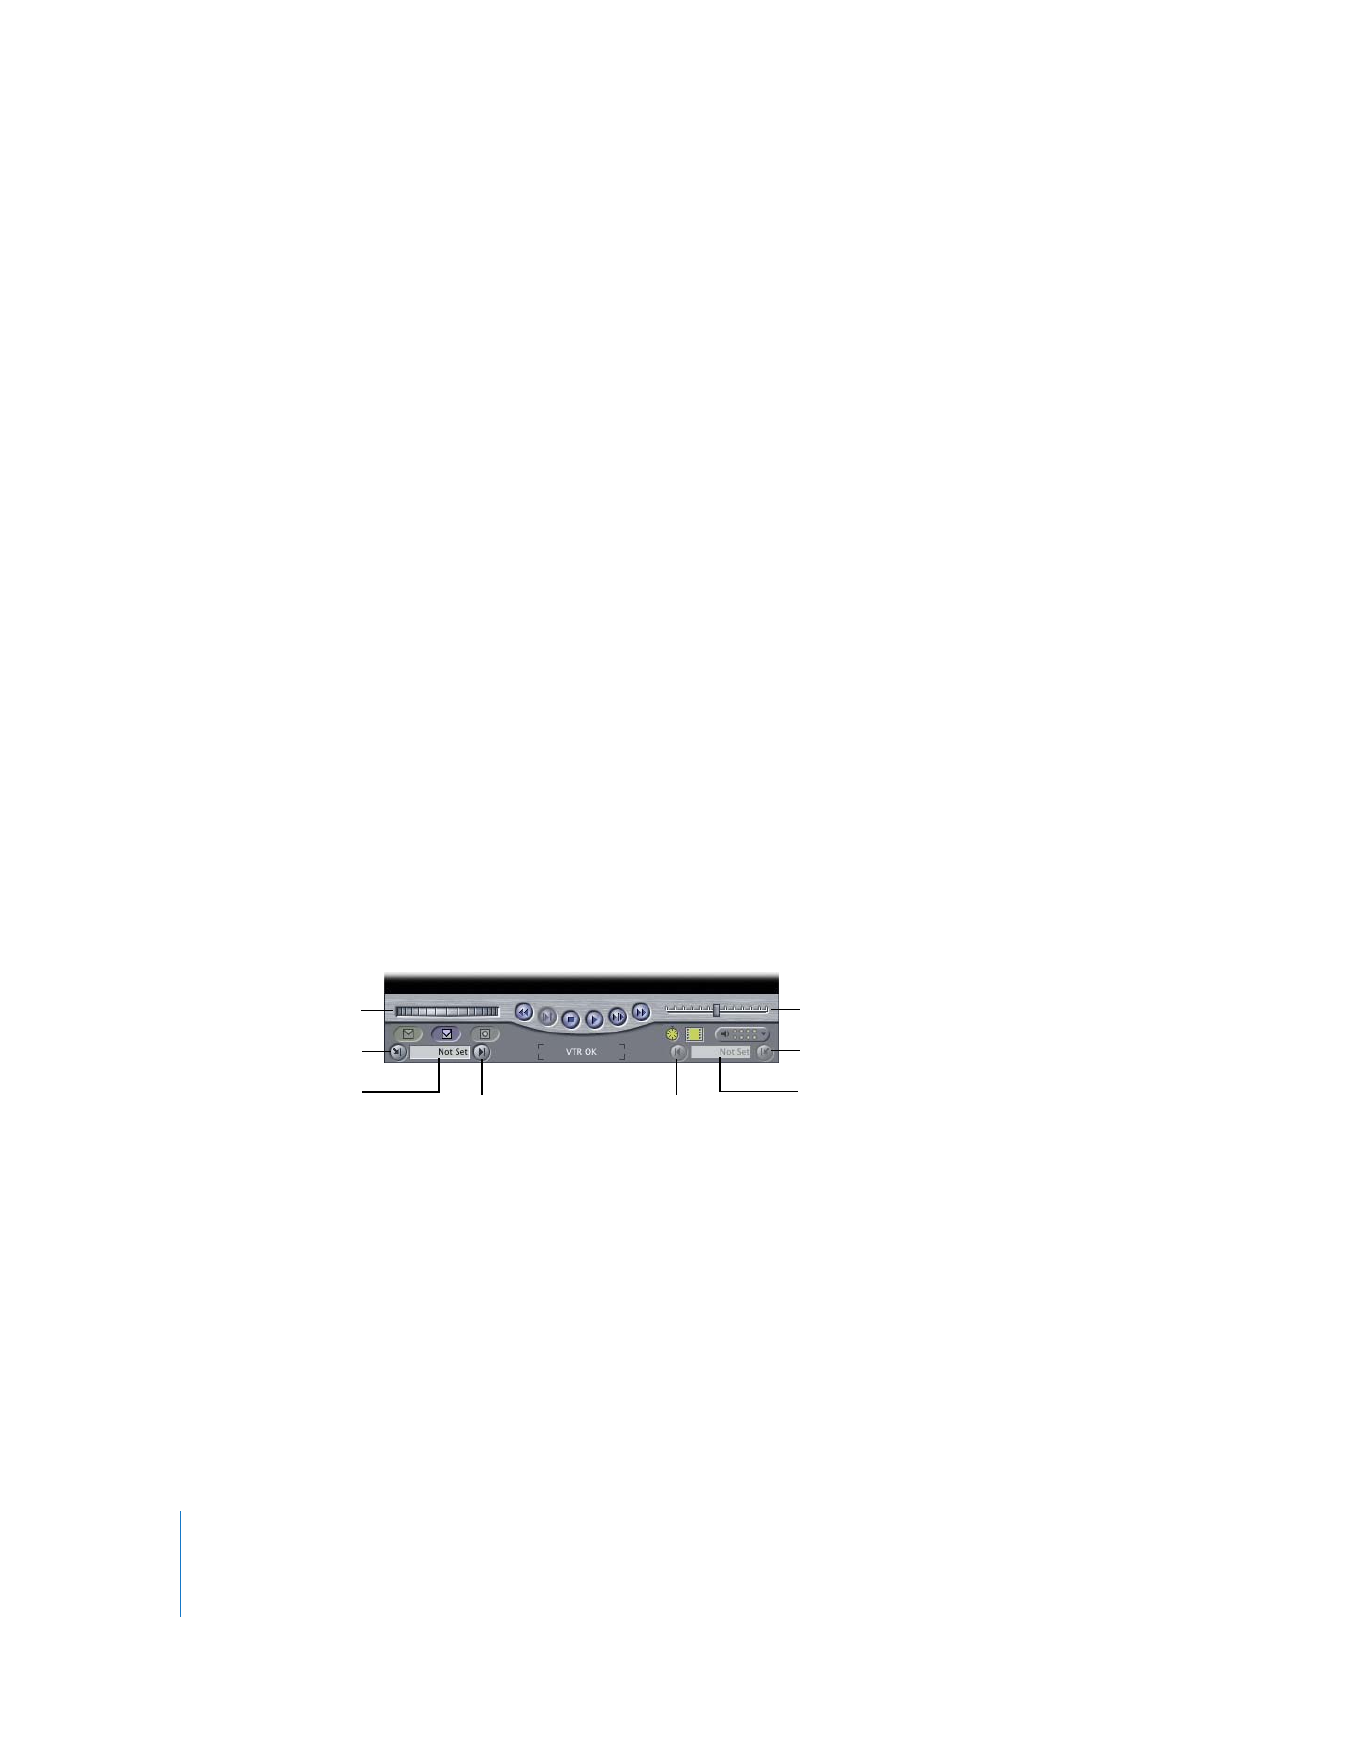
Navigation and Marking Controls
 Shuttle control: Drag the tab to the right to fast-forward and to the left to rewind the
tape. The speed depends on the distance of the tab from the center. When the tab is
green, playback speed is normal. Keyboard shortcuts are the J, K, and L keys.
 Jog control: Use this to move forward or backward a few frames at a time on the
tape. This is useful for visually locating a specific frame. You can also press the
Forward Arrow or Back Arrow.
Timecode for the Out point
Go to Out Point
Mark Out
Go to In Point
Timecode for the In point
Mark In
Shuttle control
Jog control
Chapter 14
Assemble and Insert Editing Using Edit to Tape
203
III
 Mark In: Click this button, or press I, to set the frame on your tape where recording
will start.
 Mark Out: Click this button, or press O, to set the frame on your tape where
recording will stop.
 Go to In Point: Click this button, or press Shift-I, to move the tape to the In point
you set.
 Go to Out Point: Click this button, or press Shift-O, to move the tape to the Out point
you set.
Destination Track Controls
These controls allow you to specify which tracks on tape are edited to when performing
an insert edit. In addition to video and timecode, up to 16 audio tracks can be output to
supported video and audio decks.
Note: When you perform an assemble edit, all tracks on your recording deck are
simultaneously record-enabled and the destination track controls are disabled.
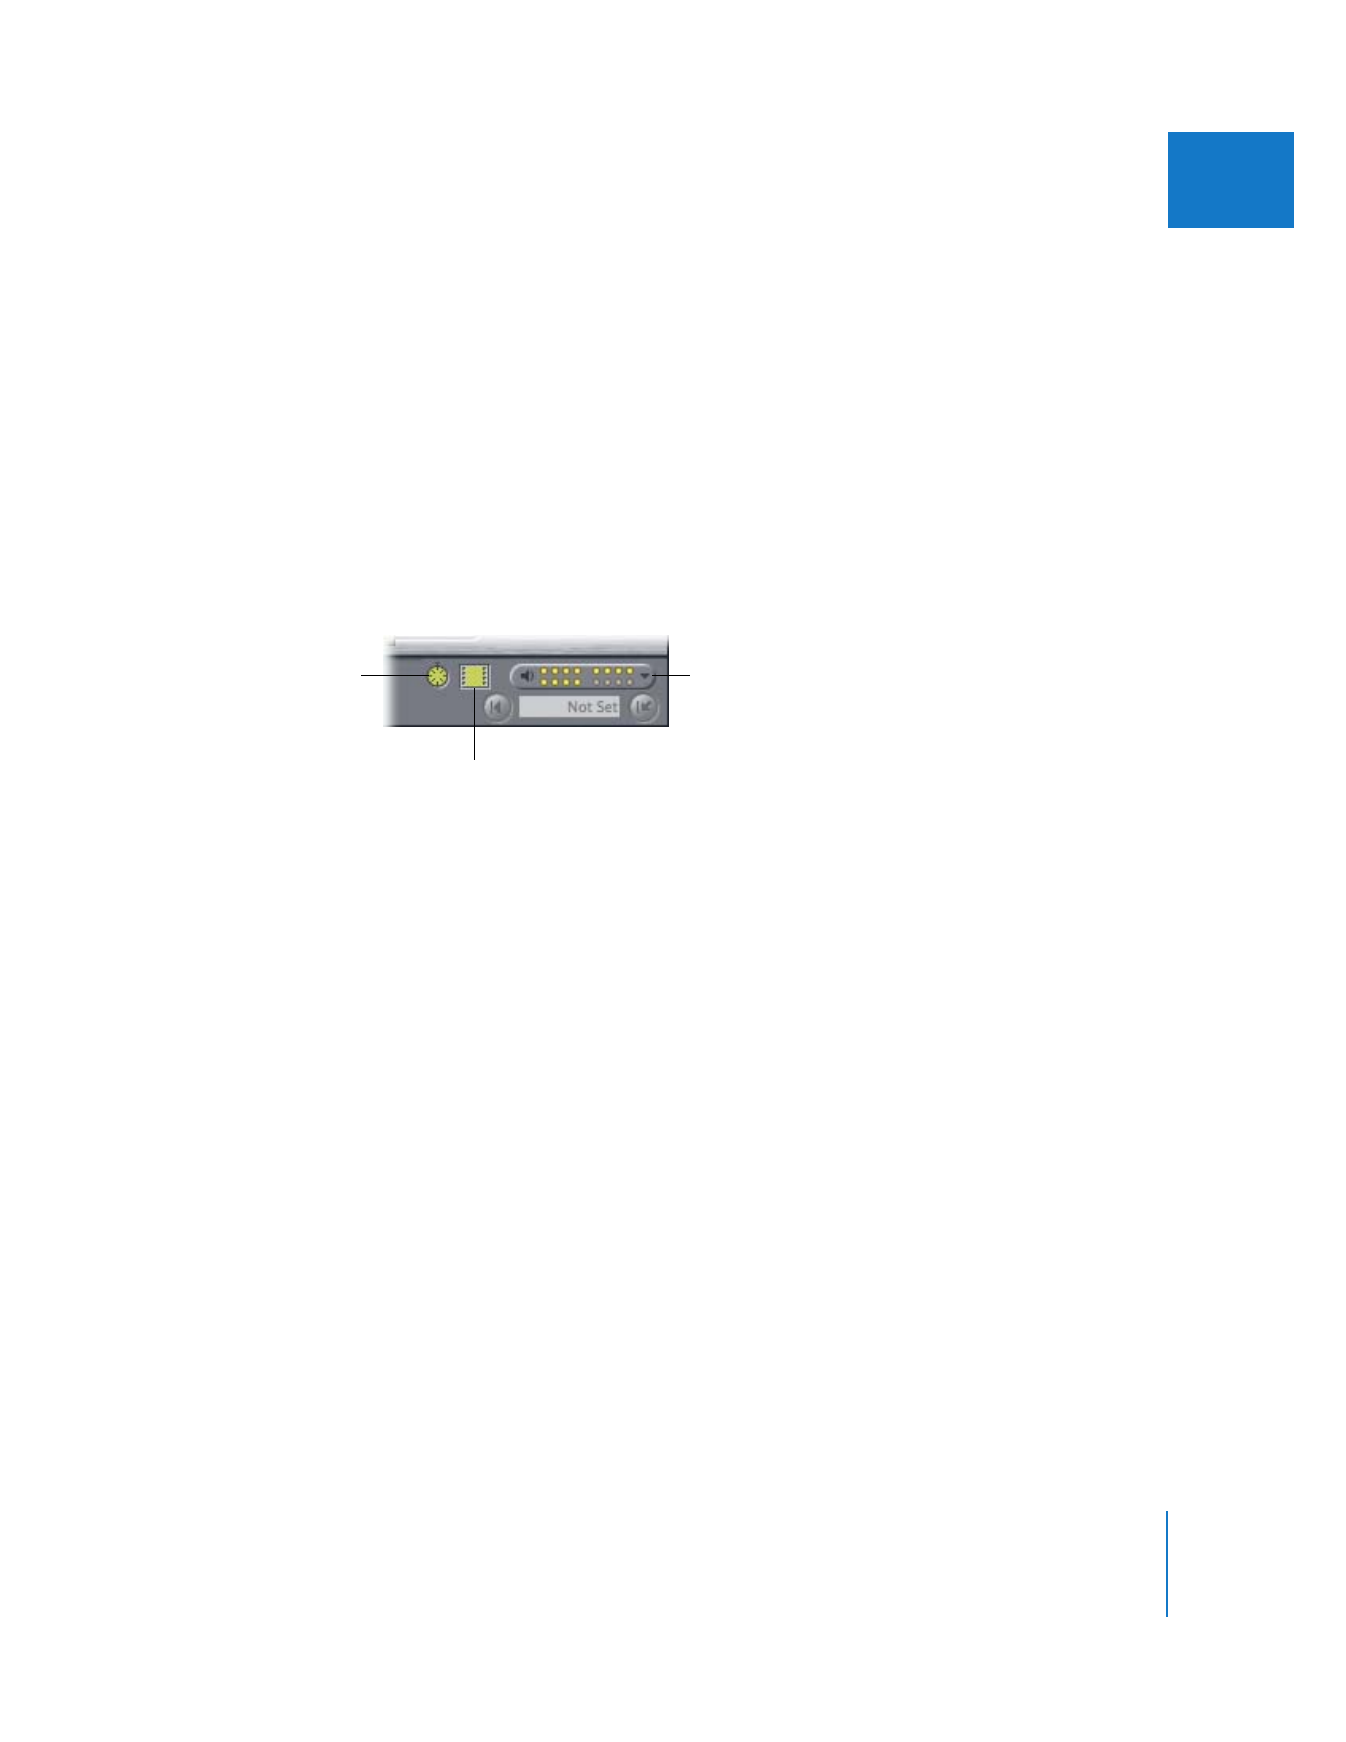
 Timecode Insert: When this control is selected, the timecode of the clip or sequence
to be output is edited to tape along with its audio and video. The timecode edited to
tape is taken from the section of the clip or sequence being output. Turn on this
option only if you want to overwrite the timecode already on the destination tape.
This feature works with devices that support serial device control protocols such as
RS-422, as well as some DVCPRO HD devices.
Important:
When insert editing video and audio into an existing program on tape,
you generally want to disable Timecode Insert in order to leave the existing
timecode unchanged.
 Video Insert: When this control is selected, the video track on tape is replaced by the
video output from your computer. Turning off this control prevents the video of your
clip or sequence from overwriting the video already on your destination tape.
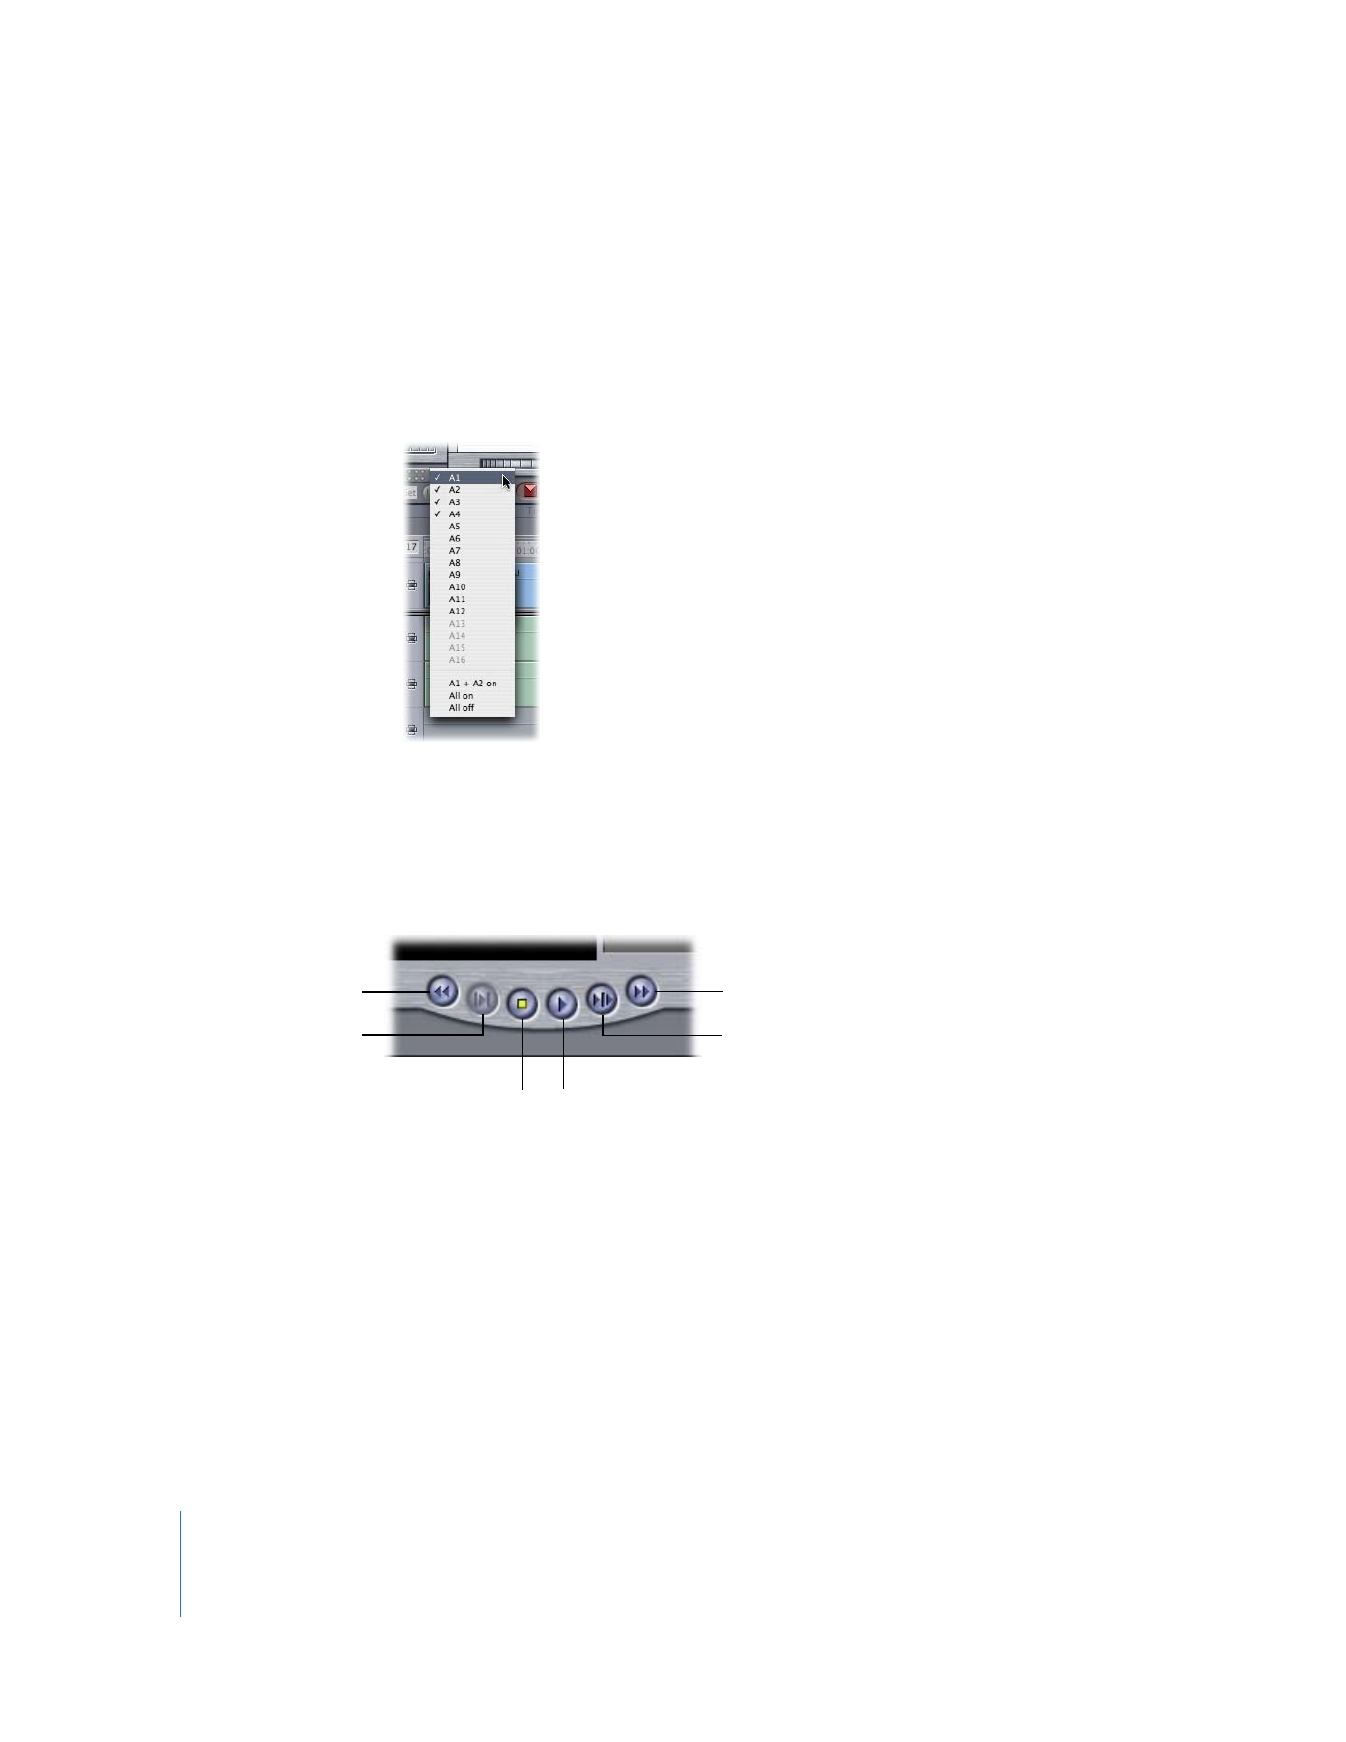
 Audio Insert: This pop-up menu allows you to individually record-enable audio tracks
on tape when insert editing. The number of audio tracks available in this pop-up
menu is determined by the Audio Mapping option in the currently selected device
control preset. Unavailable audio channels are dimmed. For more information about
Audio Mapping options, see “
Using the Edit to Tape Window
” on page 209.
Choose your audio tracks
from this pop-up menu.
Click here to enable or
disable timecode.
Click here to enable
or disable video.
204
Part III
Output
To record-enable an audio track, choose it from this pop-up menu and a
checkmark appears next to it. Choose it a second time to remove the checkmark
and disable the track.
Sixteen audio channel indicators in the Audio Insert pop-up menu indicate which
audio tracks are record-enabled on your VTR. The color of an audio channel indicator
indicates its state.
 Yellow: The audio track is record-enabled on the connected VTR.
 Gray: The audio track is record-disabled on the connected VTR.
Transport Controls
Transport controls let you navigate the videotape.
 Rewind: Click this button, or press J, to rewind the videotape.
 Play In to Out: Rewinds the tape to the current In point you set and then plays
forward from that point to the Out point you set. If there is no Out point, the tape
plays to the end.
 Stop: Click this button, or press K or the spacebar, to stop the videotape.
 Play: Click this button, or press L, to play the tape.
Play
Stop
Fast Forward
Rewind
Play Around Current
Play In to Out
Chapter 14
Assemble and Insert Editing Using Edit to Tape
205
III
 Play Around Current Frame: This is based on the preview pre-roll and preview post-
roll settings in the Editing tab of the User Preferences window. The tape plays from
the playhead position at the pre-roll setting and continues through the amount of
time specified by the post-roll setting.
 Fast Forward: Moves the videotape forward. You can also press the L key repeatedly
to go through a range of speeds.