
Performing an Insert Edit When Editing to Tape
An insert edit allows you to edit individual video or audio tracks to tape, setting
frame-accurate In and Out points. Insert editing requires tapes that already have a
prerecorded signal, such as blacked tapes. For details, see “
About Insert Editing to Tape
”
on page 199.
Important:
Make sure you’ve read and followed the instructions in Volume 1,
Chapter 11, “Connecting DV Video Equipment.”
Note: Some tape formats and VTRs, such as consumer mini-DV devices, do not
support insert editing. If your VTR or tape format is limited to assemble editing (such as
a DV deck or camcorder), then the insert editing controls in the Edit to Tape window
are dimmed.
To perform an insert edit:
1
Choose File > Edit to Tape.
In most layouts, the Edit to Tape window appears on top of the Canvas.
2
Choose Editing or Mastering mode from the pop-up menu in the top center of
the window.
For more information about the Editing and Mastering modes, see “
Video Tab
” on
page 201.
3
Select a clip or sequence in the Browser.
The preview option is
disabled if you are using
DV equipment.
Chapter 14
Assemble and Insert Editing Using Edit to Tape
213
III
4
If you haven’t already done so, set In and Out points for your clip or sequence in the
Viewer, if you don’t want to output the entire clip or sequence.
Use three-point editing to set your In and Out points. For more information on
three-point editing, see Volume II, Chapter 10, “Three-Point Editing.”
5
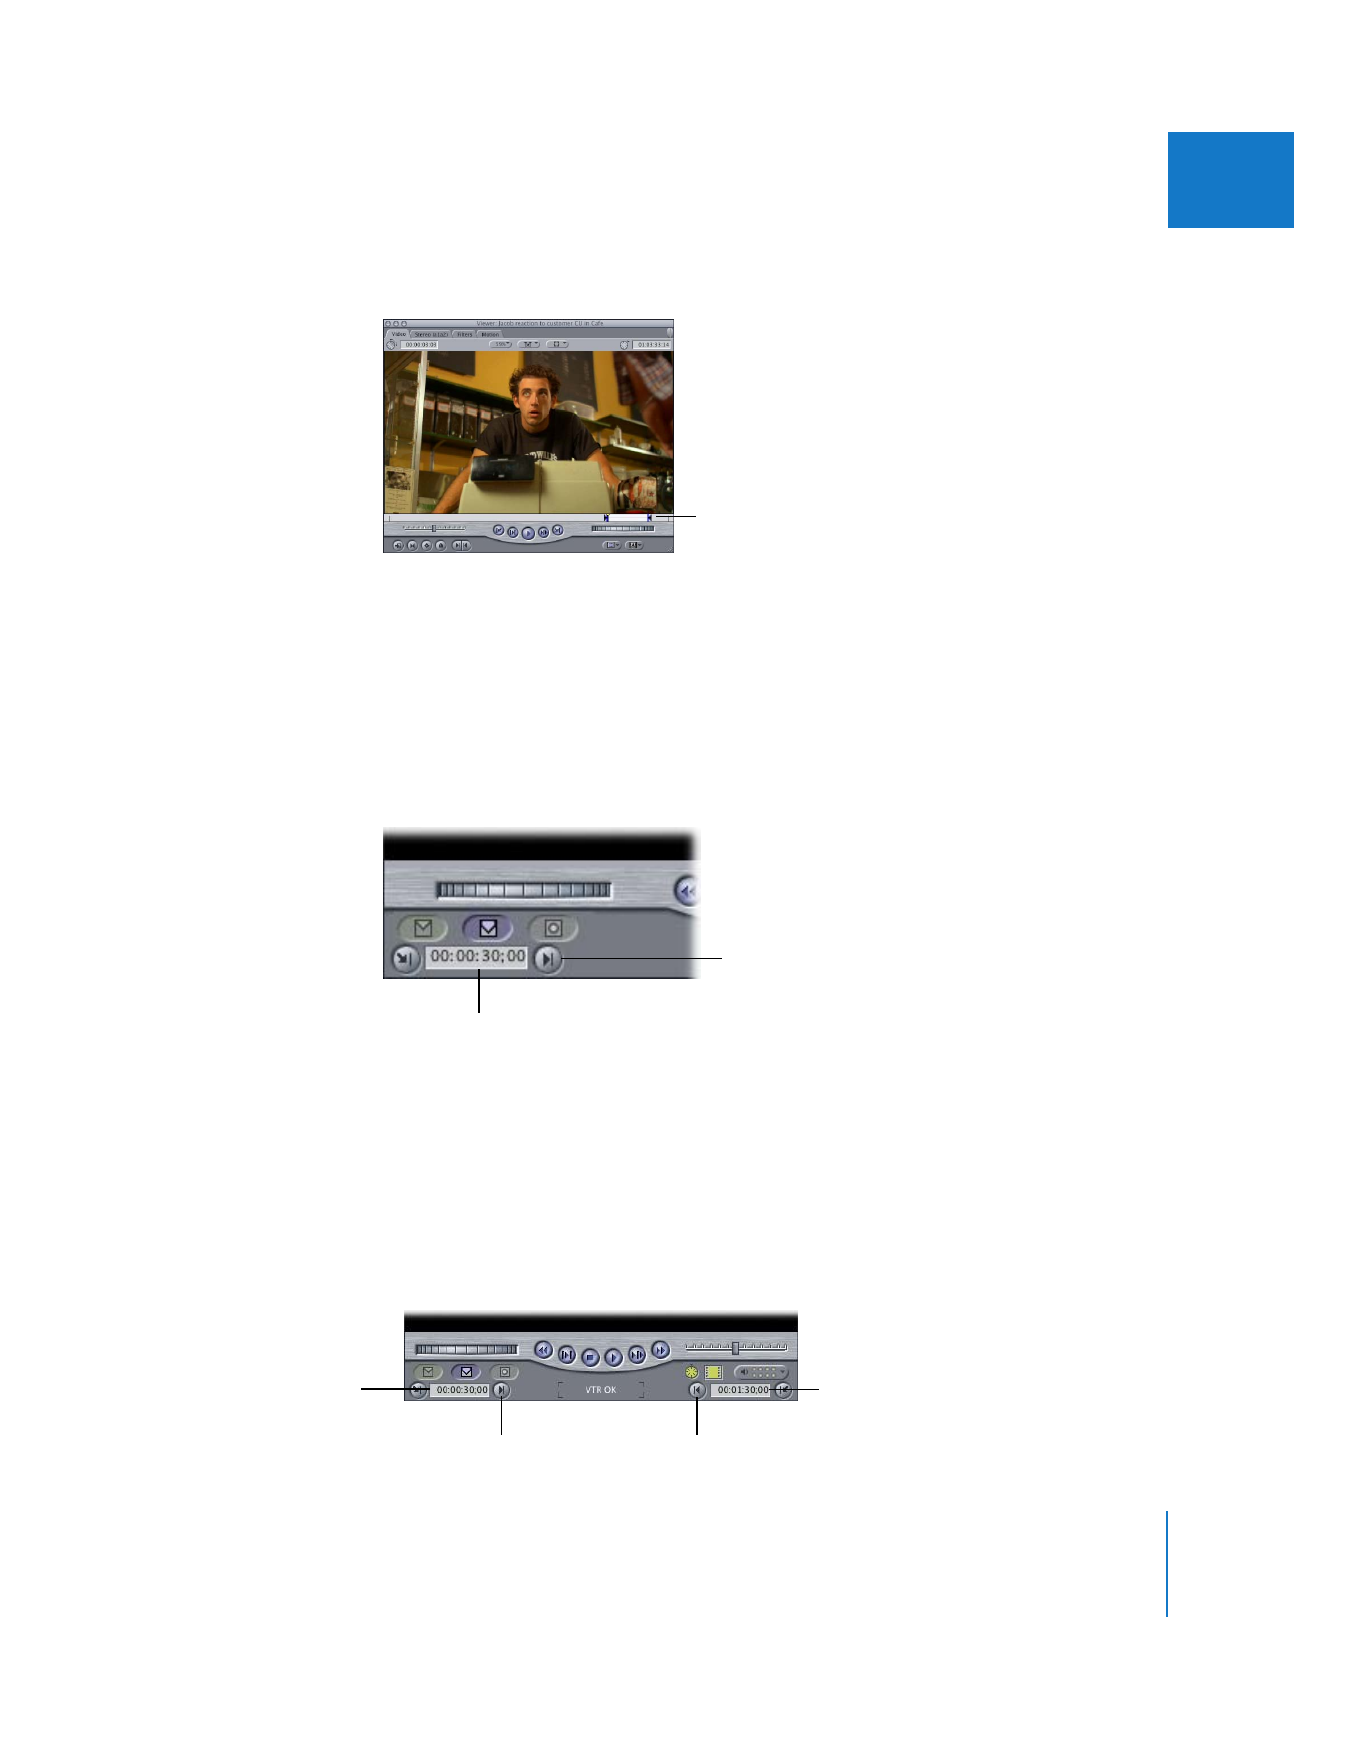
Set In and Out points on your tape where you want your clip or sequence recorded.
If you’re in Mastering mode: Use the transport controls in the Edit to Tape window to
cue the tape where you want to start your initial edit. Then press I or click the Mark In
button to set the In point. (You don’t set an Out point in this mode, because you may
include trailer elements that extend the edit duration.)
If you’re in Editing mode: Use the transport controls in the Edit to Tape window to cue
the tape and set an In point, an Out point, or both, depending on the type of
three-point edit you’re doing.
 To set an In point: Cue the tape where you want to start your initial edit, or type a
value. Then press I or click the Mark In button.
 To set an Out point: Cue the tape where you want your clip or sequence to end, or
type a value. Then press O or click the Mark Out button.
Set In and Out points
for the part you want
to record.
Mark In button
Timecode for the
In point on the tape
Mark Out button
Timecode for the
In point on the tape
Mark In button
Timecode for the
Out point on the tape
214
Part III
Output
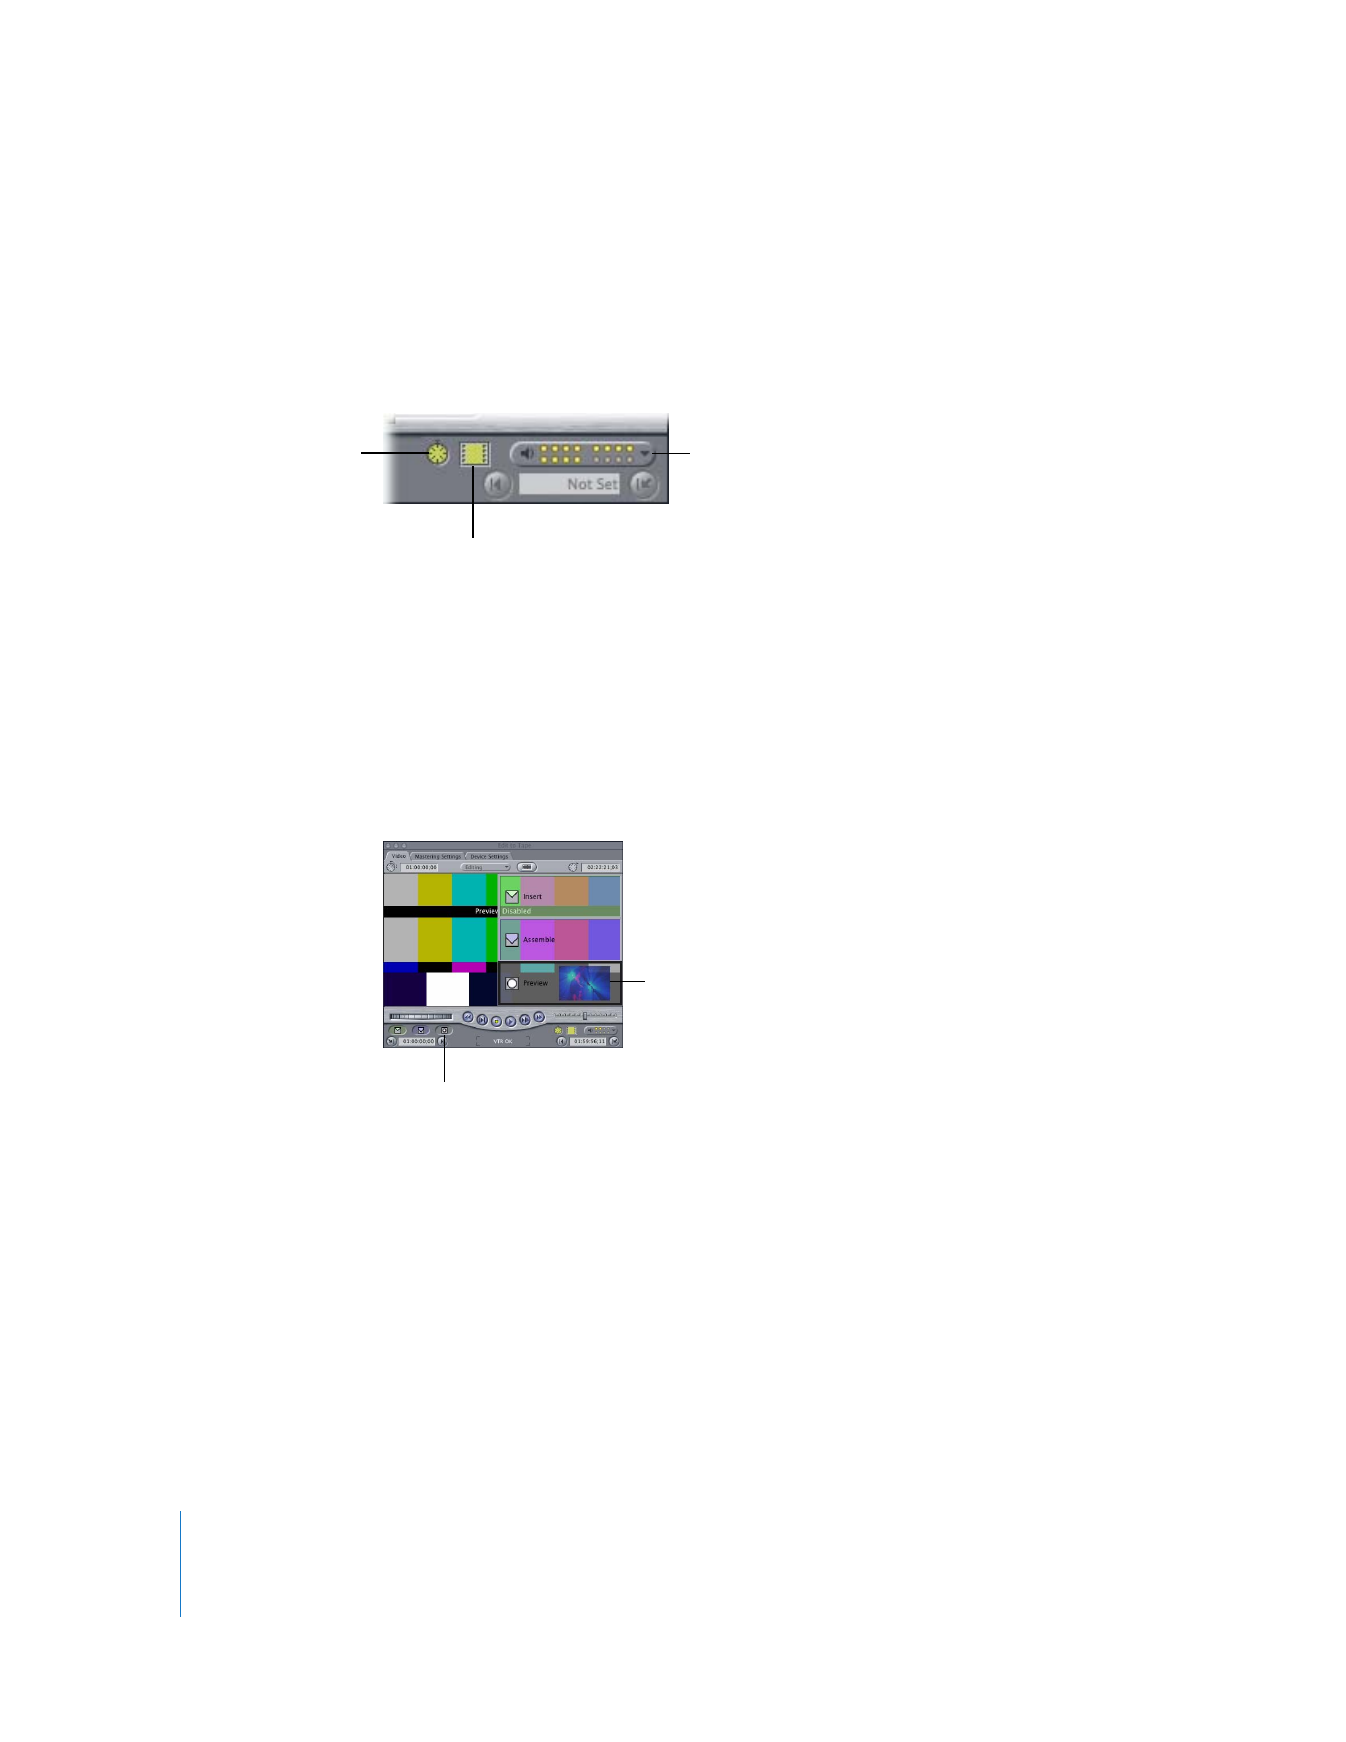
6
Select the destination video and audio tracks to be edited to in the Edit to
Tape window.
When performing an insert edit, you can selectively record-enable the video, audio,
and timecode tracks on tape. Destination tracks that are disabled in the Edit to Tape
window are not overwritten on the destination tape.
7
If you are including leader elements using Mastering mode, click the Mastering
Settings tab, then select the elements you want to include before and after your
sequence or clip.
For an explanation of the leader and trailer options, see “
Adding Standard Leader and
Trailer Elements
” on page 208.
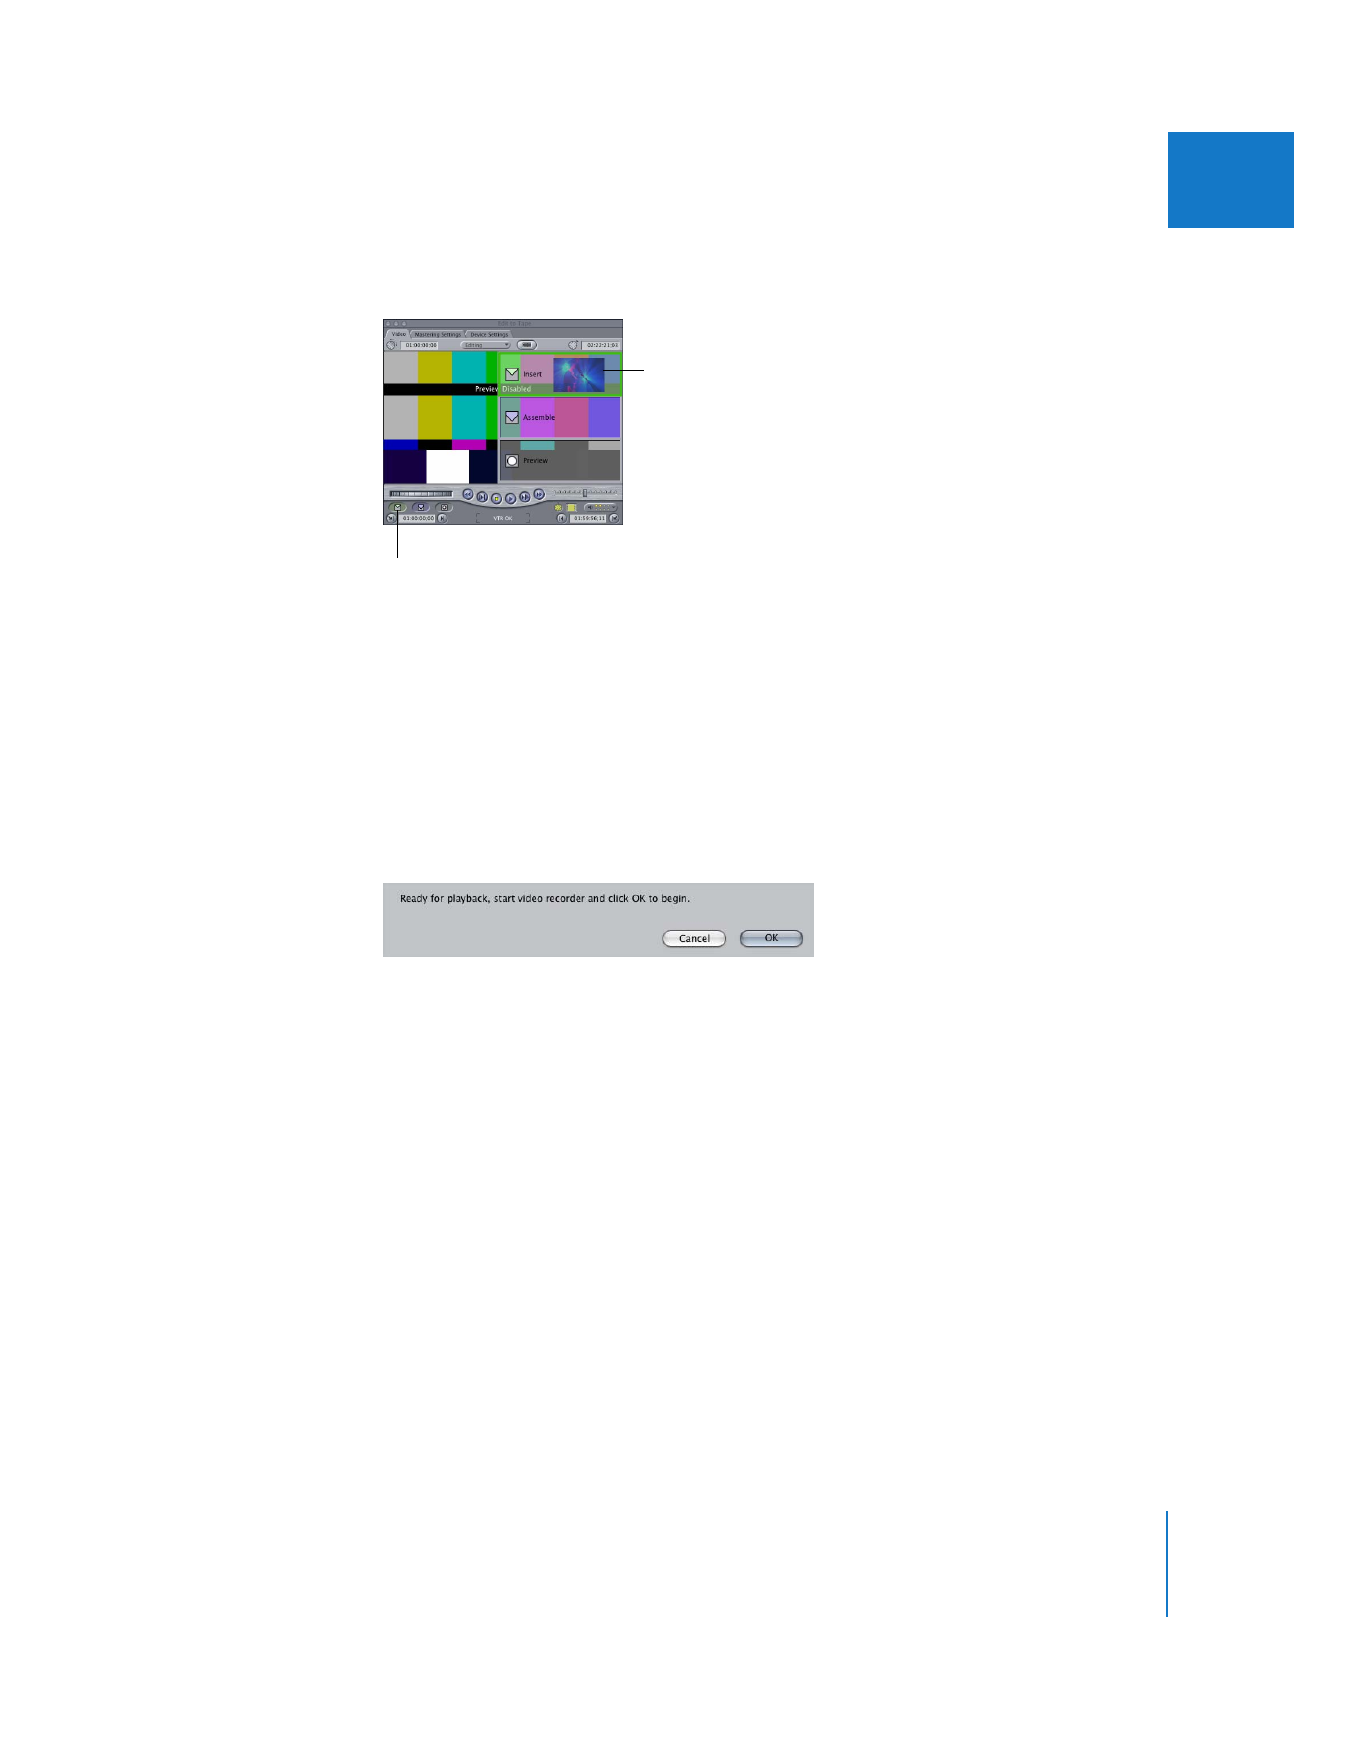
8
To preview how your edit will appear on tape, drag your clip or sequence to the Preview
section of the Edit Overlay in the Edit to Tape window, or click the Preview Edit button.
Previewing lets you see how your insert edit will appear on tape before you actually
record it. This is especially useful for seeing how an edit in the middle of existing
footage on tape will appear.
To cancel the preview, press Esc.
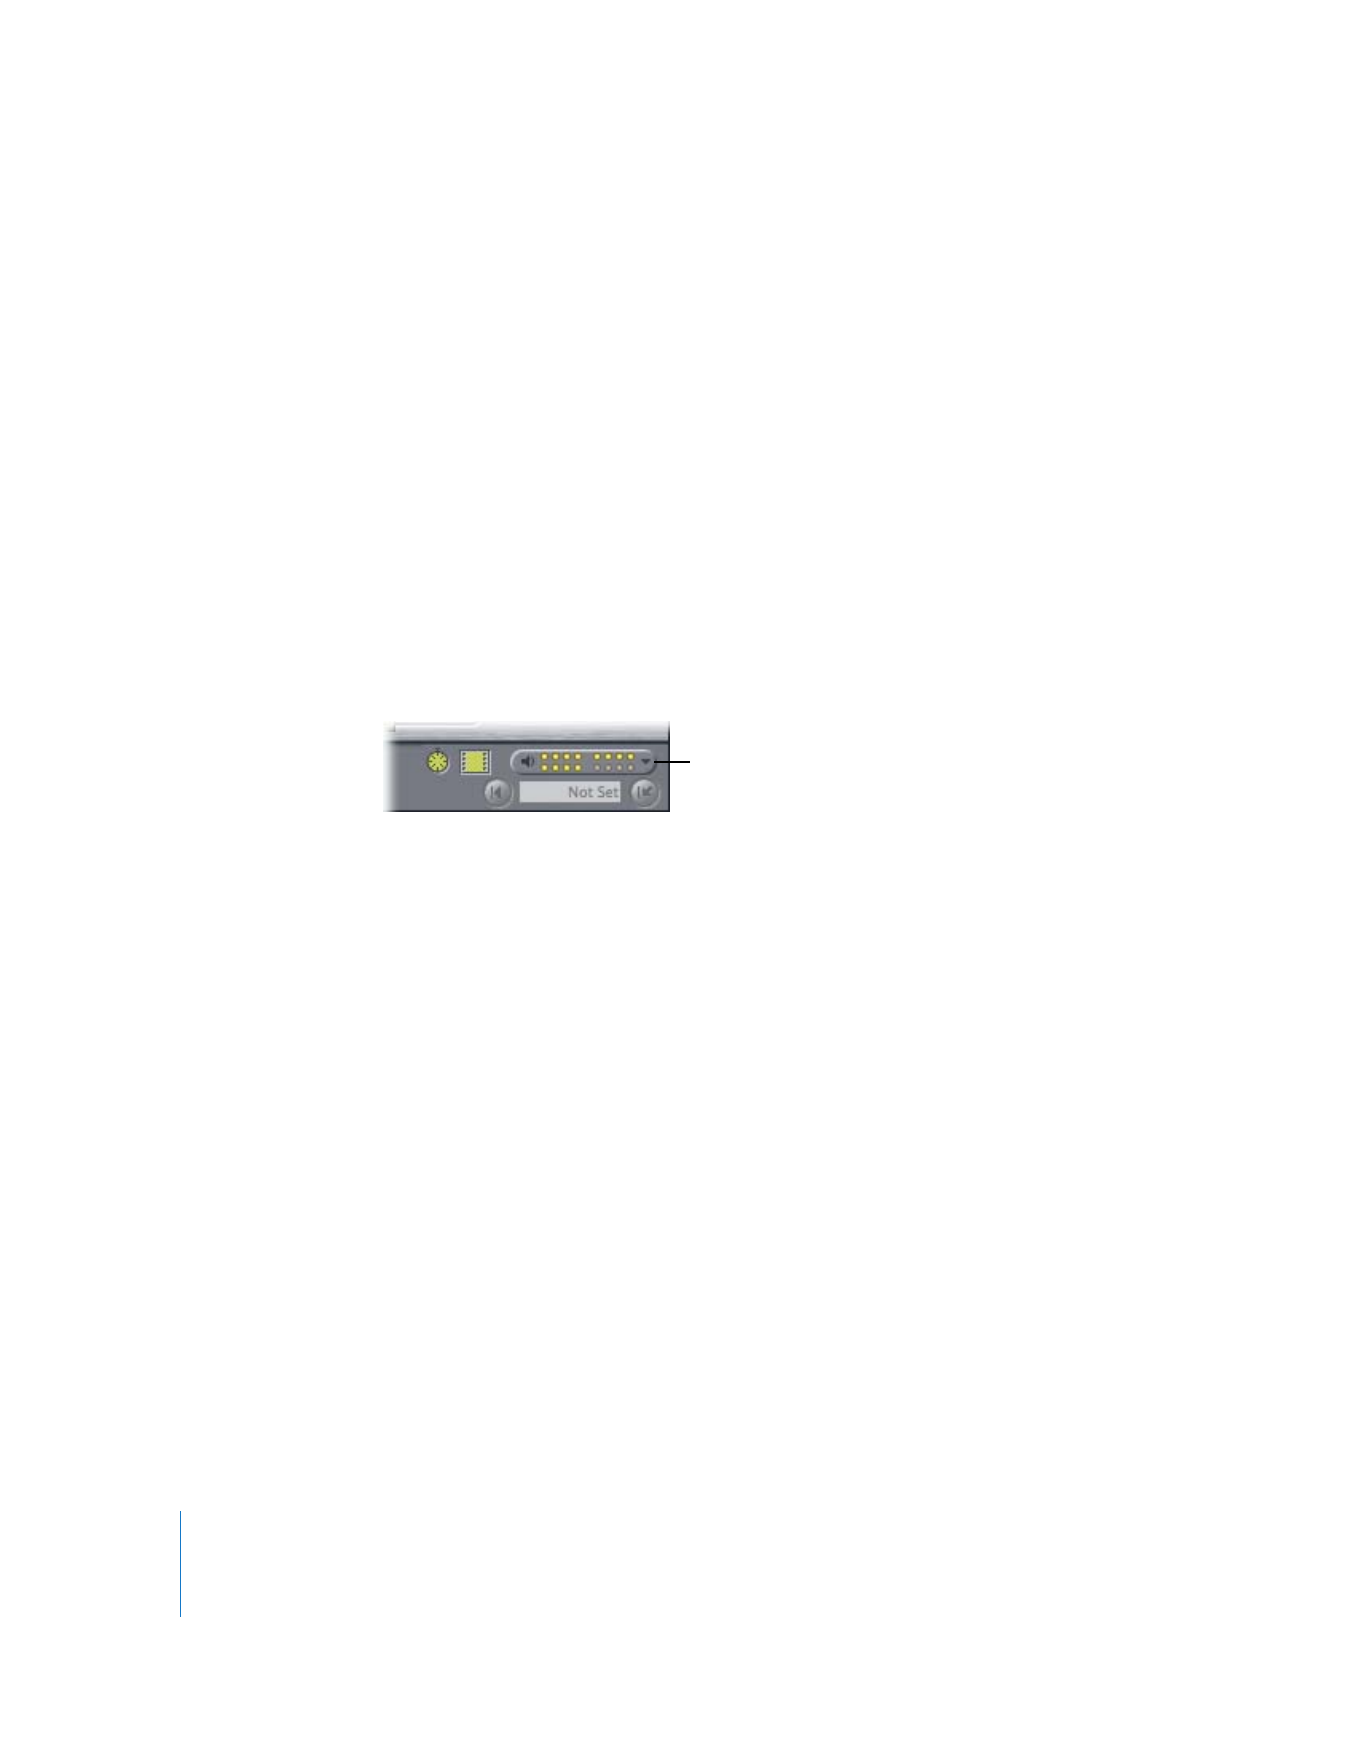
Choose your audio tracks
from this pop-up menu.
Click here to enable or
disable timecode.
Click here to enable
or disable video.
Or click the Preview
Edit button.
Drag the clip or sequence
here to preview your
insert edit.
Chapter 14
Assemble and Insert Editing Using Edit to Tape
215
III
9
To edit your sequence or clip to tape, drag it from the Browser or Viewer to the Insert
section of the Edit Overlay in the Edit to Tape window or click the Insert Edit button.
Transitions and effects that require rendering, along with any leader and trailer
elements, are rendered automatically prior to output. A dialog shows you the rendering
progress of your sequence or clip. You can also choose to output unrendered real-time
effects at a lower quality, saving time by avoiding rendering. Options for choosing the
quality of rendered effects can be set in the Render Control tab of the Sequence
Settings, and in the Real-Time (RT) pop-up menu in the Timeline. For more information
on setting these options, see “
Render Control Tab
” on page 366.
10
In the dialog that appears, click OK to start recording.
The videotape cues to the pre-roll point before the In point, plays until the In point
is reached, and then begins recording. To cancel an edit in progress, press Esc or
click Cancel.
Drag the clip or sequence
here to do an insert edit.
Or click the Insert
Edit button.
216
Part III
Output