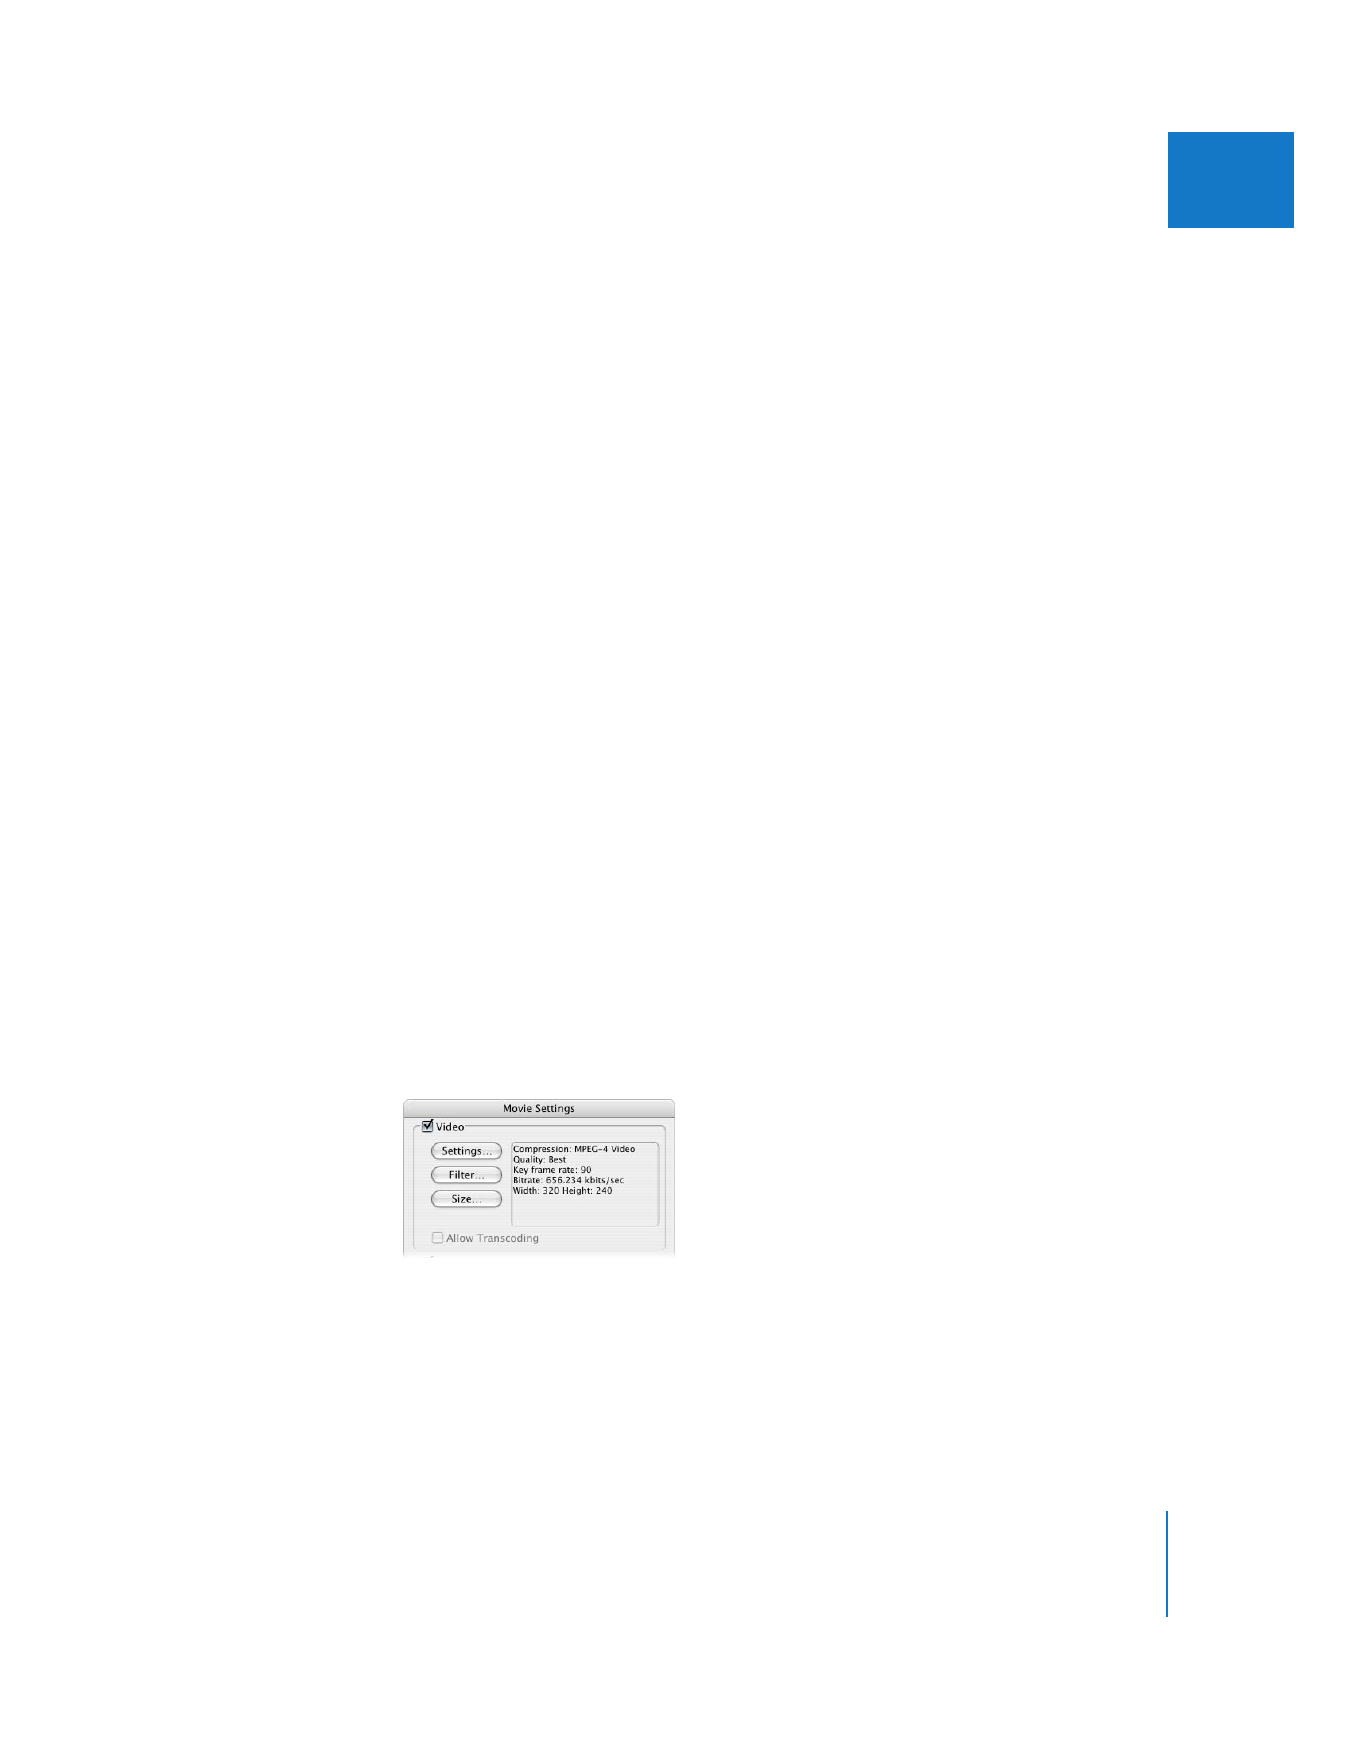
QuickTime Movie Video Settings
You can choose the following settings for the video track of your exported
QuickTime movie.
 Settings: Click this to adjust the compression used to export your video track.
 Filter: Click this to add and adjust additional video filters.
 Size: Click here to set a size for the movie.
250
Part III
Output
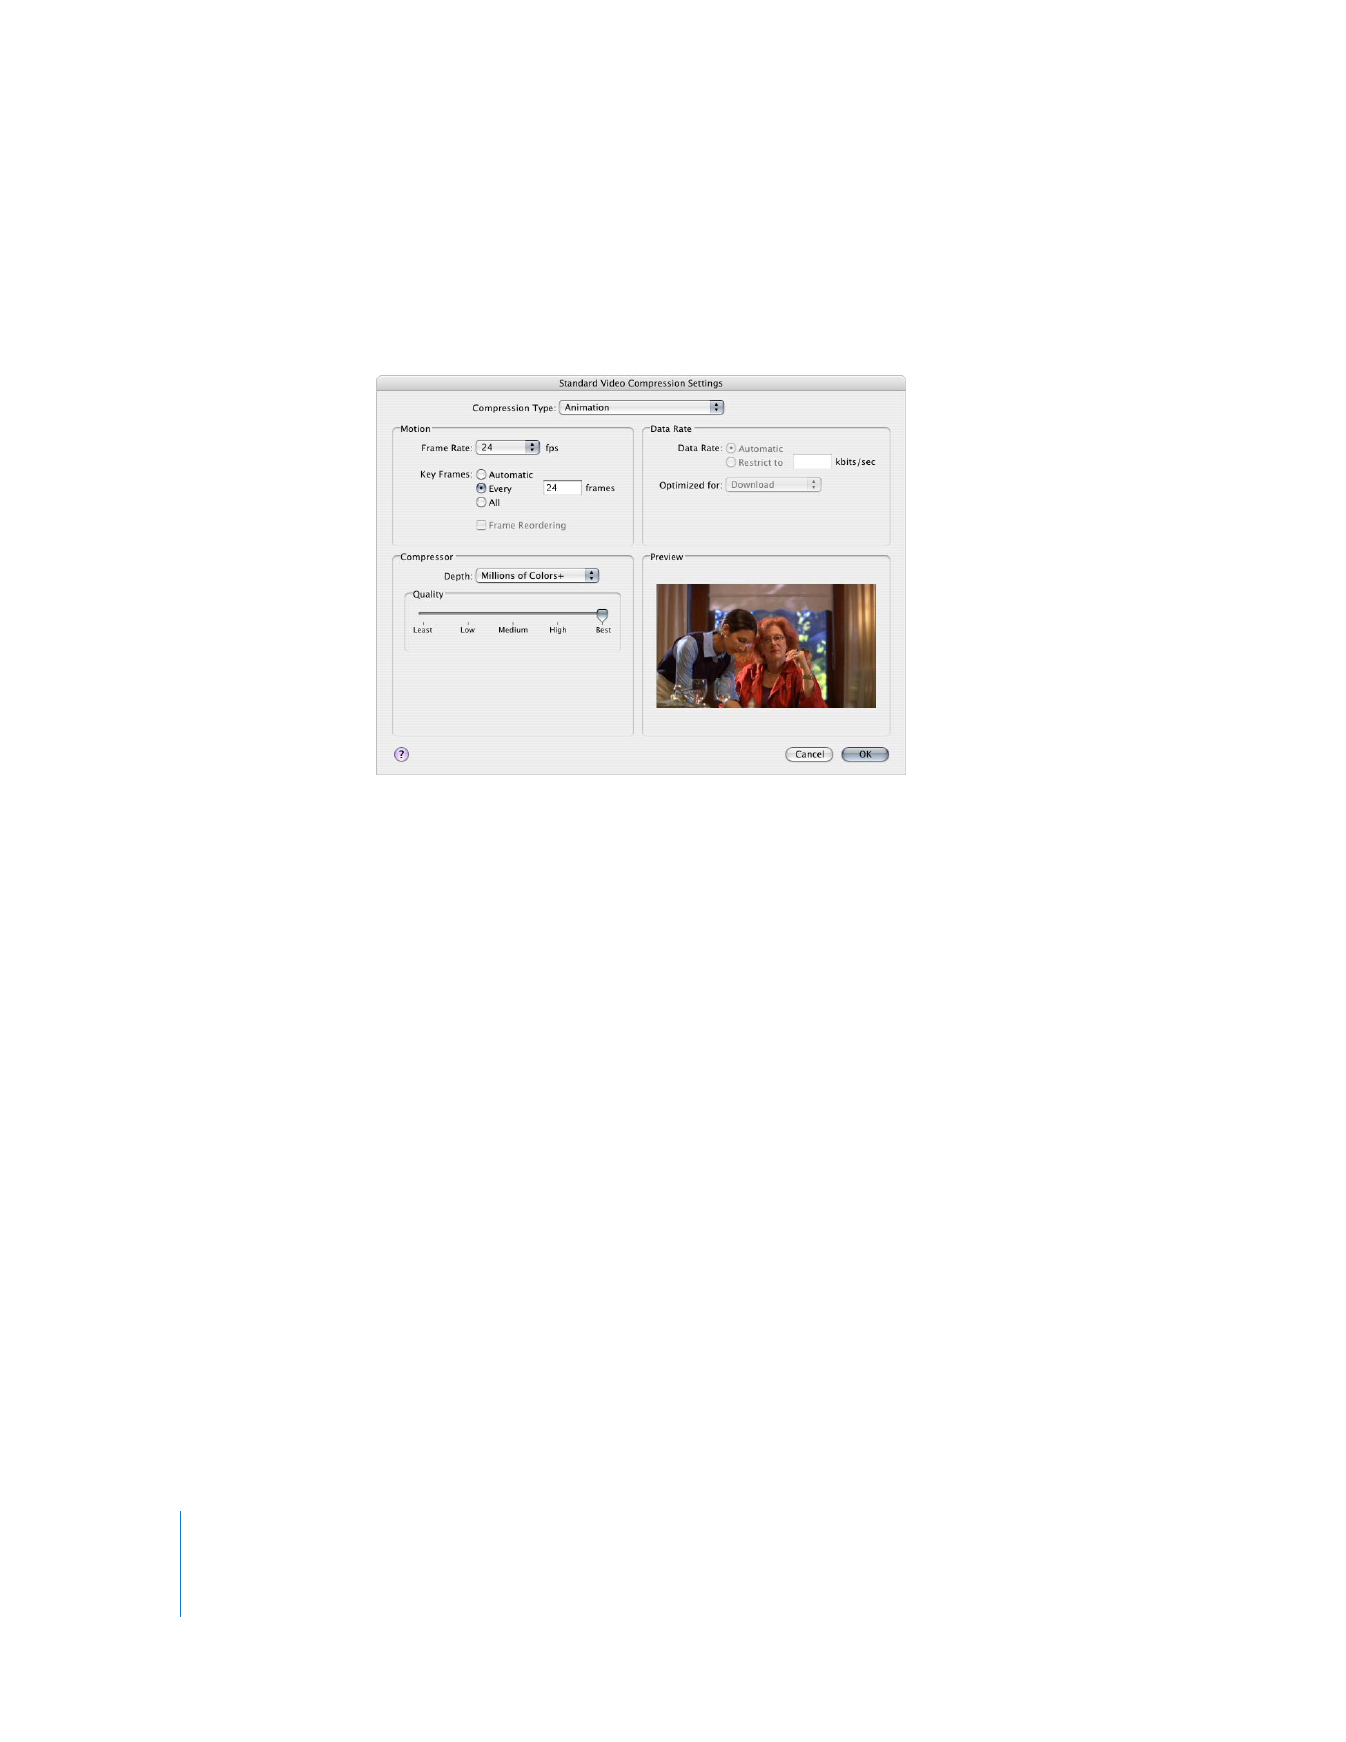
Standard Video Compression Settings
The Standard Video Compression Settings dialog appears when you click Settings in the
Video area of the Movie Settings dialog. Depending on the codec you choose from the
Compression Type pop-up menu, various options may be available, as explained below.
Compression Type
Select a codec from this pop-up menu to compress the video. All the standard QuickTime,
Final Cut Pro, and third-party video codecs installed on your system are available.
Motion Area
 Frame Rate: Define the frame rate of your exported movie. You should always match
the frame rate of the clip or sequence you are exporting. If you want to convert your
exported clip or sequence to a different frame rate while minimizing temporal artifacts,
try using Compressor instead of the Export Using QuickTime Conversion command.
Chapter 18
Exporting Using QuickTime Conversion
251
III
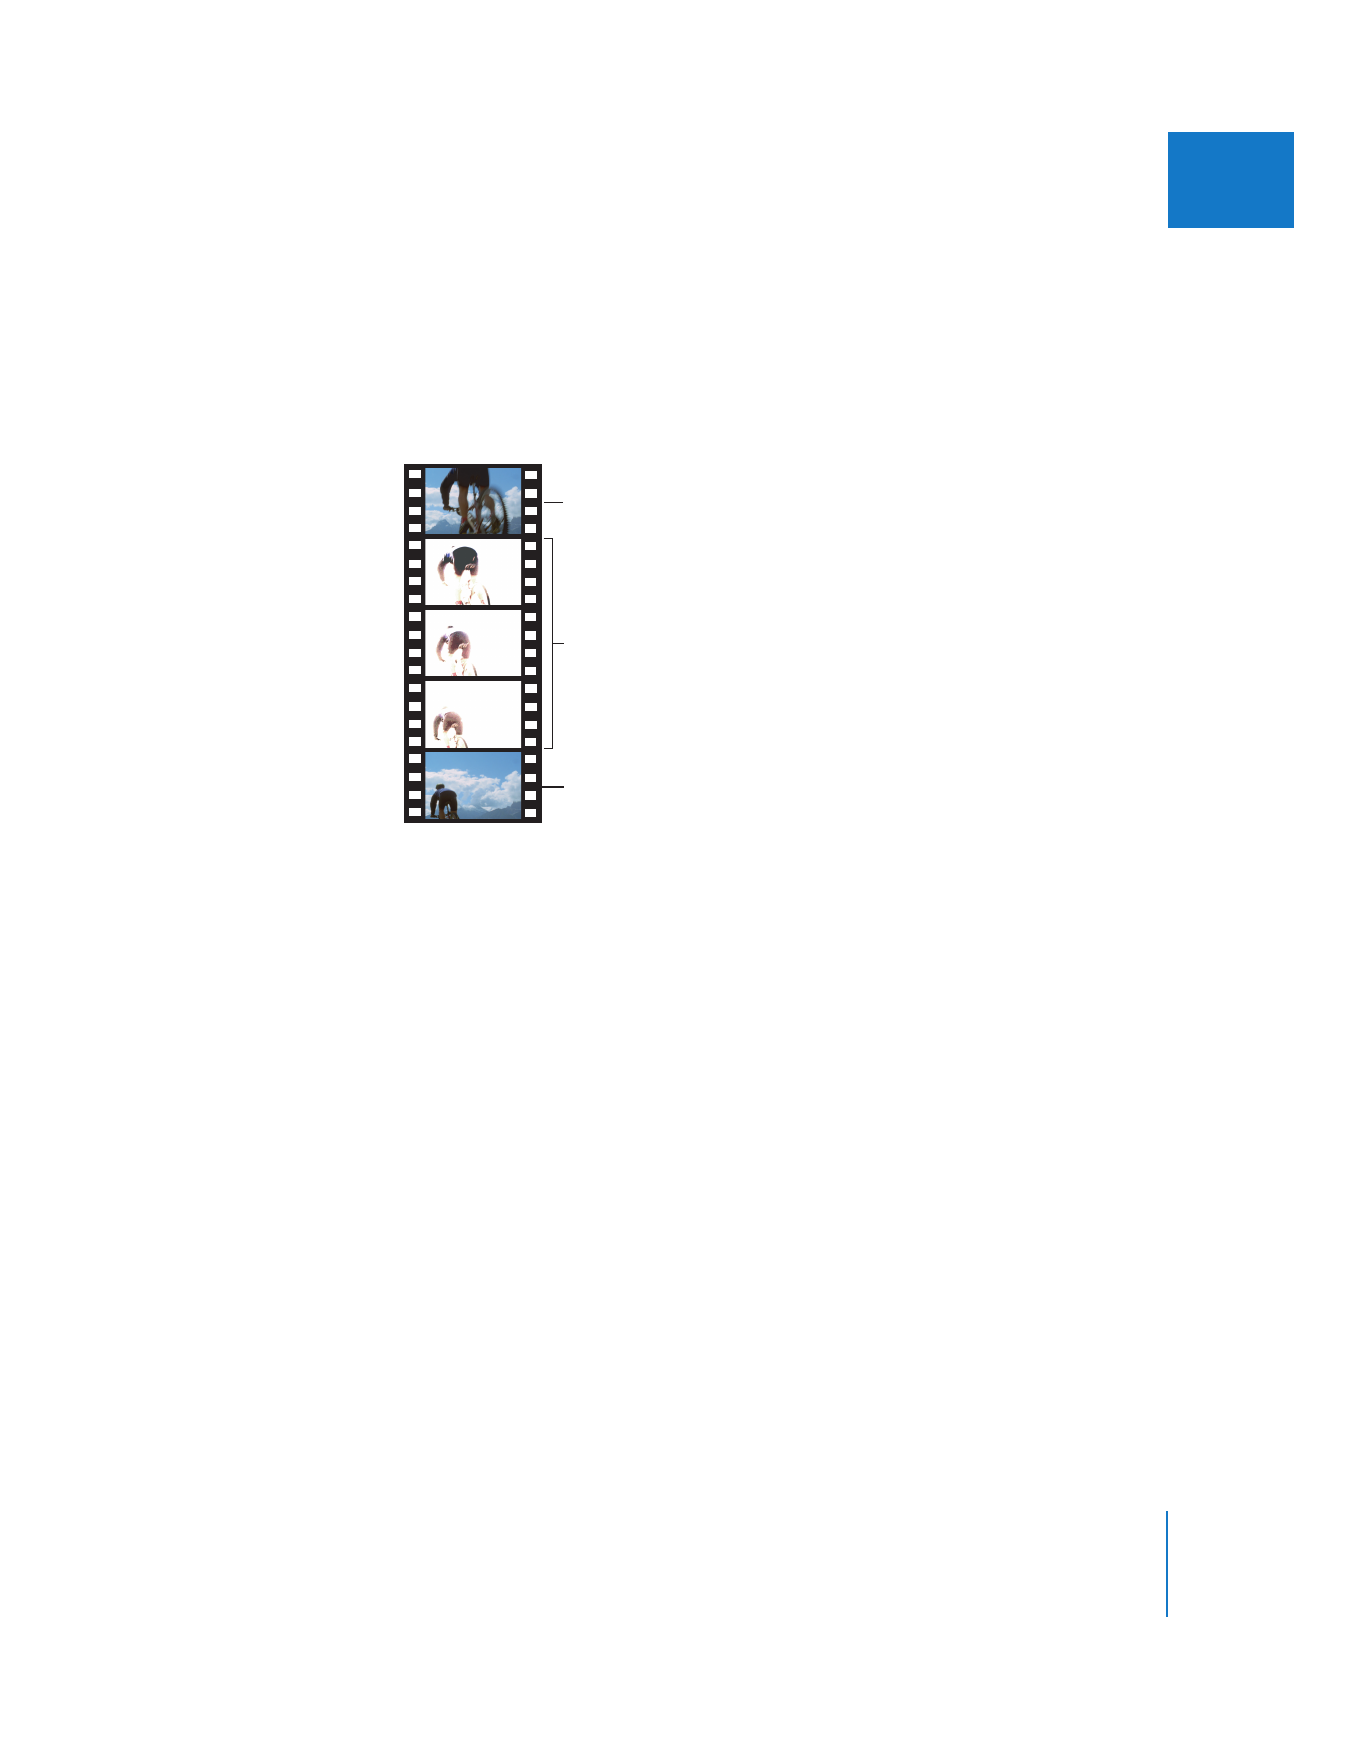
 Key Frames: Key frames are available if your selected codec uses temporal
compression. Most video frames in close proximity have a high percentage of visual
redundancy. Compression key frames reduce data rate by only storing complete
images at regular intervals or when abrupt visual shifts occur. The remaining frames
only store information about the change, or delta, between themselves and the key
frame. Increasing the number of frames between key frames increases the amount
of compression and makes the final file size smaller.
Depending on the codec you use, the movie file’s quality, especially for clips and
sequences with a lot of motion, may decrease if there are too few key frames
specified. If there’s a lot of motion in your media file, you need key frames more often
than you do with more static footage, such as an interview sequence. A setting of
one key frame every ten frames is a good starting point.
Some video codecs allow you to insert a key frame every certain number of frames,
while other video codecs use natural key frames by scanning the whole file to
detect where the major similarities and differences occur and inserting the key
frames accordingly.
 Automatic: QuickTime adds temporal compression key frames when necessary.
 Every N frames: Temporal compression key frames are created every N frames.
Because key frames require more data to store than the in-between frames, a
higher value here results in a movie with a lower data rate.
 All: A key frame is added on every frame. This increases the data rate of the
movie significantly.
Key frame
Delta frames
Key frame

252
Part III
Output
Data Rate Area
 Data Rate: These options allow you to specify the data rate for your QuickTime video.
 Automatic: The selected codec adjusts the data rate of your QuickTime
video automatically.
 Restrict to N kbits/sec: When available, you can use this field to set the number of
kilobytes per second (KB/sec.) required to deliver your media file. This setting is
useful if you have a specific bit rate (such as a DSL connection) or amount of space
(on a DVD or CD ROM). You should choose a data rate that is appropriate for your
delivery medium and set it as high as possible within your data limitations. When
you set a data rate, you override other codec quality settings because the codec
compresses the file as much as it needs to based on its data rate limit.
Note: Remember that the data rate is only for the video track of a media file. If your
media file also contains audio, you must allow some space for that, too.
Compressor Area
 Depth: Choose a color depth. Some codecs allow you to choose between color or
grayscale, while others allow you to specify the number of colors (which corresponds
to a bit depth), such as 4, 16, 256, or millions of colors (2-, 4-, and 24-bit, respectively).
You can also specify an alpha channel for some codecs by choosing Millions of Colors+.
 Quality: Adjust the slider for the level of spatial compression you want. Some codecs
may not allow you to specify this setting.
Depending on the codec you choose, other options may be available, such as scan
mode (interlaced versus progressive) and aspect ratio. There may also be an Options
button you can click to set additional codec-specific options.
Preview Area
A preview image of the current frame of your clip or sequence is displayed here. When
you adjust some compressor options, the preview image is updated so you can see
how certain settings will affect your image.

Chapter 18
Exporting Using QuickTime Conversion
253
III
Filter Settings
These options are available when you click Filter in the Video area of the Movie Settings
dialog. QuickTime filters apply to your entire exported clip or sequence. This is different
from applying a filter within Final Cut Pro, where a filter is applied only to selected clips
or parts of a clip.
 Load: Click here to use a filter you’ve saved, such as one used in an earlier project.
 Save: Click here to save a filter’s settings, if you might use them again.
Export Size Settings
The Export Size Settings dialog appears when you click Size in the Video area of the
Movie Settings dialog. When QuickTime 7.1 or later is installed, a large number of size,
scaling, and aspect ratio options are available when you export your movie.
Select a filter in this list.
Click a disclosure triangle
to see more filters.
Adjust settings for the
filter in this area.

254
Part III
Output
Dimensions
This pop-up menu allows you to define the clean aperture size of your exported
QuickTime movie. For more information about QuickTime aperture modes, see “
About
QuickTime Aperture Display Modes
” on page 260.
Depending on the option you choose, width and height fields may also appear. The
following options are available in the Dimensions pop-up menu:
 Current: The current dimensions of your clip or sequence in the Viewer or Canvas,
respectively. You should avoid this option in most cases because it’s difficult to set
precise dimensions by scaling the Viewer or Canvas window. This option disables the
“Preserve aspect ratio using” pop-up menu.
 Compressor native: The native dimensions of the codec selected in the Compression
Type pop-up menu of the Standard Video Compression Settings dialog. Not all
codecs have native dimensions. In this case, the dimensions set in the Current option
are used. DV, DVCPRO, and DVCPRO 50 have native NTSC and PAL dimensions of
720 x 480 and 720 x 576, respectively. IMX, DVCPRO HD, HDV, and XDCAM HD codecs
also have native dimensions.
 640 x 480 VGA, 320 x 240 QVGA, 160 x 120: These are multiples of the VGA image
dimensions with an aspect ratio of 4:3.
 352 x 288 CIF and 176 x 144 QCIF: These are multiples of the CIF image dimensions
with an aspect ratio of 4:3 (assuming a nonsquare pixel aspect ratio). CIF and QCIF
were originally designed for use in video conferencing and for compatibility with
NTSC and PAL video.
 768 x 576 SD: PAL digital video dimensions (assuming square pixels) with an aspect
ratio of 4:3.
 1280 x 720 HD and 1920 x 1080 HD: High definition video dimensions (assuming
square pixels).
 NTSC 720 x 480 4:3 and 16:9: Normal and anamorphic NTSC digital video for DV,
DVCPRO, DVCPRO 50, and DVD MPEG-2.
 NTSC 720 x 486 4:3 and 16:9: Normal and anamorphic NTSC digital video complying
with the ITU-R BT. 601 specification.
 PAL 720 x 576 4:3 and 16:9: Normal and anamorphic PAL digital video complying with
the ITU-R BT. 601 specification.
 HD 1280 x 720 16:9 720-line high definition video dimensions.
 HD 1440 x 1080 16:9: Subsampled 1080-line high definition video dimensions.
 HD 1920 x 1080 16:9: Full-resolution 1080-line high definition video dimensions.
 Custom: Allows you to enter any height and width you choose. This is useful when
you need specific image dimensions or special aspect ratios such as 1.85 or 2.40.
∏
Tip: It’s a good idea to keep the frame width and height divisible by four if you’re using
MPEG-based codecs or Sorenson.
Chapter 18
Exporting Using QuickTime Conversion
255
III
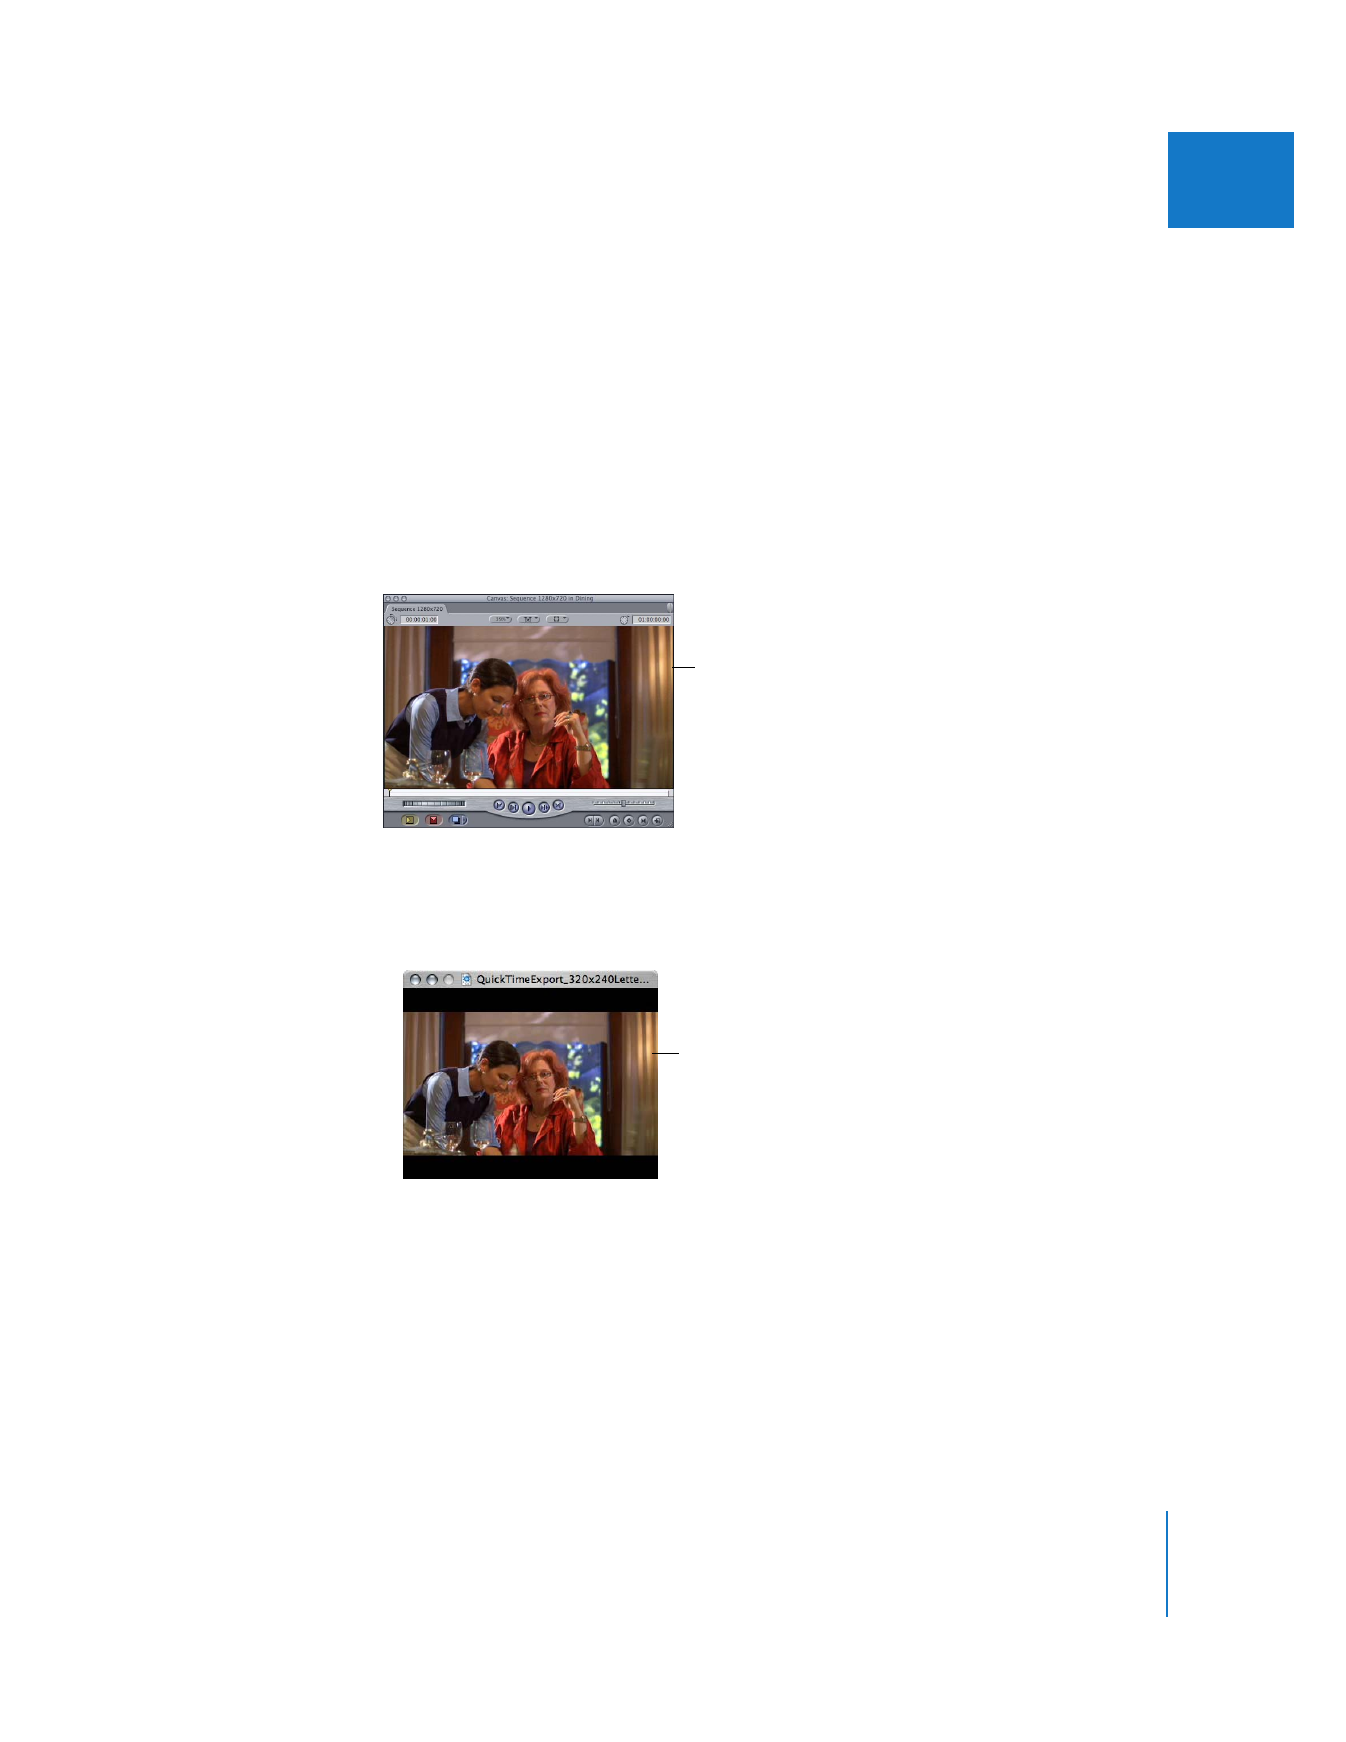
Preserve Aspect Ratio
When the “Preserve aspect ratio using” checkbox is selected, the aspect ratio of your
source movie is preserved by choosing one of three options. In the following examples,
a 1280 x 720 (16:9) high definition sequence is shown scaled down to 320 x 240 (4:3).
Important:
These options do not take into account the effect of pixel aspect ratio
when determining what aspect ratio to preserve. For example, if you are exporting a
DVCPRO HD sequence (960 x 720), these options preserve the aspect ratio of the pixel
dimensions, which is 4:3 (960 ÷ 720), not 16:9 as you would expect. For best results,
always nest sequences with nonsquare pixels into a sequence format with square
pixels. In this case, you could nest your DVCPRO HD sequence into a sequence with
dimensions of 1280 x 720.
 Letterbox: Scales your clip or sequence video to fit proportionally in the clean
aperture dimensions of your exported movie. Black bars are added on the top and
bottom (letterboxed) or left and right (pillarboxed) as necessary.
1280 x 720 (16:9)
sequence
16:9 letterboxed within
320 x 240 (4:3)
256
Part III
Output
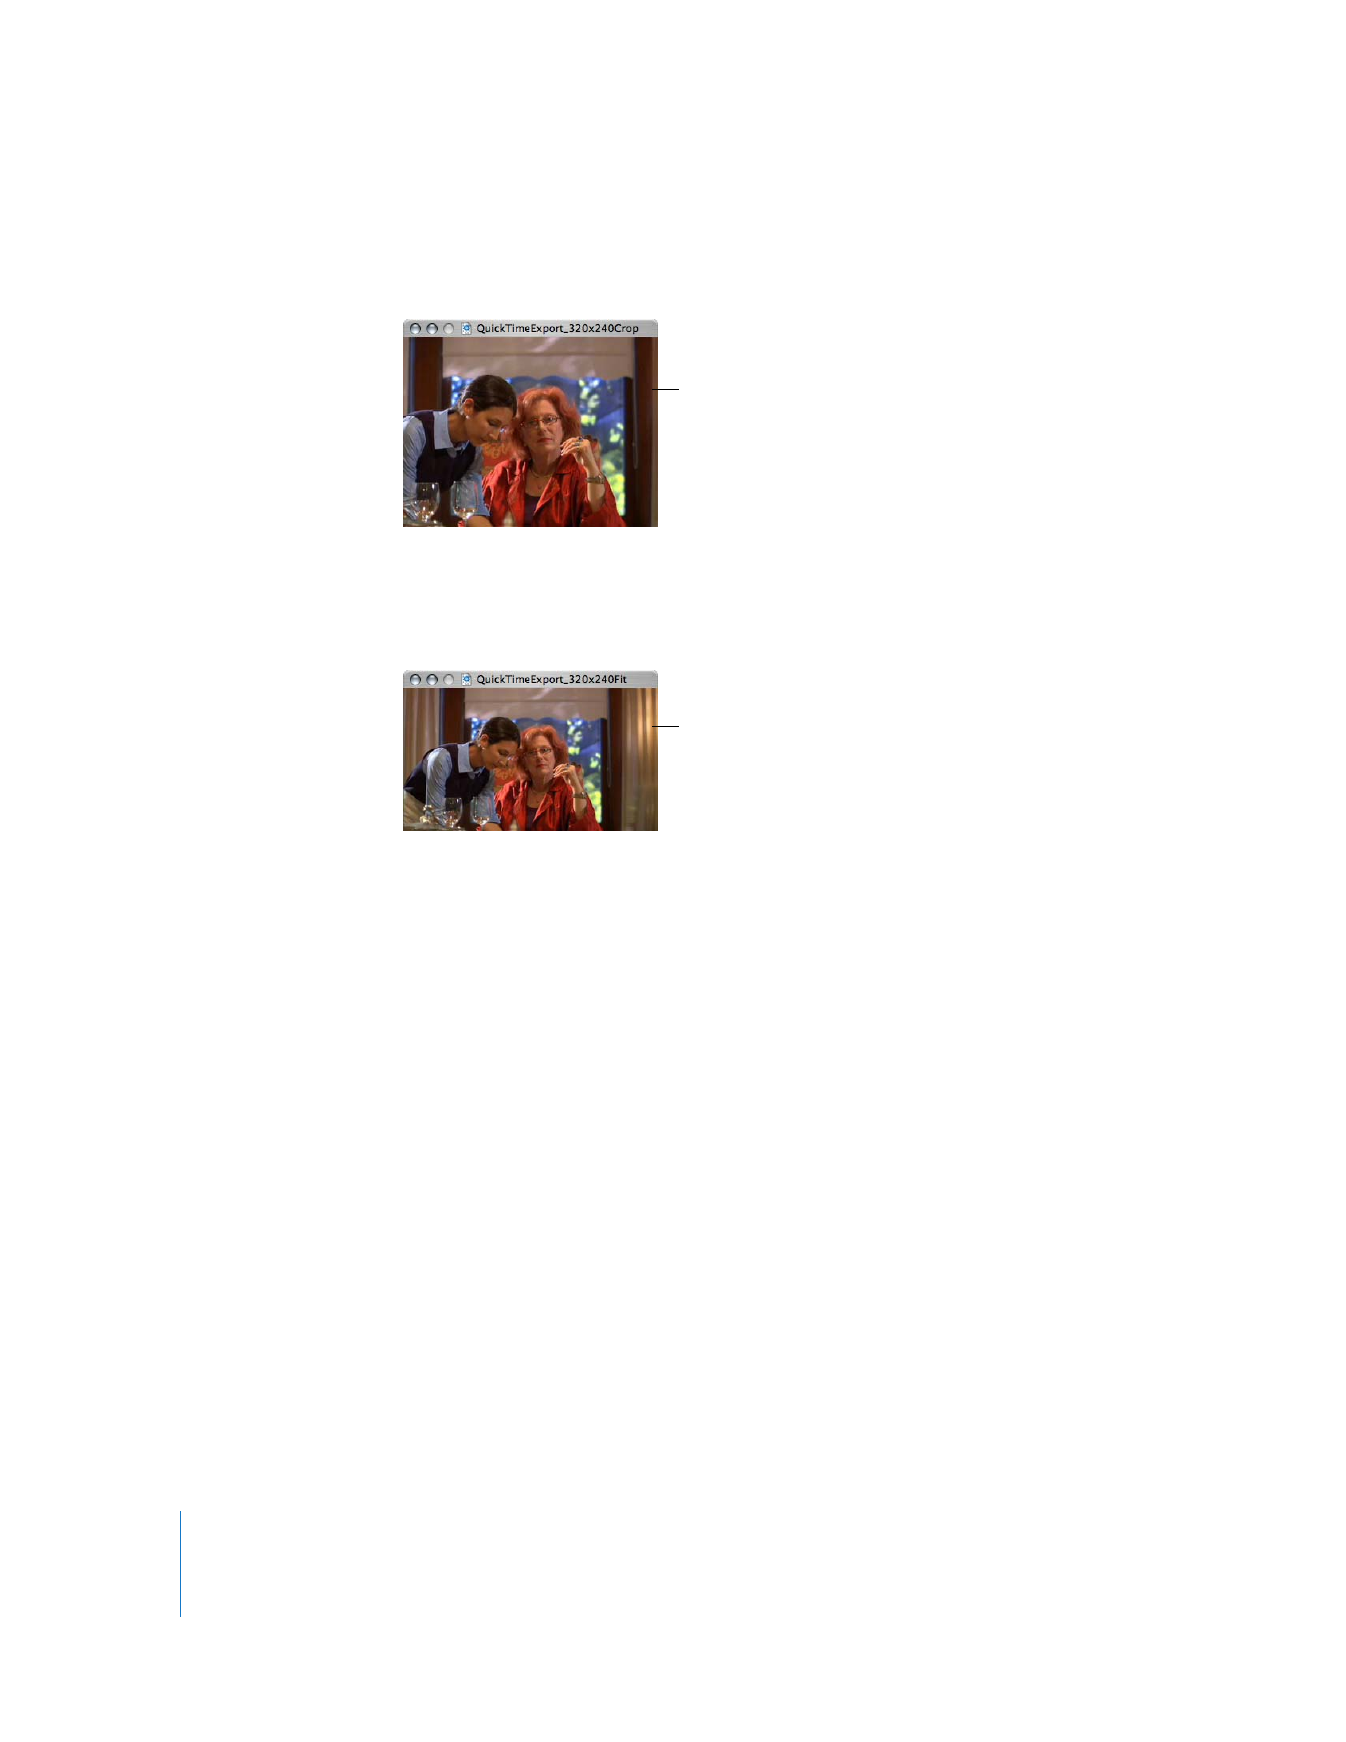
 Crop: Scales and center-crops your clip or sequence video to fit in the clean aperture
dimensions of your exported movie.
 Fit within dimensions: Changes the shortest dimension of the exported movie
(usually the height) so that the source sequence or clip fits within the exported
movie dimensions when scaled.
For example, if your sequence dimensions are 1280 x 720 (16:9) and the exported
movie dimensions are 320 x 240 (4:3), the exported movie dimensions are changed
to 320 x 180 (16:9) and the exported sequence is scaled to these dimensions.
When the “Preserve aspect ratio using” checkbox is not selected, the sequence or clip
video is stretched to fit the export movie size.
Deinterlace Source Video
Select this checkbox to avoid artifacts when scaling interlaced video formats such as
standard definition NTSC (480i), PAL (576i), or 1080i video.
16:9 cropped
to 320 x 240 (4:3)
16:9 within
320 x 180 (16:9)
Chapter 18
Exporting Using QuickTime Conversion
257
III