Exporting a DV Stream
A DV Stream file is just like the DV video and audio data recorded on DV tape. This file
format is used with applications such as iMovie. DV Stream files are not the same as
QuickTime movie files with separate, extensible tracks. Use the DV Stream option to
make iMovie-compatible DV Stream files.
To export a DV Stream file:
1
Select a clip or sequence in the Browser, or open a sequence in the Timeline.
2
Choose File > Export > Using QuickTime Conversion.
3
Choose a location and enter a name for the file.
4
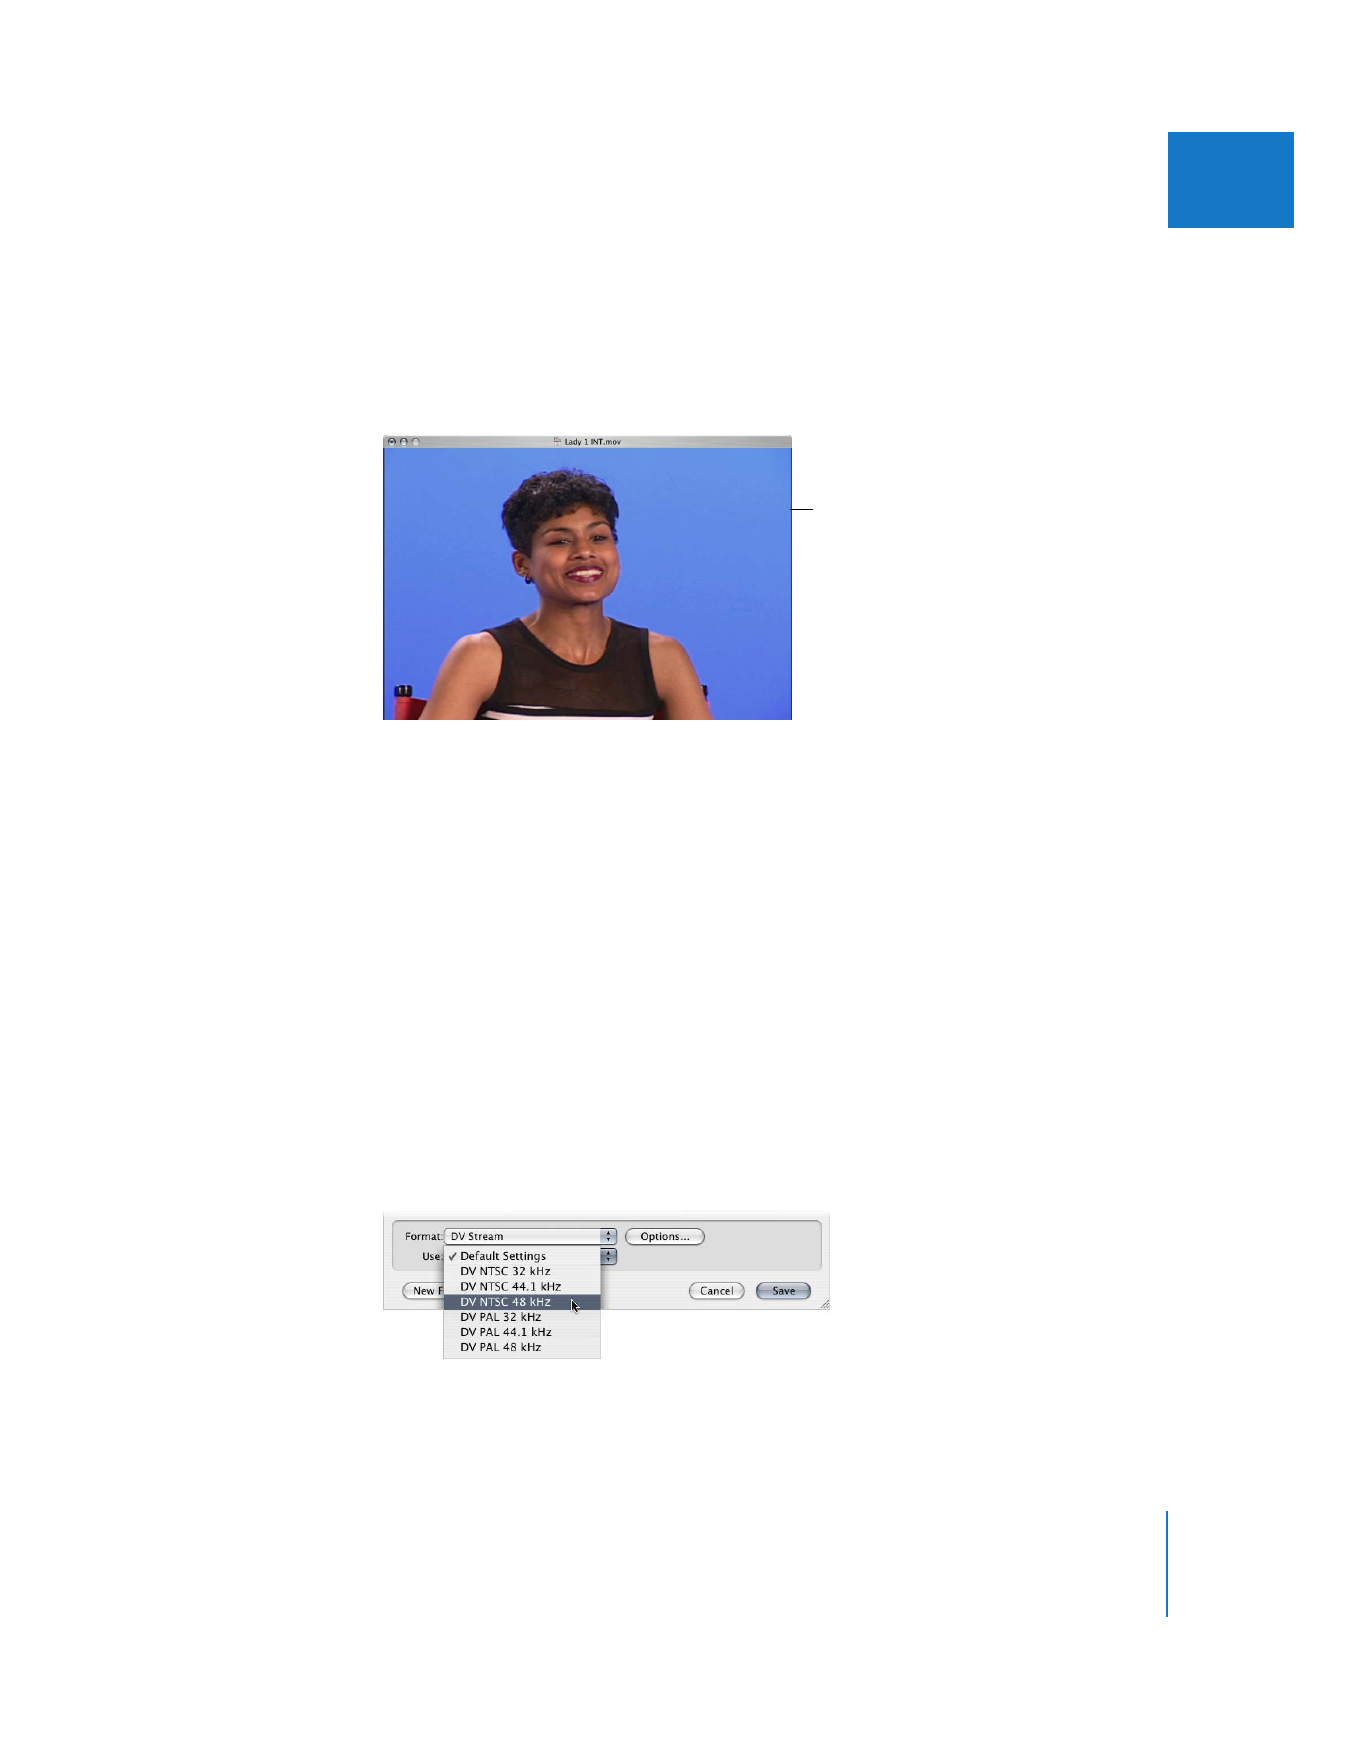
Choose DV Stream from the Format pop-up menu.
5
Choose a setting from the Use pop-up menu, based on the video standard and audio
sample rate of the selected clip or sequence.
Encoded Pixels: pixels
displayed “as is,” with no
pixel aspect ratio correction
or cropping applied
264
Part III
Output
6
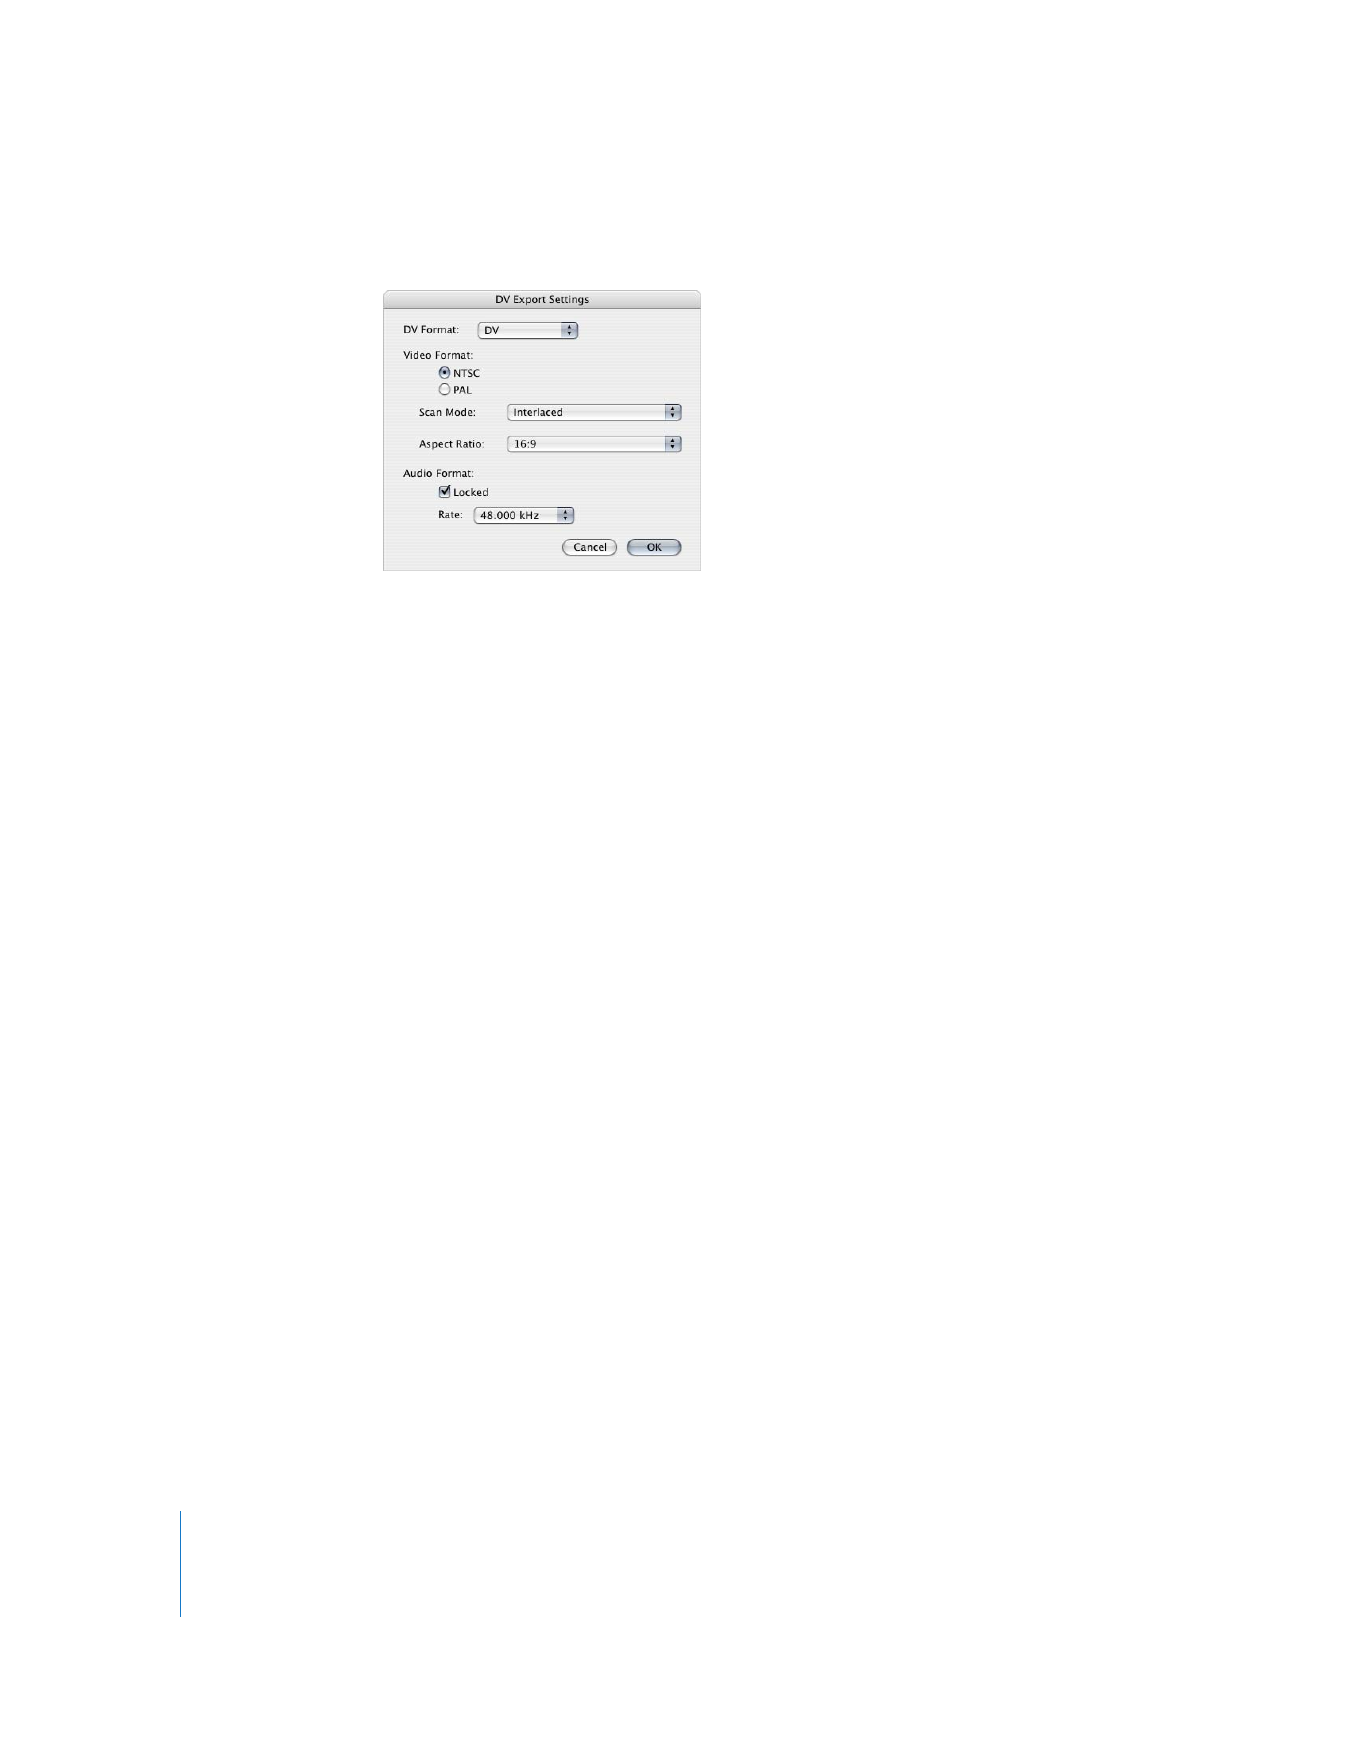
To customize settings, click Options.
 DV Format: Choose a DV format, such as DVCPRO 50, here.
 Video Format: Choose the video standard, scan mode, and aspect ratio for the
exported file.
 Audio Format: Choose your options.
 Locked: Conforms the audio tracks to the “locked audio” standard, in which the
audio and video sample clocks are synchronized.
 Rate: Choose a sample rate for the exported file from this pop-up menu.
Note: DVCPRO and DVCPRO 50 always use locked audio with a sample rate of
48 kHz. With these formats, these options are not adjustable.
7
When you’re ready to export, click Save.
A dialog shows you the progress of the export. To cancel your export, press Esc or
click Cancel.