Using the Print to Video Command
Make sure you’ve read and followed the instructions in Chapter 13, “
Preparing to
Output to Tape
,” on page 187 before you use the Print to Video command. Make sure
everything is working properly before you start recording.
To test playback:
m
Move the playhead to the position in the Timeline where you want output to begin,
then press the Space bar to play back your clip or sequence.
If you have an external monitor connected to your video device, the clip or sequence
will play on it, as well as on your computer’s monitor.
To print to videotape:
1
Select the desired sequence or clip in the Browser, or open your sequence and make
the Canvas or Timeline active.
2
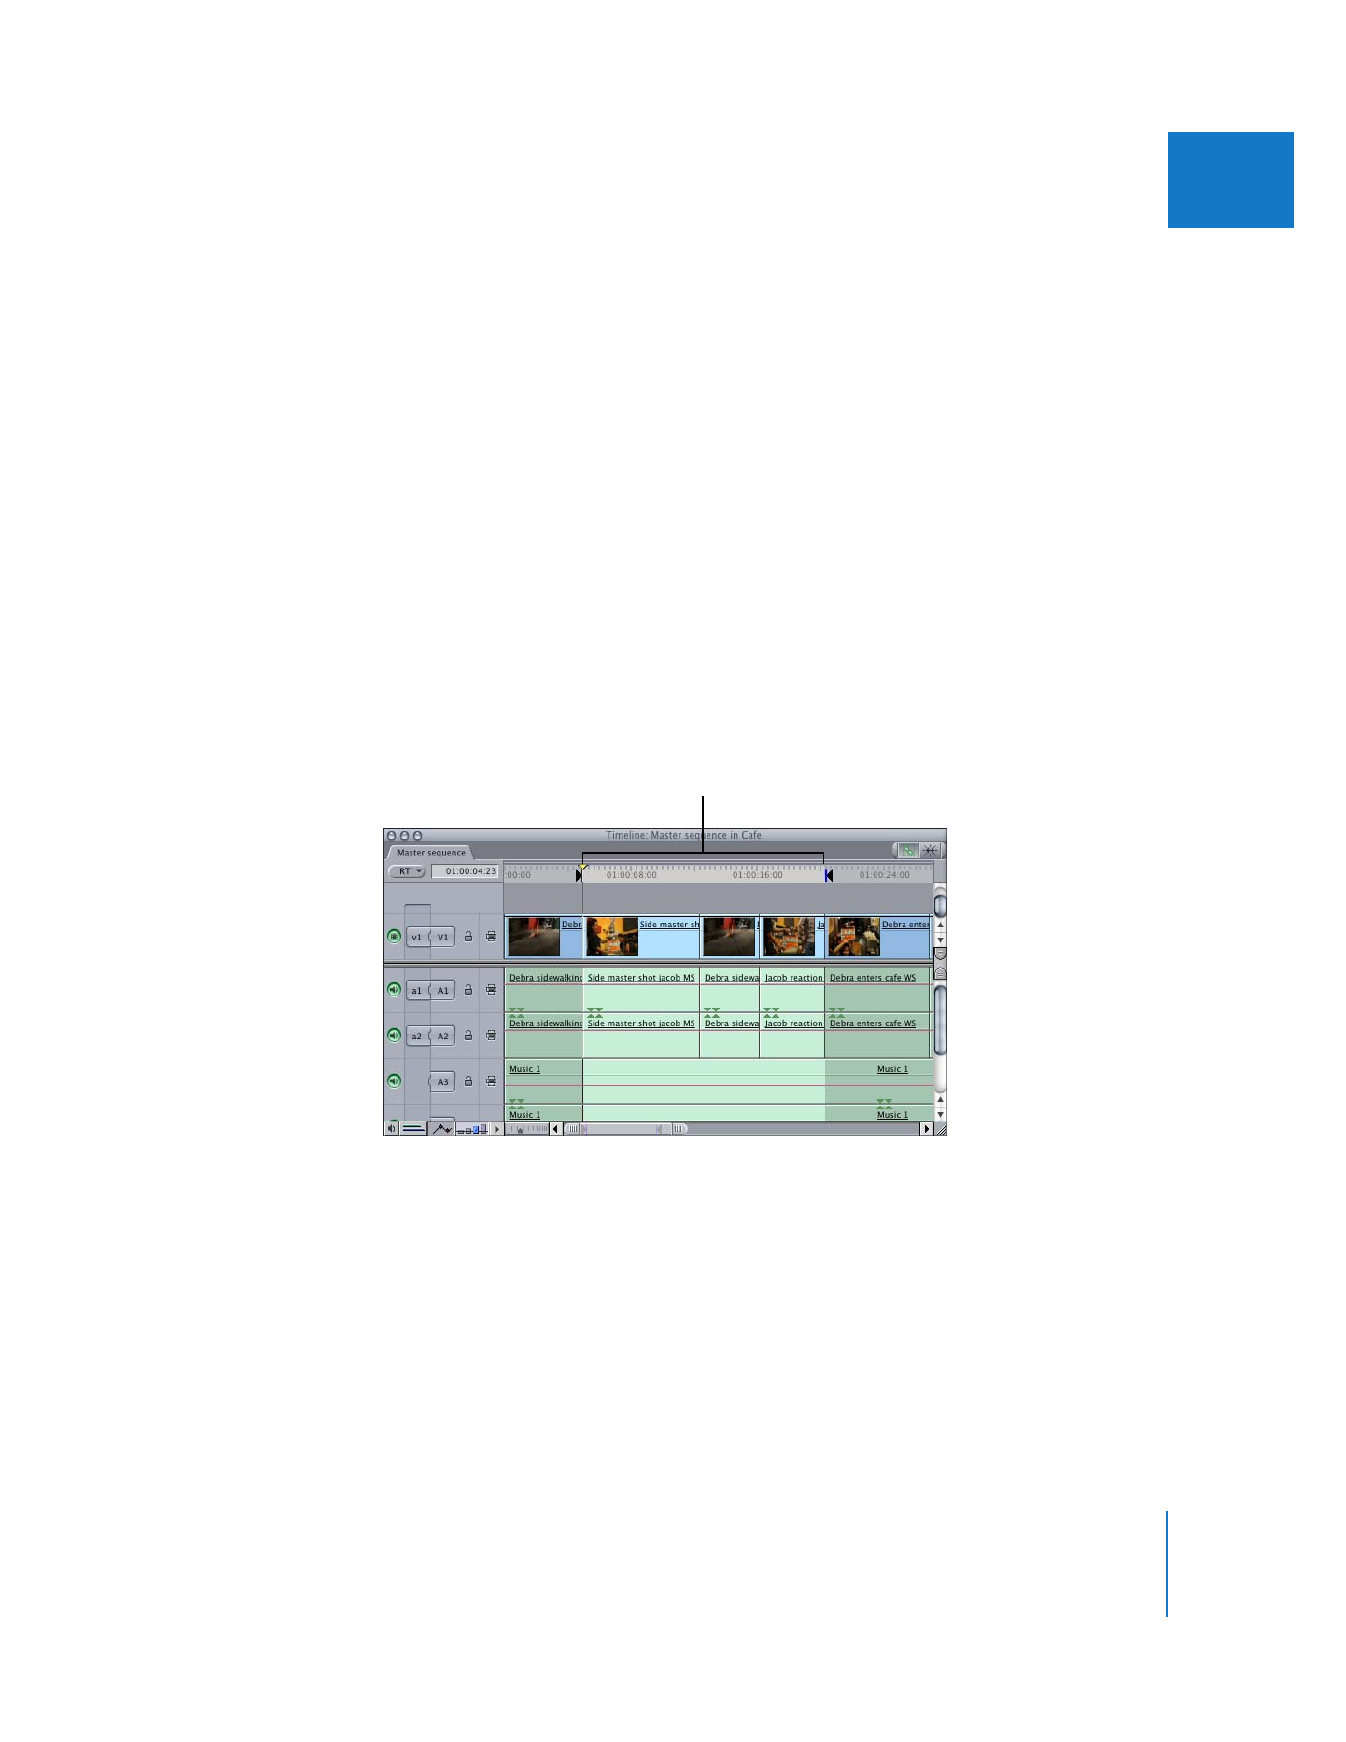
To output part of a sequence or clip to video, set In and Out points to designate the
part you want to record to videotape.
For more information, see Volume II, Chapter 7, “Setting Edit Points for Clips and Sequences.”
3
Choose File > Print to Video.
Mark In and Out
points, if desired.

222
Part III
Output
4
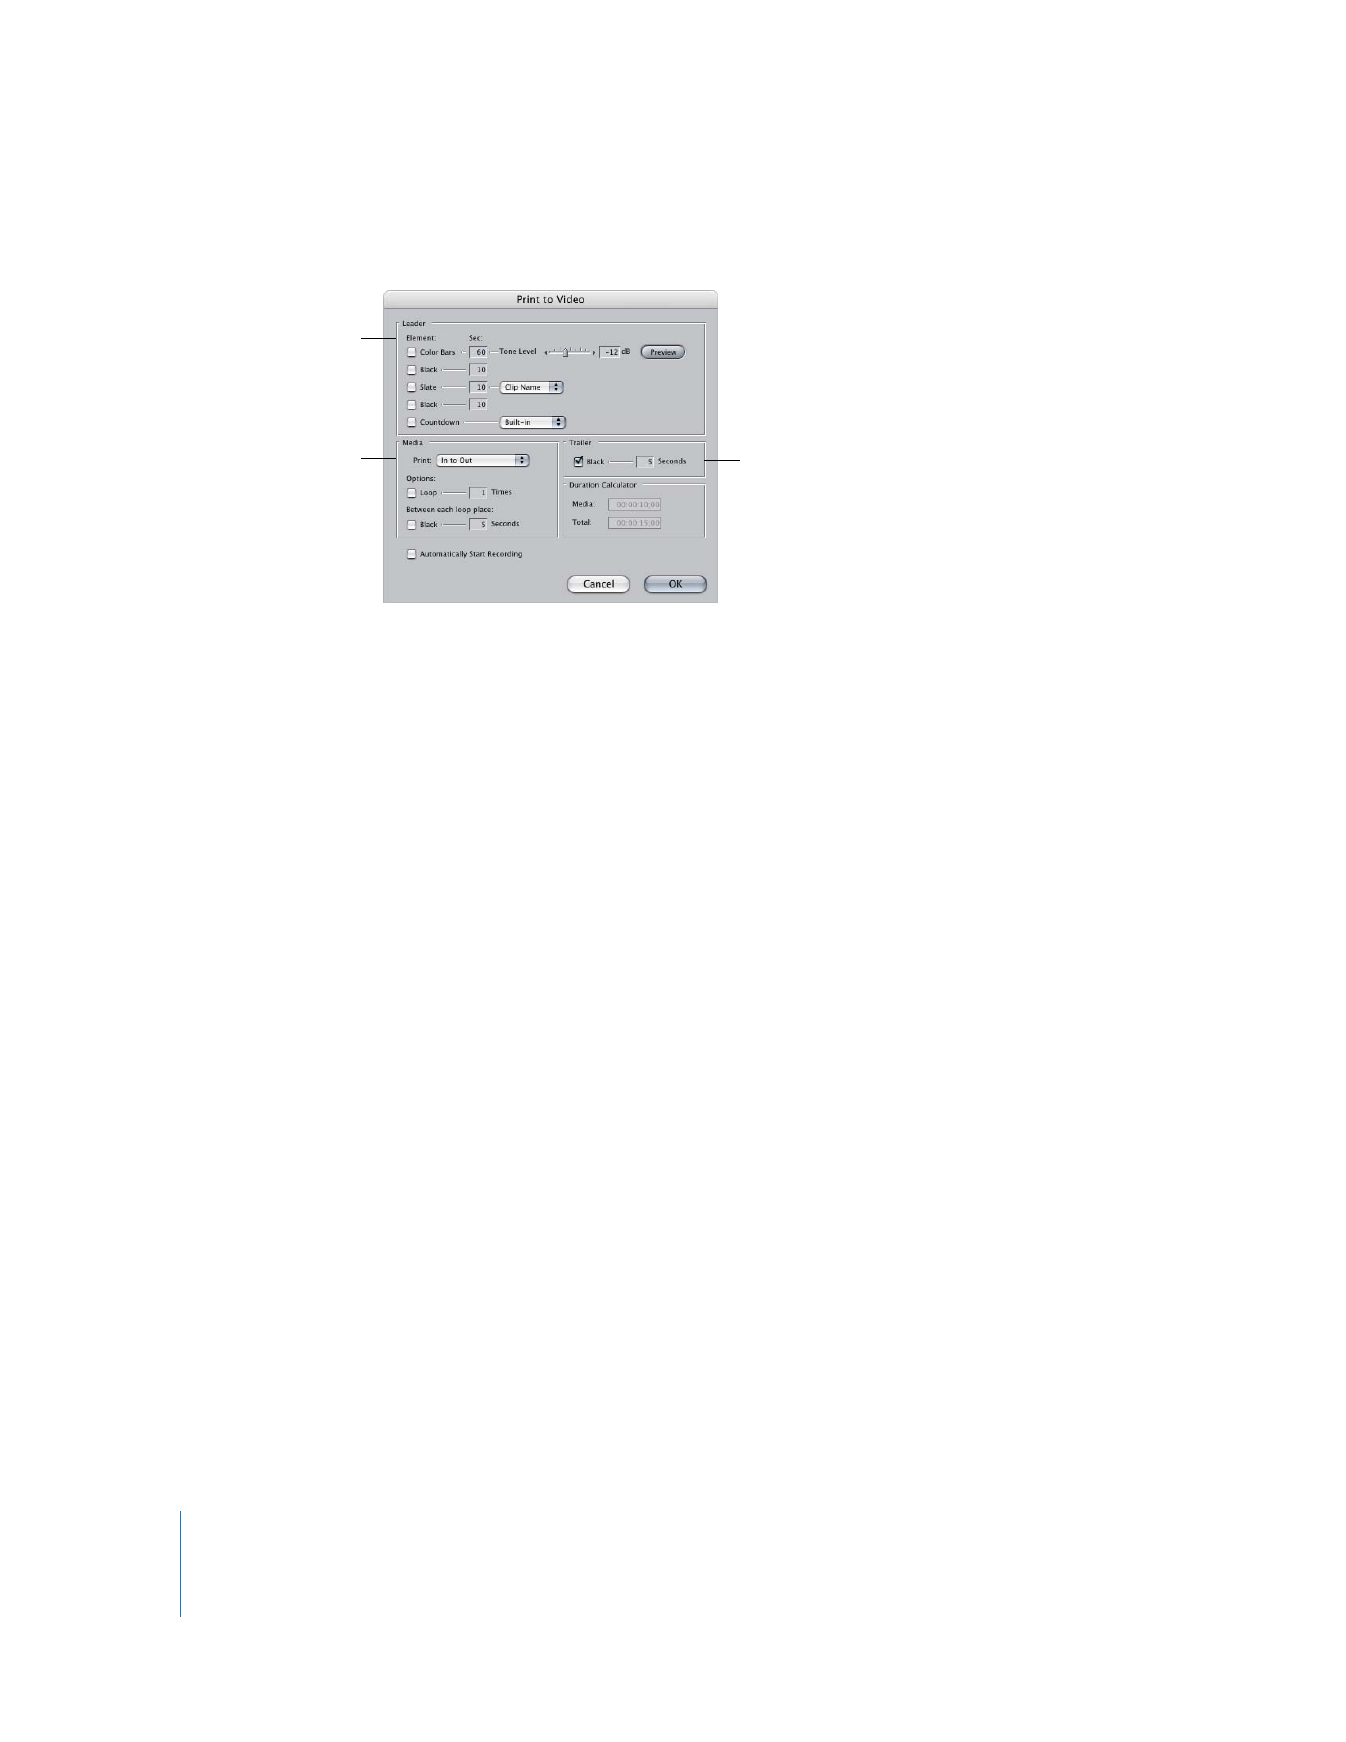
Select elements you want to print along with your sequence or clip.
All selected elements are sent to tape in the order listed. Make sure elements you don’t
need are not selected. Some of these items may require rendering before you can start
recording. For a complete explanation of the options available, see “
Mastering Settings
Tab
” on page 205.
Important:
Make sure there is sufficient time on your tape by using the Duration
Calculator before proceeding.
5
When you’ve finished setting options, click OK.
Transitions and effects that require rendering, along with any added elements, are
rendered automatically prior to output. You can also choose to output unrendered
real-time effects at lower quality, saving time by avoiding rendering. Options for
choosing the quality of rendered effects when using the Print to Video command can be
set in the Render Control tab of the Sequence Settings window. For more information
on setting options in the Render Control tab, see “
Render Control Tab
” on page 366.
Note: All audio that requires rendering is automatically rendered with a render quality
of High, regardless of the render quality setting.
6
When a message tells you to start recording, press the Record button on your
camcorder or deck. Wait a few seconds for your video device to reach a smooth
recording speed, then click OK to begin recording.
7
When playback is finished, press the Stop button on your camcorder or deck.
The last frame of your clip or edited sequence is held as a freeze frame until you stop
your recording device.
Enter options to add a
trailer at the end of the
clip or sequence.
In this section, select
the media you want
to print and choose
looping options.
In this section, select all
of the options you want
to add before the clip
or sequence.

Chapter 15
Printing to Video and Output from the Timeline
223
III