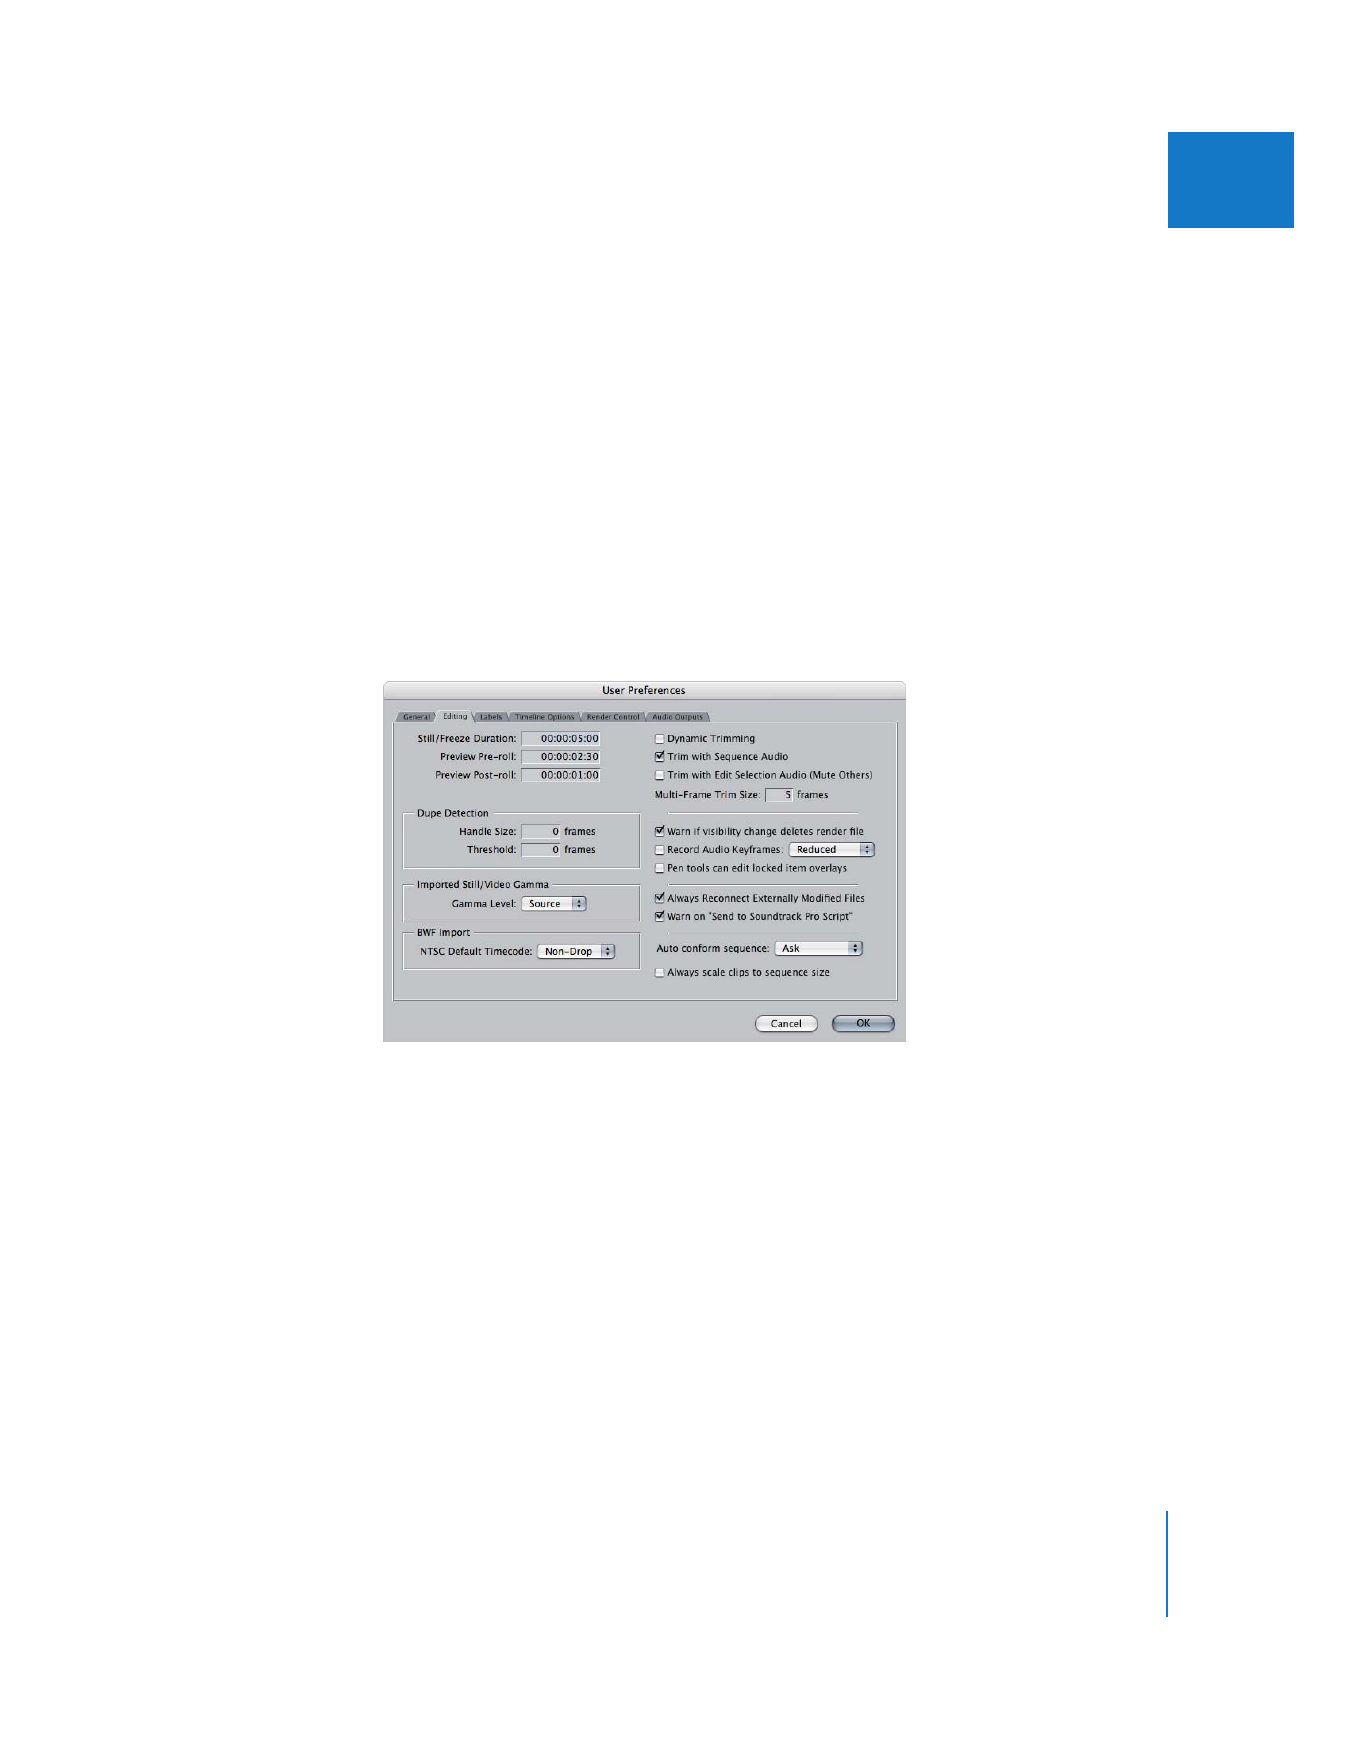
Editing Tab
The preferences in this tab affect editing behaviors in Final Cut Pro.

310
Part IV
Settings and Preferences
Default Timing Options
 Still/Freeze Duration: This value determines the duration for imported graphics and
freeze frames you create in Final Cut Pro (when you choose Modify > Make Freeze
Frame in the Canvas or Viewer). The default duration is 10 seconds. In and Out points
are set around the middle of a clip, providing equal handles for trimming on either
side of the clip.
You can increase the length of a Freeze Frame by opening it in the Viewer and
entering a higher value in the Timecode Duration field.
Note: In Final Cut Pro, duration is the amount of time between a clip’s In and Out
points, while length refers to the time between Media Start and End. The default
length of a still image or freeze frame clip is 2 minutes, while its duration is
determined by the still/freeze frame duration. However, if you set the still/freeze
duration to be greater than 2 minutes, new still images or freeze frames are created
at this length without handles.
One reason you may want to change this value is if you’re going to import an
image sequence. For example, if you set the Still/Freeze Duration to 00:00:00:01
(one frame), you can import an entire folder of numbered images and then place
them in a sequence.
 Preview Pre-roll: This value is used by the Play Around Current control and the Trim
Edit window to determine how much time before the playhead should be played.
 Preview Post-roll: This value is used by the Play Around Current control and the Trim
Edit window to determine how much time after the playhead should be played.
For more information, see Volume I, Chapter 6, “Viewer Basics.” The setting is also
applicable in the Trim Edit window; see Volume II, Chapter 20, “Trimming Clips Using
the Trim Edit Window.”
Dupe Detection Options
 Handle Size: This preference adds frames to the beginning and end of the clip
regions which are used for comparison, to determine whether or not to display
duplicate frames indicators. This can be used to take into account the extra frames
that must be used for physically cutting and cementing pieces of negative that are
necessary for film match-back, to prevent you from accidentally including frames
that can’t really be used. By default, this is set to 0.
Chapter 23
Choosing Settings and Preferences
311
IV
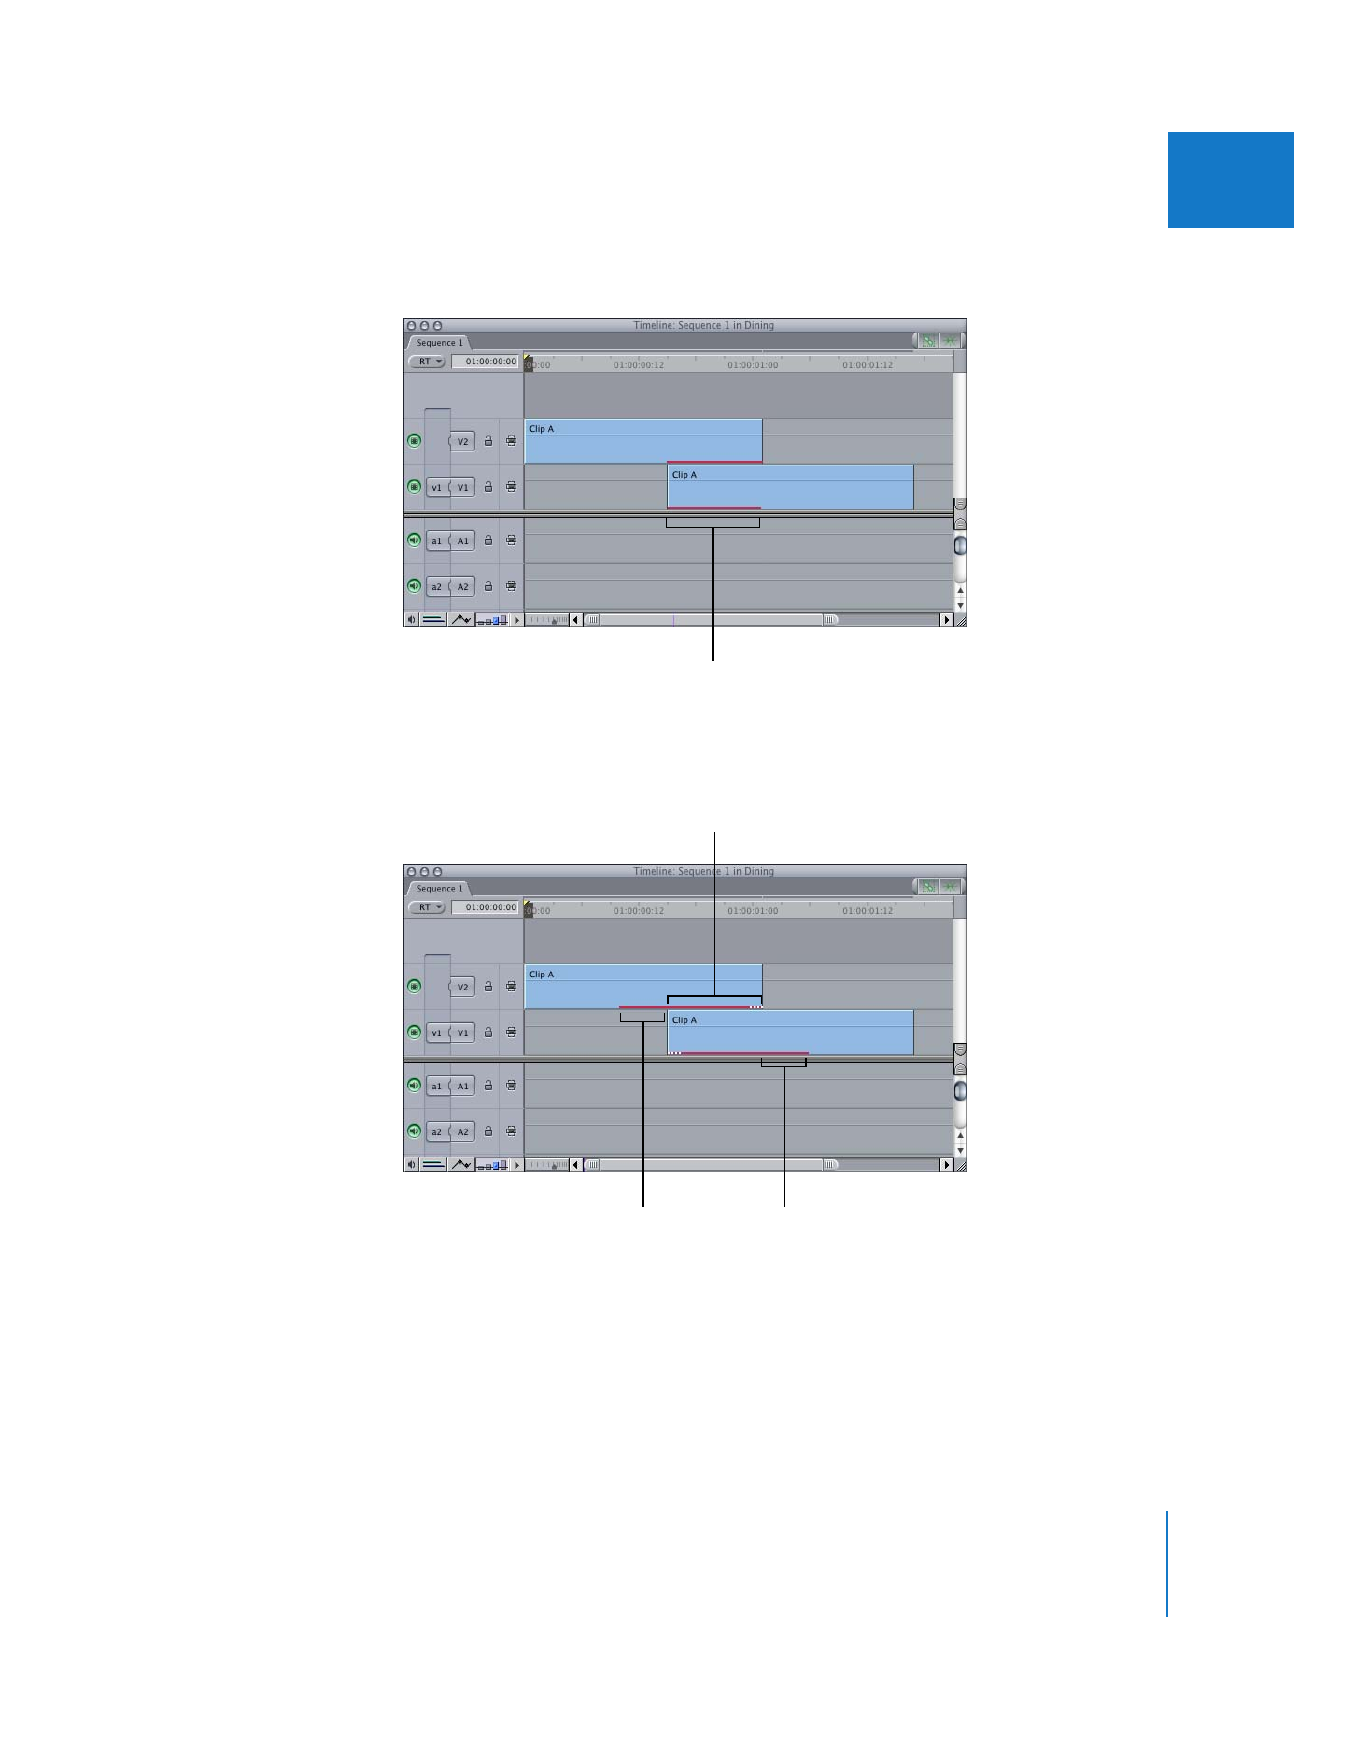
In the following example, the sequence contains ten duplicate frames. Below, the
handle size setting is set to zero frames, so no additional frames are shown.
When the handle size setting is set to ten frames, five additional frames on either
side of the duplicate frames are displayed.
These ten frames are used
twice, so they are shown as
duplicate frames.
Five additional frames
beyond the duplicate
frames are shown here...
...and here.
Ten duplicate frames.
312
Part IV
Settings and Preferences
 Threshold: This allows you to set a minimum number of frames that must be
duplicated before a duplicate frame’s indicator will appear. By default, this is set to
0 so that all instances of duplicated frames are indicated. You can set it as high as
99 frames (3 to 4 seconds, depending on the frame rate), in which case there
would have to be a minimum of 99 consecutive duplicated frames before a
duplicate frames indicator would appear. For more information on duplicate frames
indicators, see “
Keep Track of Duplicate Frames
” on page 149 and Volume II,
Chapter 21, “Adding Transitions.”
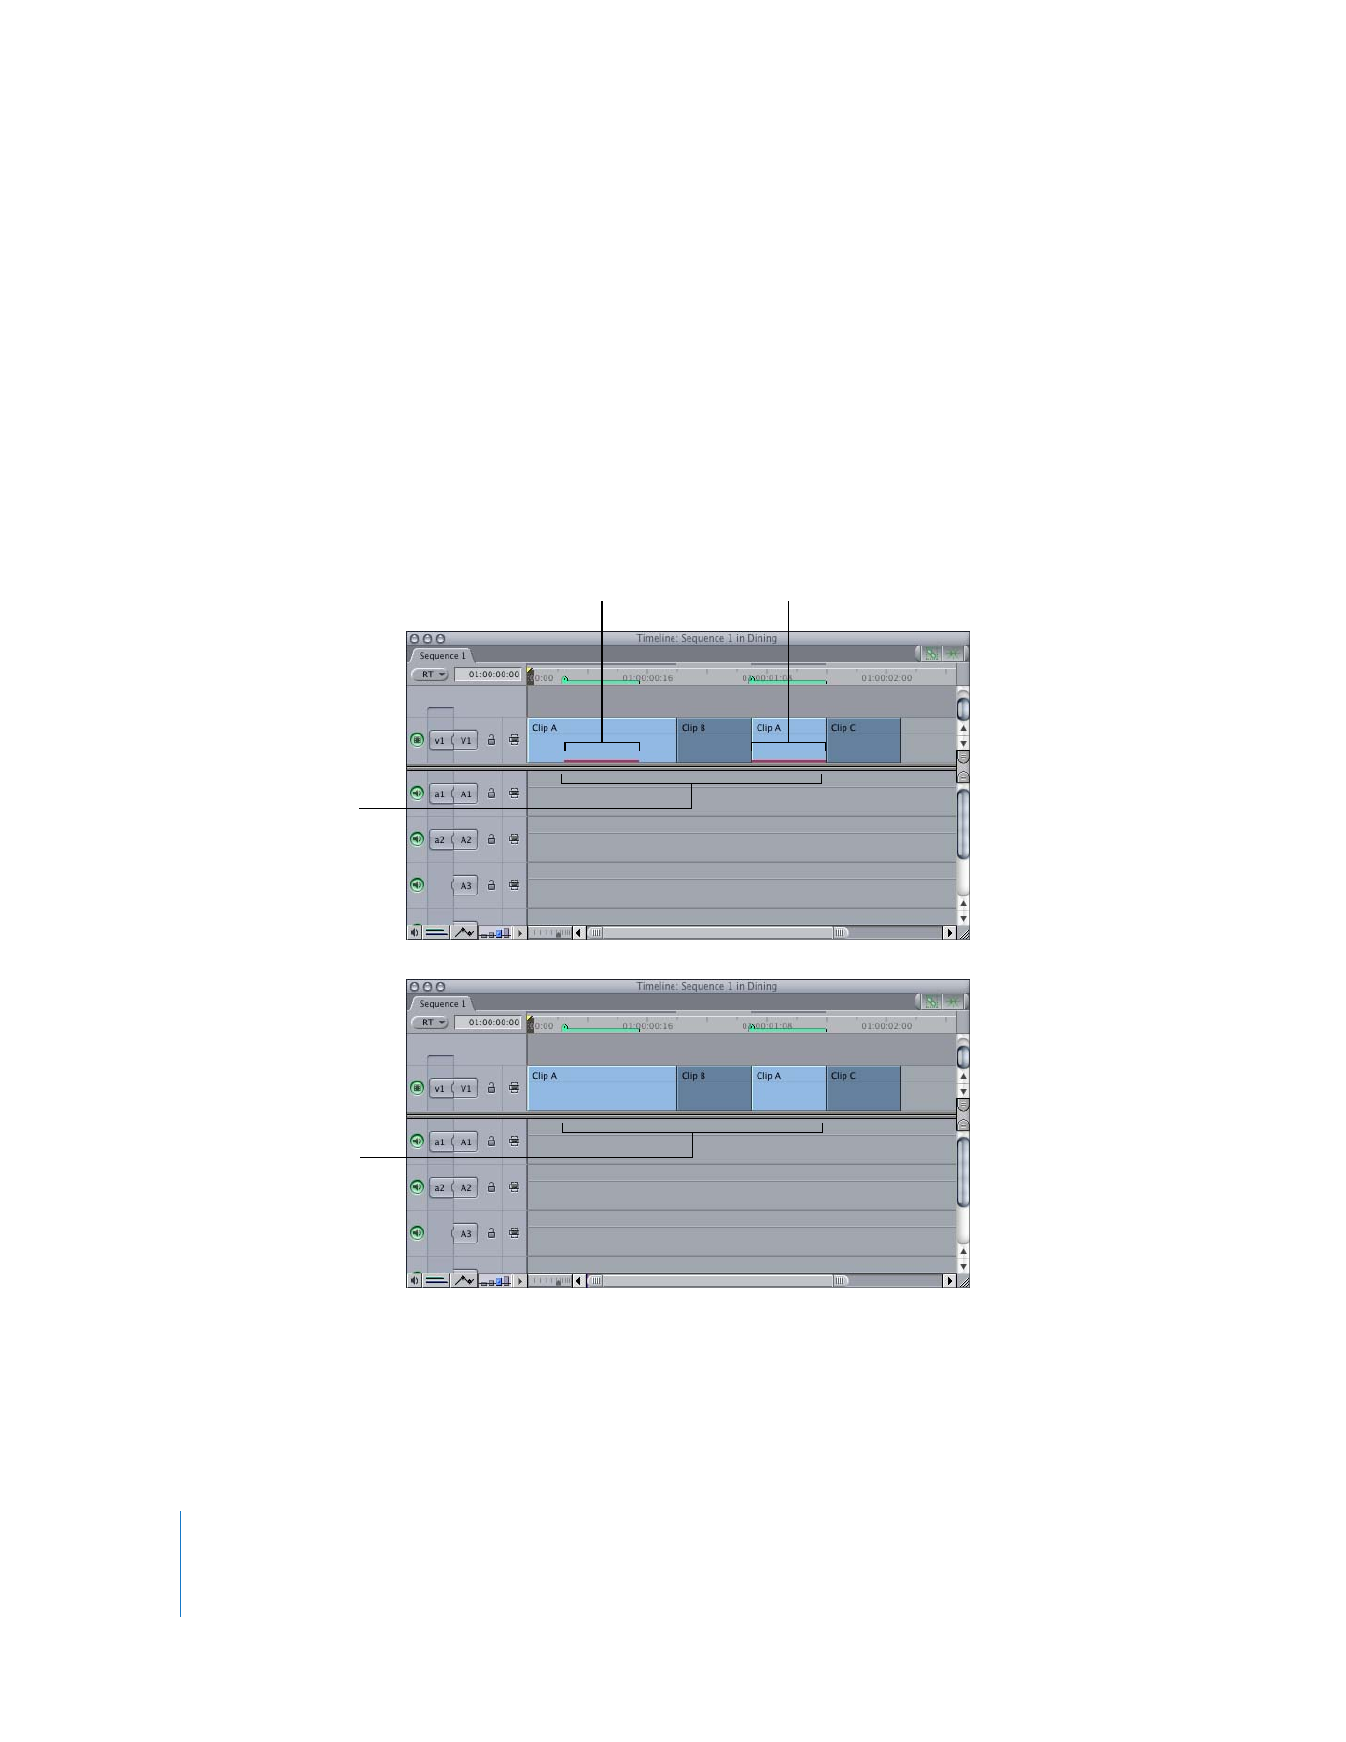
The example below shows a sequence that contains two instances of clip A, and ten
of the frames from Clip A are used twice.
The same ten frames
from the same media
file are used here...
...and here.
When the handle
threshold is less than or
equal to 10, the duplicate
frames are displayed.
When handle
threshold is greater
than 10, the duplicate
frames are not indicated.

Chapter 23
Choosing Settings and Preferences
313
IV
Imported Still/Video Gamma
 Gamma Level: This pop-up menu determines the default gamma setting for
supported still images and graphics that you import. During playback, Final Cut Pro
uses this gamma setting to determine whether gamma correction should be applied
to the clip. For more information, see Volume III, Chapter 29, “Rendering and Video
Processing Settings.”
BWF Import
 NTSC Default Timecode: This pop-up menu determines the default timecode mode
(drop frame or non-drop frame) for imported Broadcast Wave Format (BWF) files with
an NTSC-related sample rate. For more information, see Volume I, Chapter 20,
“Importing Media Files into Your Project.”
Trim Edit Window Options
 Dynamic Trimming: Select Dynamic Trimming to allow edit points in the Trim Edit
window to automatically follow the position of the playhead. For more information,
see Volume I, Chapter 9, “Timeline Basics.” The setting is also applicable for trimming;
see Volume II, Chapter 19, “Learning About Trimming Clips.”
 Trim with Sequence Audio: When this option is selected, you hear all sequence audio
tracks while using the JKL keys on either side of the Trim Edit window.
 Trim with Edit Selection Audio (Mute Others): When this option is selected, all audio
tracks except the ones currently selected in the Timeline are muted when you use
the JKL keys to play either side of the Trim Edit window.
 Multi-Frame Trim Size: This value determines how many frames are trimmed when
using the Trim Back and Trim Forward buttons in the Trim Edit window or the
equivalent shortcut keys in the Timeline. The maximum number of frames allowed is
99. For more information, see Volume II, Chapter 20, “Trimming Clips Using the Trim
Edit Window.”
Visibility, Track Locking, and Audio Keyframe Options
 Warn if visibility change deletes render file: Making an entire track invisible
automatically deletes any render files associated with that track. Make sure you select
this option to see a warning before this occurs.
Note: As an alternative to hiding a track and losing its render files, you can make
individual items invisible, which preserves these render files. To find out how to
disable individual clip items, see Volume III, Chapter 19, “Compositing and Layering.”

314
Part IV
Settings and Preferences
 Record Audio Keyframes: When this option is selected, keyframes are recorded
whenever audio level, pan, or filter controls are adjusted. The pop-up menu defines
how detailed keyframe automation is when recorded using the Audio Mixer or audio
filter controls.
Note: The Record Audio Keyframes button also controls this option. By default, this
button appears in the button bar of the Audio Mixer (Tool Bench) window.
You can choose the resolution of keyframe recording (in other words, how often
audio level and panning keyframes are added to a clip while you adjust a fader in the
Audio Mixer). For more information about recording audio keyframes, see Volume III,
Chapter 5, “Using the Audio Mixer.”
 All: Records the maximum number of keyframes possible while you move a
channel strip’s fader or panning slider. The end result is a precise re-creation of the
levels you set using the Audio Mixer. The drawback to this option is that you might
end up with an extremely dense cluster of keyframes in the audio level overlays of
the affected clips that can be difficult to edit later.
 Reduced: Reduces the number of recorded keyframes that are created when you
move a channel strip’s fader or panning slider. The resulting level or panning
overlay in the Timeline or Viewer is an accurate reproduction of the levels you set,
but is easier to edit using the Selection or Pen tool.
 Peaks Only: Records only a minimum number of keyframes necessary to
approximate the levels you recorded when moving a channel strip’s fader or panning
slider. Keyframes recorded using the Peaks Only option reflect only the highest and
lowest levels that were recorded. This is primarily useful when you want to record a
minimum number of keyframes to edit later in the Timeline or Viewer.
 Pen tools can edit locked item overlays: If this option is selected, you can modify audio
level and video opacity keyframes in clips on locked tracks in the Timeline.
File Reconnection and Final Cut Studio Integration Options
 Always Reconnect Externally Modified Files: When this checkbox is selected,
Final Cut Pro reconnects clips to any media files that have been modified since the
last time Final Cut Pro was the active application. Select this option when you are
working with a lot of media files or projects, such as embedded Motion or
Soundtrack Pro projects. For more information, see “
Reconnecting Media Files
Automatically
” on page 85.
 Warn on “Send to Soundtrack Pro Script”: When this checkbox is selected, Final Cut Pro
displays a dialog that allows you to decide how media files are processed when you
choose File > Send To > Soundtrack Pro Script > Script Name. For more information,
see Volume III, Chapter 11, “Working with Soundtrack Pro and Logic Pro.”

Chapter 23
Choosing Settings and Preferences
315
IV
Automatic Conforming and Scaling Options
These options control how mixed-format sequence editing is handled.
 Auto conform sequence: This pop-up menu determines whether sequence settings
are automatically conformed to the settings of the first clip added.
 Always scale clips to sequence size: Select this checkbox when you want edited clips
whose frame size is smaller than that of the current sequence to be scaled up when
you add them to the sequence.
For more information about these options, see Volume III, Chapter 30, “Working with
Mixed-Format Sequences.”