Determining and Entering the Timecode Offset
You can easily determine if there is a difference between the timecode and video
signals by capturing test footage that has timecode “burned in” to the video picture
information. By comparing the numbers in the timecode track to the timecode
numbers in the video picture, you can determine the offset between them.
If there is an offset, you can calibrate your timecode and video capture setup by
entering the number of frames by which the timecode signals are offset from the video
in the Capture Offset field of the current device control preset.

358
Part IV
Settings and Preferences
To determine the timecode offset:
1
Do one of the following:
 Create a window-burn (or window dub) test tape for timecode offset testing. You can
do this by transferring a tape with timecode to another tape of the same format,
making sure you connect an output that can display timecode information visually.
 Connect the monitor out (or super out) output of your VTR to the input of your video
interface. A monitor output is a dedicated output for displaying VTR status
information such as a timecode counter superimposed (or “burned-in”) over the
video information. Some VTRs don’t have a separate monitor output, but instead
have an option for turning on the deck status display and timecode information on
the main output. Enable this option.
2
Capture a clip of video from a tape with LTC (Longitudinal TimeCode) or VITC (Vertical
Interval TimeCode) timecode on it.
For more information, see Volume I, Chapter 17, “Capturing Your Footage to Disk.”
3
Compare the timecode value recorded in the captured media file (in the Current
Timecode field) with the burned-in timecode on the video frame.
If both timecode values match, then there is no offset, so no adjustment is necessary. If
the timecode values do not match, there’s an offset and you’ll need to compensate for
this to capture your video properly.
Current Timecode field
Burned-in timecode

Chapter 26
Device Control Settings and Presets
359
IV
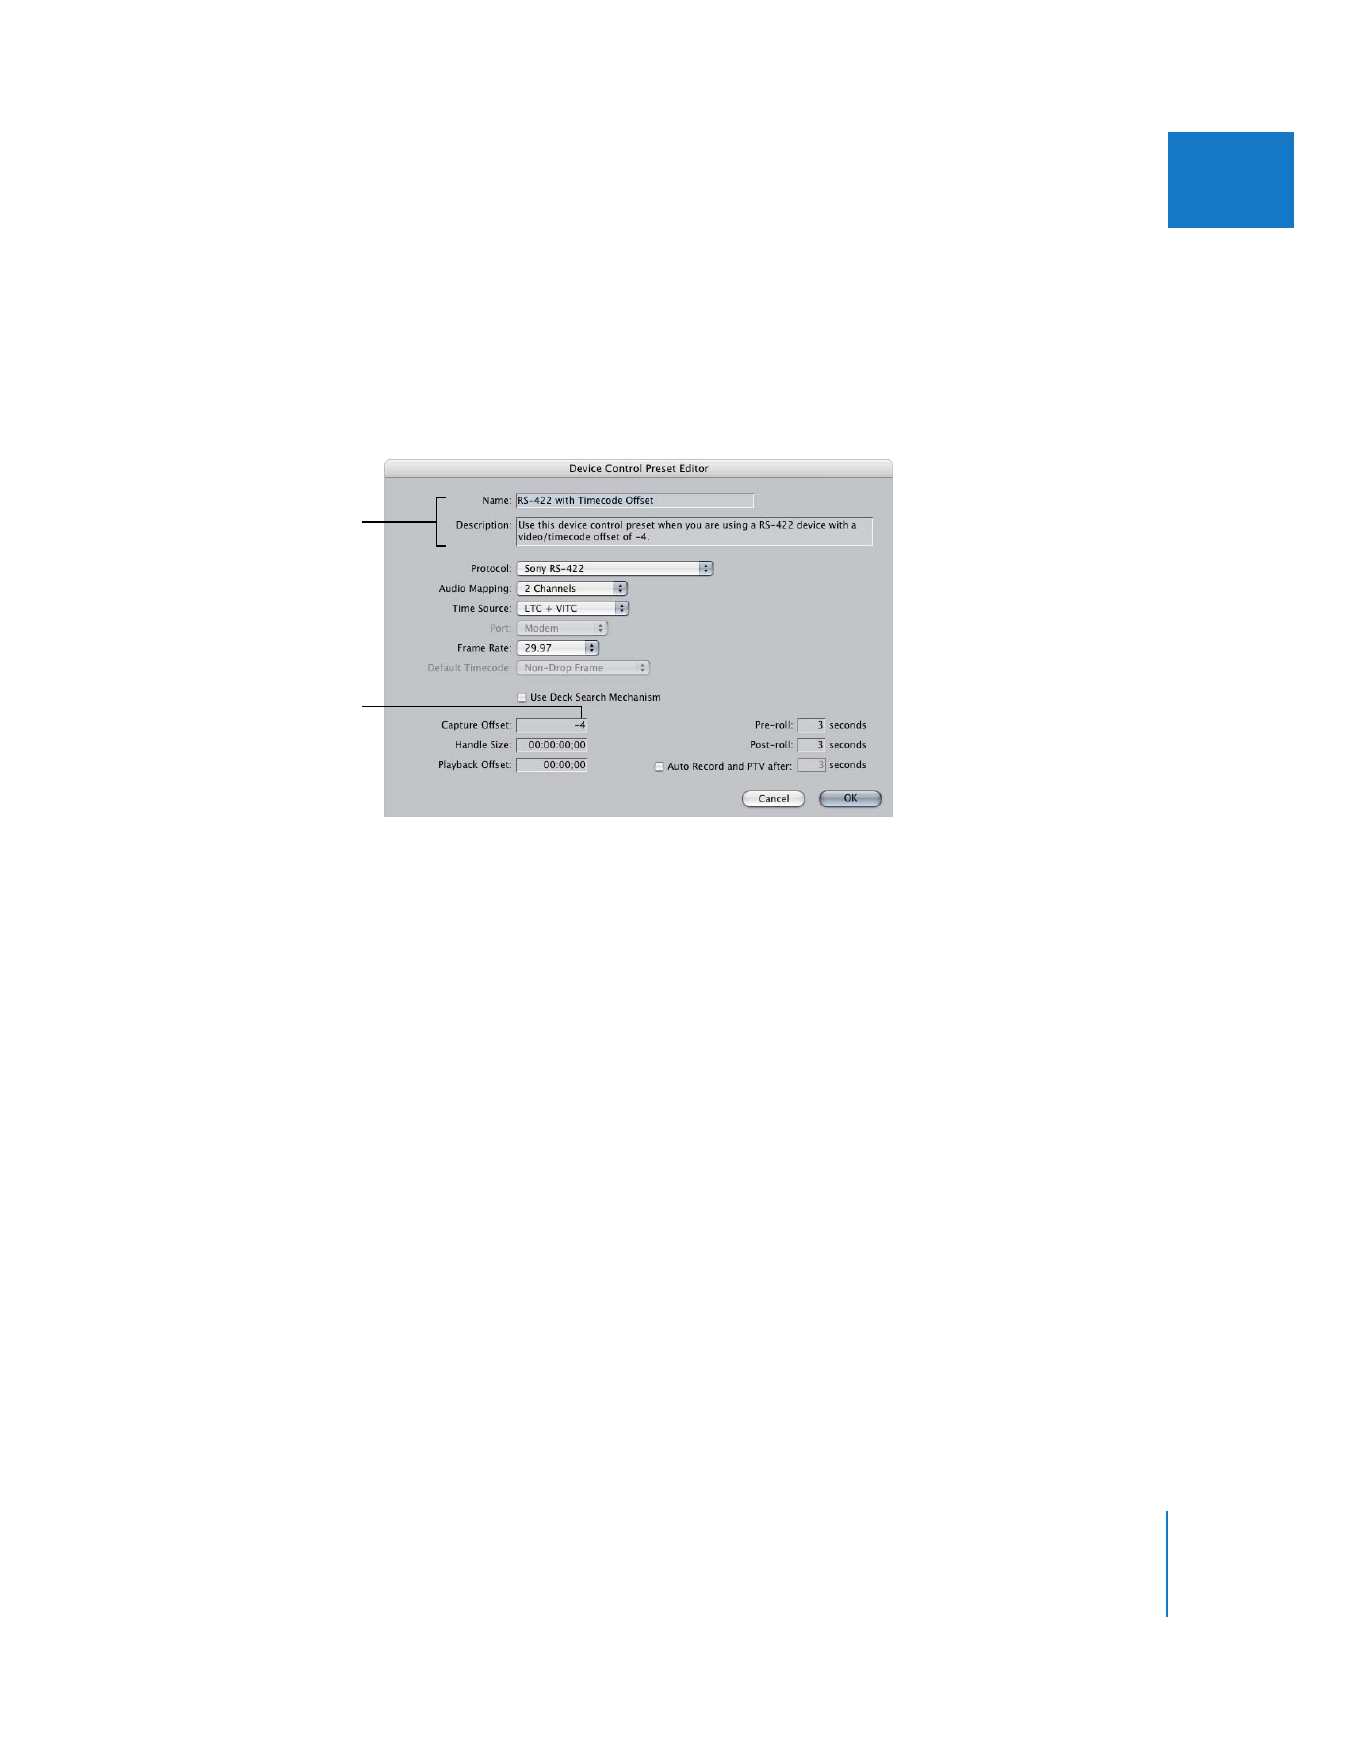
To enter a timecode offset:
1
Choose Final Cut Pro > Audio/Video Settings, then click the Device Control Presets tab.
2
Make sure your current method of device control is checked, then click Edit.
If you’re using a locked preset, a new copy of the preset is created.
3
Enter a new name and description for this device control preset indicating which
camcorder or deck it is calibrated for.
4
Enter a number of frames in the Capture Offset field, then click OK.
Enter a negative number if the clip’s timecode track has higher numbers than the
burned-in timecode. For example, if the clip’s Media Start timecode is 01:00:00:04, and
the first video frame has a burned-in timecode number of 01:00:00:00, enter –4 in the
Capture Offset field.
After entering the timecode offset, it’s a good idea to capture a few more clips and
compare the timecode track numbers with the burned-in timecode to determine if the
timecode offset you entered is correct.
Important:
Some devices may require fractional offsets to maintain accuracy when
batch capturing over a long duration. For example, suppose that capturing a single
clip using a 2-frame offset results in an accurately captured clip, but when you batch
capture ten clips, some clips are not accurately captured. In this case, try adjusting the
offset by a fractional value (for example, 2.5 instead of 2).
Enter the capture offset
here; add a hyphen for a
negative offset.
Enter an appropriate
name and description for
your new preset.

360
Part IV
Settings and Preferences